Wednesday, April 13, 2011

Decorating Easter Eggs

 1.Leaf and Flower Eggs
Stenciled flowers and leaves give chicken and goose eggs a rich, complex look.

 2.Lace Eggs
This Easter, take hard-boiled eggs to new heights by embellishing them with lacy patterns.
 3.Speckled Butterfly Easter Eggs
Give egg-shaped boxes a natural touch with speckled paint, butterflies, and a rabbit cut from decorative paper.
 4.Stenciled Eggs
With stencils made of waterproof vinyl adhesive tape and cut-out shapes, you can create perfectly rendered patterns on your Easter eggs. Make plaid, polka-dotted, punctuated, or monogrammed eggs, or create your own designs.

 5.Natural Egg-Dyeing Techniques
This Easter, try these natural and unique egg-dyeing techniques that are simple to do and produce beautiful results.

 6.Tissue Paper Eggs
Use this simple technique to create beautifully decorated Easter eggs.

 7.German-Style Paper Cutout Eggs
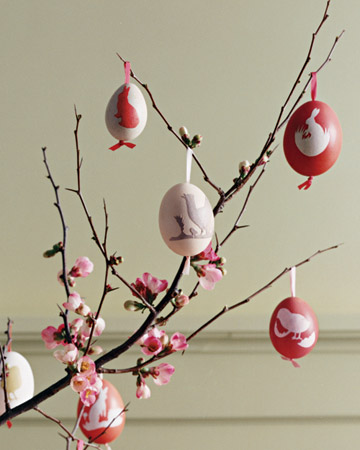
Give the scissors a rest: The easiest way to make silhouettes for these intricately decorated eggs is to use craft punches.
 8.Square-Patterned Eggs
Bright colors and geometric designs make modern-looking eggs, like these square-patterned ones.

 9.Paper-Napkin Decoupage Eggs
Brighten a clutch of undyed eggs with stylized patterns from paper napkins.

 From Martha Stewart

Silk-Dyed Easter Eggs-video


Add florals, stripes, and swirls to your Easter eggs with this simple silk-dyeing technique.


Read more at Marthastewart.com: Easter Egg Decorating and Easter Baskets - Martha Stewart

Embellished Chocolate Easter Eggs -video


Write a personalized Easter message on a hollow chocolate egg using a contrasting shade of melted chocolate.

 From Martha Stewart

Silk-Dyed Eggs

One of our family Easter traditions is to dye eggs with pieces of old silk. I saw a cute little old lady show Martha how to do it a few years ago and I ran upstairs right then to steal a tie! It’s way cooler than those cups of neon liquid that end up all over your clothes, your furniture and your hands plus it gives you an excuse to rid a man’s closet of ugly ties.
I’m going to be short on words today because I have a ton of pictures to post! Let’s get started.
For full, printable directions: Click here.
And to see tons of tie-dyed eggs submitted by OBB readers, Click here!
Here’s the quick run-down:
You need 100% silk for this to work. Make sure to check the labels to make sure you’re not buying polyester, which can look similar. I grab old ties at the thrift store where they’re all under a buck. And remember: when it comes to ties, you may not want ugly ones on your man, but ugly ties do make pretty eggs! You could also use silk from an old blouse, a scarf, whatever.
I try to find an assortment of colors and patterns. Usually dark blues, purples, and reds work the best, but it’s fun to experiment with all kinds of things. The interesting thing is that you never know how much of the color and pattern will transfer to the eggs. Sometimes ties I think will be awesome really disappoint, and ones I didn’t think much of make the most beautiful eggs. Here’s the ties I picked up this year:

Usually it will tell you if it’s 100% silk right on the main label of the tie, but a lot of them don’t, and if that’s the case, check that little tiny end, it’s usually hiding there.

The first step is to deconstruct the tie. Snip the seams and remove the lining so you are just left with the silk. (And yes, this old Christian Dior Tie, which I love, was only 50 cents at the thrift store!)

Next you cut a piece large enough to cover an egg. Wrap the egg with the right side of the fabric making contact with the egg. The right side is the printed side, or the side that would be on the outside of the tie. You want to try to wrap the fabric as tight as you can without breaking the egg of course. The more direct contact the silk has with the egg shell the clearer the imprint of the pattern. Where there are folds in the fabric you’ll get kind of a swirly water color effect. I love those parts- it adds to the charm. Once wrapped, tie with a piece of string or a twisty tie. (Do yourself a favor and go with the twisty tie!)
A little thought: You’re going to use the largest part of the tie, at the bottom, and be left with the rest of it which might not be large enough to use again. What I do is take all of those pieces and just stitch them together on my sewing machine. It’s really fast and then I’m left with a brand new piece of silk to cut squares from. You can get a lot more use out of them that way and it’s fun to combine fabrics. Also, you can use a piece of silk more than once, but it loses a large amount of it’s potency after the first dye, so I always just toss the used pieces.

Looking at the picture below makes me happy. It just does. How cute are those little guys? They have no idea what’s comin’…

After the eggs are wrapped, you’re going to wrap them again with a light colored light weight piece of fabric. An old pillowcase or sheet is perfect. If you go to the thrift store to get ties, you may want to grab a pillowcase too. Otherwise you might get impatient at home and just take one from your kid’s room. Don’t tell my husband I did that.
Put all those little guys in a pot and cover them with water. Add 1/4 C vinegar and bring it to a boil. After about 20 minutes you can remove the eggs and set them in a colander or on a towel to dry and cool. Once they’re cool enough to handle you can remove the fabric.

This is my favorite part.
I get so antsy waiting for them to cool. It’s always a surprise to see what went on in that little package. Below are some of my results. I have to say that the first one is probably my favorite egg of all the ones I’ve ever done. I can’t believe how clearly those flowers transferred and how bold the colors turned out. Incredible!

I absolutely love the cool stripy, swirly thing going on in this one

This is one of the disappointments I talked about. I was so excited for a green tie and I thought the pattern was cool (ya know, for an egg) but it turned out super light and muted. Still pretty though, kind of like water colors.


I almost didn’t buy this blue tie because it looked boring, but I’m glad I did. Remember: bad ties make good eggs!


So that’s that. Try this out and let me know how it goes. Everyone will wonder how on earth you did it! Just tell them you’re a genius.

Rub the eggs with a bit of oil on a paper towel to make them glossy and beautiful!
And if you do try it out, make sure to take some pictures and put them on our facebook page so we can all admire them!
Safety Note: A few people have asked about the dye transferring to the actual egg. Know that it is not food safe dye. Who knows where the silk came from our how it was colored. That being said, I have indeed eaten the eggs in years past and I’m still here, but to be on the safe you probably shouldn’t.
Using Blown Eggs: Thanks to the commenter who said the following: I ran into the floating blown egg problem when I tried my first test batch today. I placed a metal colander on top to hold them down they turned out great, you’ll just have to blow the water out once they’re cooled and unwrapped. The eggs turned out so nice, I’m really excited to make them with my family this weekend.
Again, here are the instructions.    http://www.ourbestbites.com/2009/03/silk-dyed-eggs-aka-tie-dyed/

Easter Basket Ideas

 1. Glittered Floral Egg Basket
Being blue has never felt so good. Especially since little presents, such as a vintage bluebird, are tucked inside these shimmering egg boxes.
 2.Golden Easter Basket
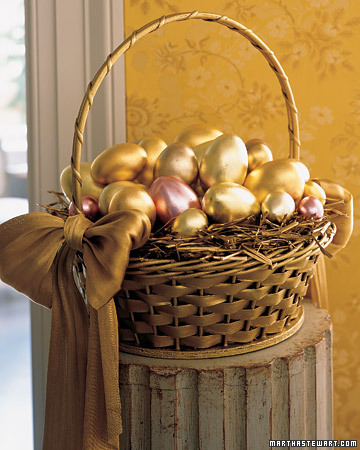
Create an Easter basket display that resembles a pot of gold at the end of the rainbow. Metallic eggs, covered in varying shades of gold leaf sheets, were set atop a bed of spray-painted hay in a sponge-painted basket. For an elegant finishing touch, tie metallic vintage-ribbon bows on either side of the basket.

 3.Flowered Easter Basket
Dress up a woven basket with silk flowers and leaves, and pare down buds to create a variety of sizes.
 4.Chocolate Bunnies and Pansies Basket 
When you're in the room with this extravagant brown basket, every fragrant breath is like a moment in a chocolate shop.
 5.Tulip Egg Basket
A tulip egg basket is the perfect addition to a spring table. When closed, the flowers evoke eggs.
 6.Metallic Polka-Dotted Eggs
This dramatic scene, featuring polka-dotted and beribboned shiny blown-out eggs, sets a new silver standard for Easter.
 7.Daffodils and Pom-Pom Chicks Basket
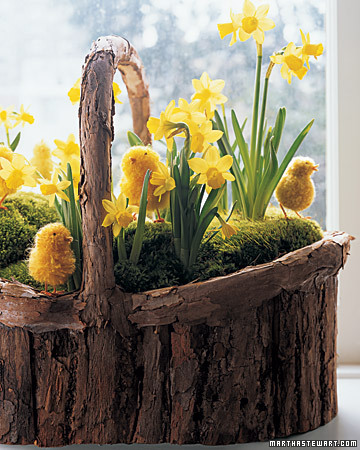
Set inside a rustic boat-shaped birch basket, this cheerful yellow hilltop vista is a breath of fresh air.
 8.Clover and Eggs Basket
This fanciful green meadow vignette seems a fitting home for a chocolate bunny.
 9.Spring Bulb Arrangement
A spring bulb arrangement is a beautiful way to make the season come alive indoors.

 From Martha Stewart.

Chocolate Egg How-To

Chocolate Egg How-To
We used Valrhona dark chocolate in this recipe because it is relatively easy to temper; the temperatures that are listed apply specifically to this brand.
Chocolate Egg How-To1. Using a pin, poke a hole in the bottom of a large raw egg; insert the tip of a utility knife, and turn to open the hole slightly. Using a rotary drill fitted with a 3/8-inch bit, carefully widen the hole to at least 1/2 inch in diameter.
2. Insert pin into the hole to pierce and "stir" the yolk. Hold the egg, hole down, over a bowl, and blow air into the hole with a rubber ear syringe (the air will displace and expel the egg). Rinse out egg. Repeat to make 12 blown eggs (you may want to make extras in case some break).

3. Sterilize eggs: Submerge them in a pot of cold water with 1 tablespoon white vinegar; bring to a boil, then simmer, skimming foam from surface, 10 minutes. Let drain on a pin board. If not dyeing eggs, let dry completely on pin board, 2 to 3 days (check insides for moisture).
4. If dyeing eggs: Mix 4 tablespoons vinegar and 12 drops of blue food coloring with 2 cups boiling-hot water in a heatproof glass or enamel bowl. Fill a separate cup with white vinegar. Using a plastic spoon, dip eggs in vinegar, then into the dye, 2 to 3 minutes. Pat eggs with paper towels to eliminate streaks. (If dye begins to cool while you're working, make a new batch.) Let the eggs dry as described above.
5. Using an offset serrated knife, very finely chop 3 pounds of chocolate. Reserve 1 cup chocolate; using a bench scraper, transfer remaining chocolate to a large heatproof bowl.

6. Temper chocolate: Set bowl over a pan of simmering water. Melt chocolate, stirring occasionally, until a chocolate thermometer registers 131 degrees. (Note: Many brands of dark chocolate should not be heated to more than 118 degrees.) Remove from heat; stir in reserved cup chocolate until completely melted. Pour 2/3 of the melted chocolate onto a clean smooth work surface (such as marble or stainless steel). Spread thinly with an offset spatula. Then gather together chocolate, and take temperature. Continue spreading and gathering chocolate until it cools to 82 degrees to 84 degrees.

7. Scrape chocolate back into bowl with remaining chocolate. Stir until it cools to 82 degrees to 84 degrees. Set bowl over a pan of warm water, and reheat to 88 degrees. To check consistency, dip a spoon in chocolate and remove; chocolate should set in about 2 minutes, turning shiny and hard. Note: This temperature must be maintained as you fill the eggs; keep a thermometer in the chocolate, and check frequently. Rest the bowl on a heating pad wrapped in a towel, or set bowl over the pan of warm (not hot) water.

8. Place eggshells in an egg carton. Place a disposable pastry bag in a tall glass, and fold top down. Fill bag with chocolate; cut tip to create a 1/4-inch opening.

9. For solid chocolate eggs: Insert tip of bag into each egg, and fill with chocolate (about 1/4 cup per egg; fill a new bag with chocolate as needed). Let set completely, about 4 hours.

10. Alternatively, fill eggs with ganache: Fill all eggs with chocolate, then let stand 5 minutes instead of letting chocolate set. Pour chocolate out of eggs into a glass measuring cup, tapping your hand against cup to let most of the chocolate drain out (do not add to tempered chocolate). Let chocolate "shells" set completely.

11. Fill a disposable pastry bag with ganache (recipe follows); cut tip to create a 1/4-inch opening. Insert tip into egg; fill with ganache. Tap egg gently, hole up, on a folded kitchen towel to eliminate air pockets; fill to top. Continue with remaining eggs. Refrigerate until set, about 4 hours. Ganache-filled eggs can be refrigerated up to 1 week; solid eggs can be stored in a cool, dry place until ready to serve.


To Make GanacheFor semisweet ganache, use 2 cups heavy cream and 1 pound semisweet chocolate. For milk-chocolate or white-chocolate ganache, use 1 1/4 cups heavy cream and 1 1/4 pounds milk or white chocolate. Bring cream just to a boil, then pour over finely chopped chocolate into a medium bowl. Let stand 5 minutes; stir until smooth. Press plastic wrap directly onto surface; let stand, stirring occasionally, until cool enough to pipe (no warmer than 80 degrees), 1 to 2 hours.
Note: The steps here are for tempering chocolate by hand. If you work with chocolate frequently, investing in a tempering machine will save time and make cleanup easier -- and the chocolate will be perfectly creamy, smooth, and shiny. Every brand of chocolate requires different tempering temperatures; see package instructions. For Valrhona, the following temperatures apply: milk chocolate, heat to 118 degrees, cool to 81 degrees to 82 degrees, then warm to 84 degrees to 86 degrees; white chocolate, heat to 118 degrees, cool to 79 degrees to 81 degrees, then warm to 82 degrees to 84 degrees.


Read more at Marthastewart.com: Chocolate Egg How-To - Martha Stewart Crafts