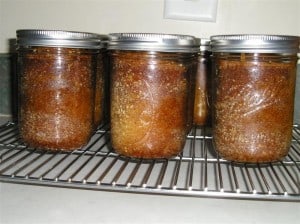
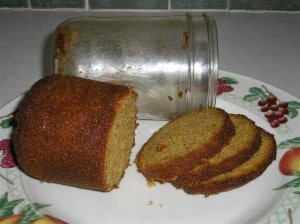
*UPDATE* After learning more about the potential risk of botulism I can no longer recommend this method of canning bread as being 100% safe. I haven’t had any trouble with it personally, and botulism is indeed very rare, though potentially fatal. I would instead recommend storing this finished product in the fridge rather than the pantry.
I am SO super excited about learning how to do this!! I’ve seen bread in jars as gift ideas before, but when I read an article on
Lehman’s Country Life stating that these breads will keep for up to a YEAR, I knew I had to give it a try.
Imagine being able to pull a fresh tasting quick bread straight off your shelf any time you want it!! What a great convenience food to stock your pantry with, especially if you have hungry kids or unexpected guests!
And the very best part of it… you don’t even have to have a canner! Anybody can do this. All you need is your jars, lids, and an oven.
Okay, so here’s how easy it is:
1. Get 8 clean wide-mouth pint size canning jars and lids. They don’t have to be hot like usual, just clean.
2. In a large bowl, mix up the pumpkin bread as usual. I used my favorite
Pumpkin Spice Bread Recipe, substituting 2/3 c. shortening for the 1 cup of vegetable oil it normally calls for.
- Supposedly you can do other quick breads in the same way; banana bread, zucchini bread, carrot bread, apple bread, etc. Check out the Lehman’s article for suggested amounts.
3. Grease your jars with shortening, all the way around the inside.
4. Pour the pumpkin bread mix into the jars, filling them halfway. DO NOT OVERFILL.
5. Bake the bread in the jars (WITHOUT lids on) at 325* for 45 min. Test one with a toothpick to make sure they are completely cooked before removing the jars from the oven.
6. When done, wipe the rims with a wet cloth and quickly screw the lids on.
As the jars cool, the lids will seal and keep your bread as fresh as the day you made it. Well, supposedly. I haven’t had a chance to test that claim yet. Ours only lasted three days before the husband and kids broke into them, but they were definitely perfect! If I can manage to stash one away for a few months to test later, I’ll let you know if it’s still just as good.
 This recipe was created by the late Venis Ewing, who made a conserve by adding walnuts to the plum puree. You can make this with any large, very sweet plum. I love serving it with Ricotta Fritters or dribbling it over poached pears. You can also add this puree to deglazed game or pork drippings to make a killer sauce. Blood Plum Puree
