Rolled Gingerbread Cookies Yield:
2-1/2-inch cookies: about 48; 3-1/2-inch cookies: about 37; 4-1/2-inch cookies: about 18 Ingredients:
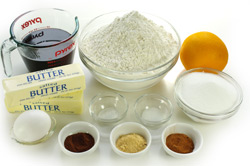
5 cups all-purpose flour
2 teaspoons ground ginger
1 teaspoon ground cinnamon
1 teaspoon ground cloves
1/2 teaspoon baking soda
1/2 teaspoon salt
zest of 1 orange (optional)
1 cup (2 sticks) unsalted butter, softened
1 cup sugar
1 large egg
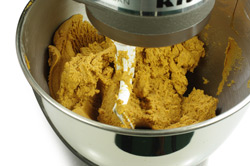
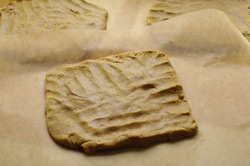
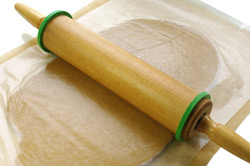
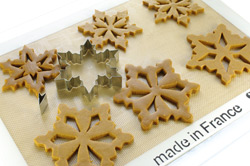
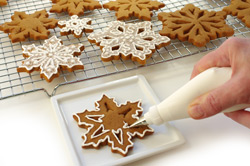
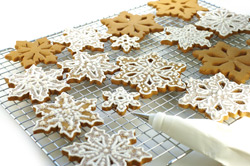
1 cup molasses 1. Whisk together the flour, ginger, cinnamon, cloves, baking soda, salt, and orange zest (if you’re using it) in a medium bowl. 2. Cream together the butter and sugar with your mixer until light and fluffy. Add the egg and molasses and mix until well blended. 3. With the mixer on low, gradually add the flour mixture to the butter mixture until the two are thoroughly blended. 4. Turn dough onto a work surface and divide into three equal portions. Form each one into a rough disk. Now you’re ready to roll, chill, and cut out cookie shapes. (See General Rolling and Cutting Instructions below). 5. Preheat the oven to 350°F. 6. After you’ve rolled and cut the dough and the cookies are on parchment-lined cookie sheets, bake them on the middle rack of your oven for 12 to 16 minutes or until the cookies start to turn a deeper brown around the edges. 7. Cool the cookies completely before decorating. For the Snowflake Gingerbread Cookies: Use snowflake cookie cutters, bake and cool. Pipe outlines with icing; sprinkle with sanding sugar while still wet. General Instructions: Rolling and Cutting the Dough 1. Place a piece of waxed paper about the size of your cookie sheet on your rolling surface. 2. Place cookie slats on the edges of the paper. The slats should be a rolling-pin width apart, to ensure that there’s stable contact between the slats and both ends of the rolling pin. 3. Place a disk of cookie dough on top of the waxed paper, between the slats. Place another sheet of waxed paper over the cookie dough and slats and use your hand or rolling pin to slightly flatten and evenly distribute the dough across the paper. Roll the pin over the waxed paper-covered dough, making sure the ends of the pin stay on the slats as the dough flattens (the pin will hover above the slats at first). If the top paper wrinkles, lift and smooth it. You’re finished rolling when the dough surface is uniform and completely level with the cookie slats. You’ll recognize this point: rolling the pin over the dough will feel effortless. 4. Slide the rolled-out piece of dough (paper and all) onto a cookie sheet and refrigerate until it’s firm, 20 to 30 minutes. Repeat the rolling process with the remaining dough portions. 5. When the dough is firm and stiff, transfer it from the refrigerator to your flat work surface. Work with one piece of dough at a time, leaving the others to chill in the refrigerator until you’re ready to cut them. Peel back the top waxed paper from the dough and cut your desired shapes. Try to get as many cookies as possible out of each rolled-out piece of dough. 6. Remove excess dough from around the shapes. Transfer the cookies to a parchment-lined cookie sheet. 7. When you’ve cut as many cookies as possible from all your rolled dough, gather the dough scraps into a ball and roll it again, using the same waxed-paper method. Continue to cut cookies and reroll the dough until you’ve used all the dough, chilling the rolled-out dough whenever it becomes too sticky to work with. 8. If you’re using any of the prebaking decorating methods (imprinting, sugaring, add-ons, and so on), now’s the time to get decorating. 9. Bake and cool the cookies as directed in the recipe (above). |  Ring in the holidays with a visit to a magical storybook realm filled with fanciful gingerbread houses, candy canes, gum drops and other sugary confections. Gingerbread houses created for the Museums’ first annual Gingerbread House competition by professional bakers and individual adults and children are displayed against a snowy landscape filled with decorated trees, twinkling lights and gingerbread people. Inspired by the theme “The City of Homes,” the Gingerbread Houses resemble actual buildings from different eras found throughout Springfield.


Wow! Amazing. I have never undertaken a Gingerbread House before and this one does two things for me. The beauty and the detail inspire me to do one. The beauty and the detail scare me to do one!
Check out ineedathisflickr stream for some more amazing shots of this beautiful work of art!