Friday, March 2, 2012

Self-Frosting Pumpkin Nutella Cupcakes

Today is the day my wonderful friend Hannah was born. It’s the first time in many years that we haven’t been together on her birthday, so last week I sent her some goodies in the mail. I needed something that would ship easily and I considered brownies or cookies until I discovered something better: self-frosting cupcakes!
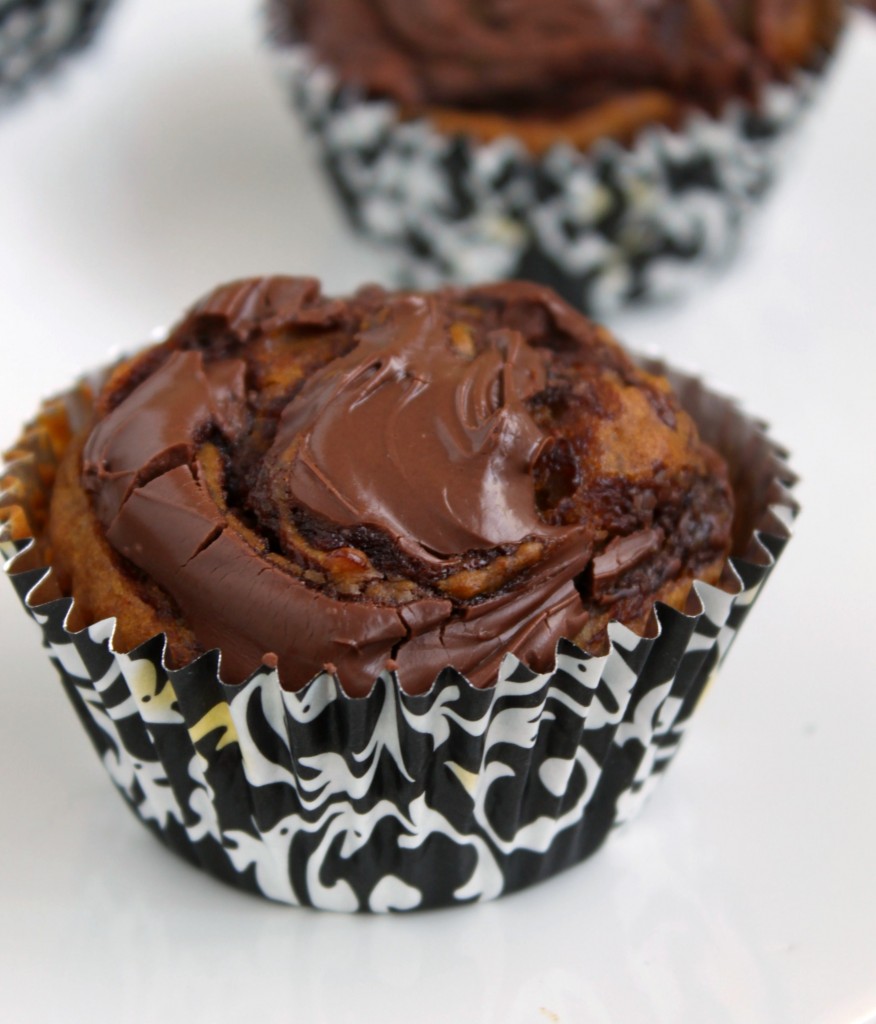
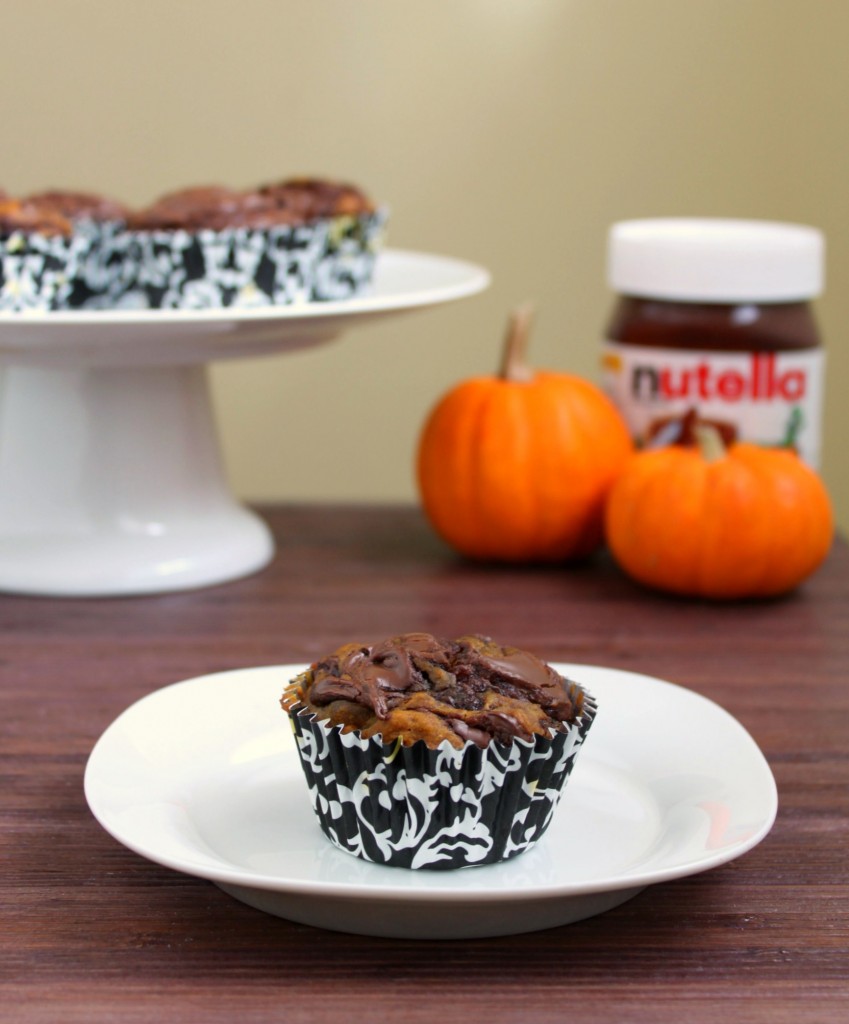
These pumpkin cupcakes have a spoonful of Nutella mixed onto the top of them before they’re baked. They come out with a creamy Nutella swirl on top, making frosting unnecessary! I put them into a large container without worry of frosting smearing everywhere. Plus, no frosting = less calories (but not less flavor), and the cake part  is moist and full of spiced pumpkin goodness. These are perfect for a fall treat!
Happy birthday Hannah!!

Recipe:

Self-Frosting Pumpkin Nutella Cupcakes
Adapted from Phenomenon
Makes 12-15 cupcakes
  • 1 15-oz. can pumpkin puree
  • 1/2 cup vegetable oil
  • 2 large eggs
  • 1 tablespoon pure vanilla
  • 1/4 cup light brown sugar, packed
  • 1/4 cup sugar
  • 2 cups all-purpose flour
  • 1 1/2 teaspoons ground cinnamon
  • 1/2 teaspoon ground ginger
  • 1/2 teaspoon nutmeg
  • 1 teaspoon baking powder
  • 1/2 teaspoon baking soda
  • 1/2 teaspoon salt
  • Nutella for topping
Preheat oven to 350°F.  Line a muffin pan with foil or paper liners.
Place the pumpkin, oil, eggs, vanilla and brown sugar in a large bowl. Beat to combine.
In a separate large bowl, whisk the flour, cinnamon, ginger, nutmeg, baking powder, baking soda and salt together. Add to wet ingredients and stir until just combined.
Fill muffin cups around 3/4 full. Place a couple of teaspoons of Nutella on top of each cupcake. Use a toothpick to swirl the Nutella around the top of the batter.
Bake 25-30 minutes or until a toothpick inserted in the middle comes out clean.  http://www.52kitchenadventures.com/2011/10/30/pumpkin-nutella-cupcakes/

Chocolate Nutella Cupcakes

Hey, remember when I said I’d be posting healthy recipes in July? Ha! Since then I’ve shared recipes for mojito popsicles, chocolate cupcakes, blood orange sorbet, and now chocolate Nutella cupcakes (also, next up: carrot cake cupcakes). So, lesson learned: don’t listen to me and don’t expect anything healthy when you visit this blog!

These cupcakes were made in honor of my 300th Facebook fan, Rachel. I actually know Rachel – she was my student intern last year. I knew she was a big fan of my desserts so to celebrate hitting a big number on Facebook, I decided to bake her something special. She asked for cupcakes and told me that she likes chocolate and Nutella.
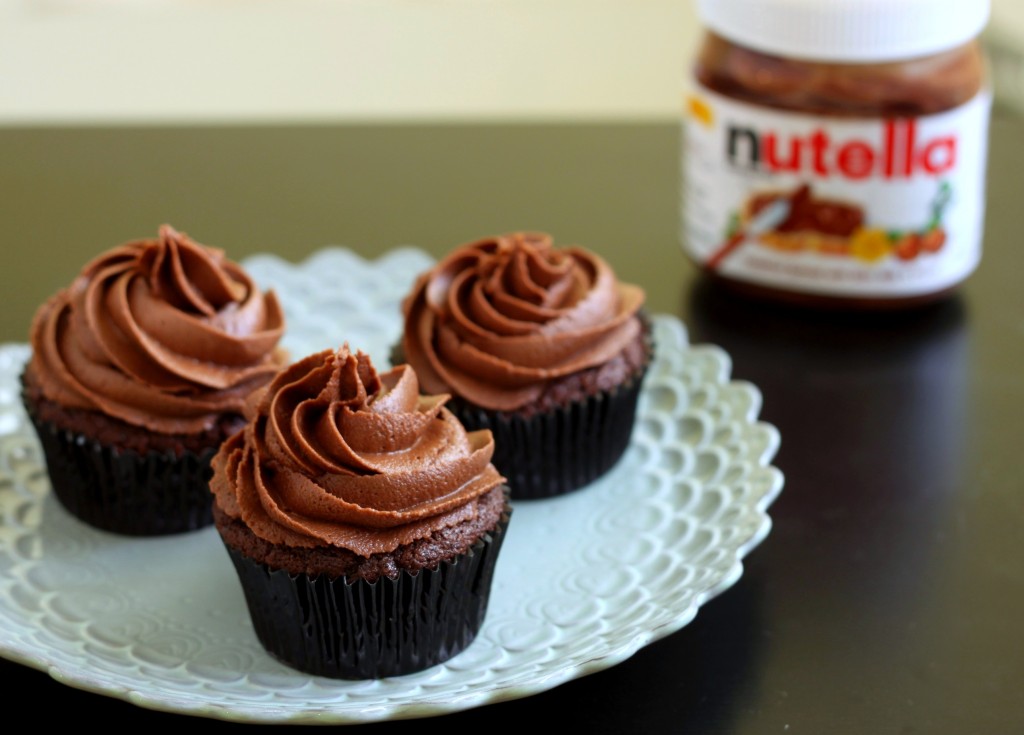
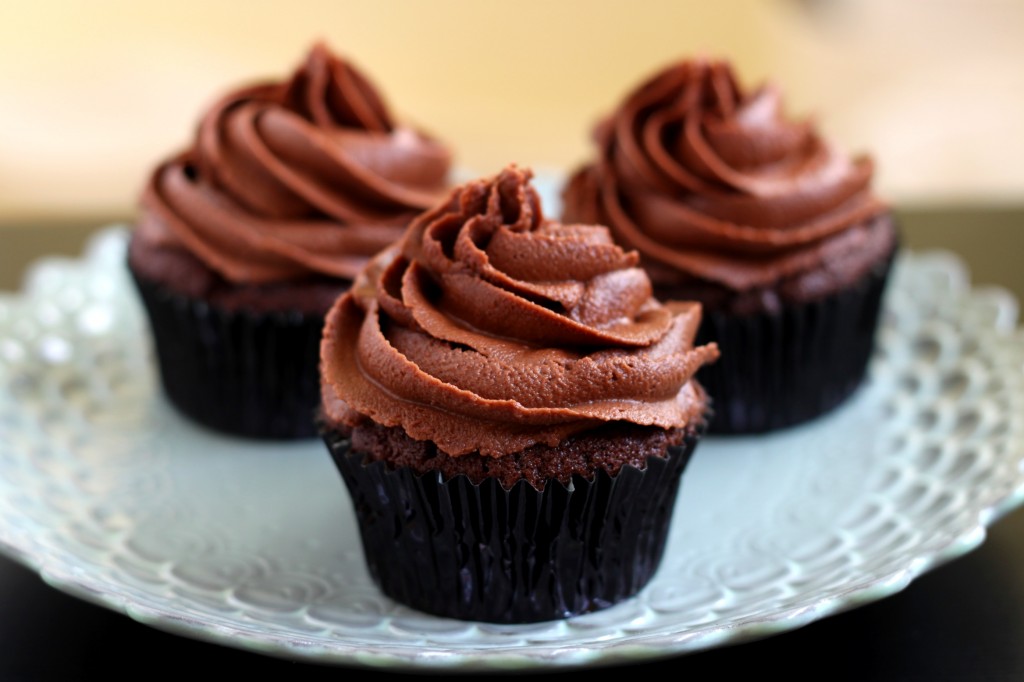
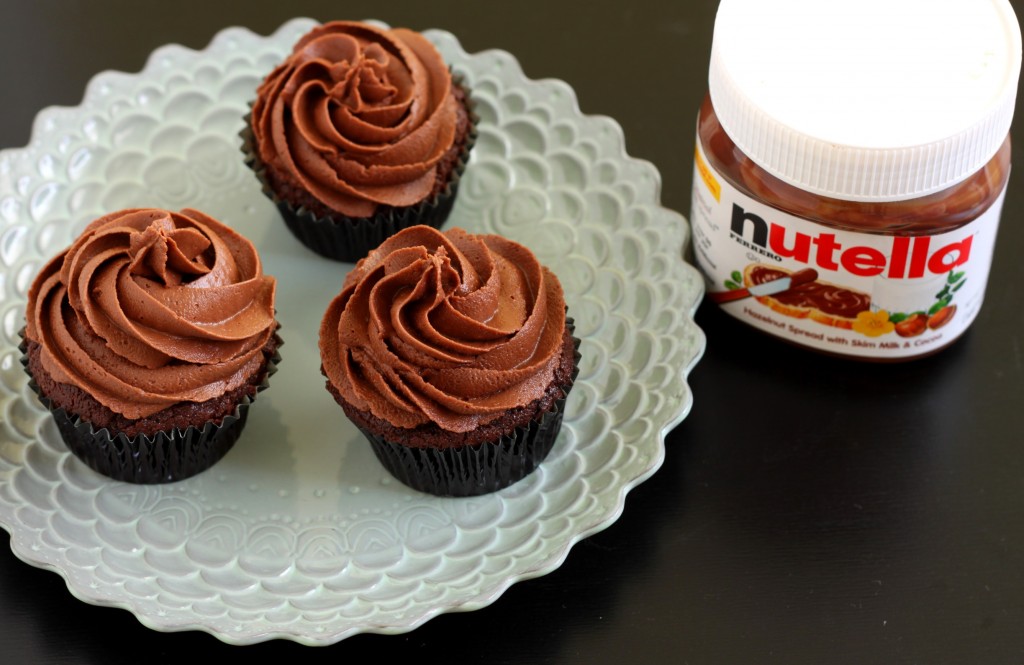
I took the “better than sex” chocolate cupcakes (think moist, very chocolatey cake) and topped them with my own Nutella buttercream. Other recipes use a little Nutella with more butter and powdered sugar, but that just didn’t do it for me. I ended up using that entire jar that’s in the photos. It was perfect: creamy, thick frosting with the distinctive flavor of the hazelnut chocolate spread. I ate one (you know – just to make sure they were okay) and was in chocolate/Nutella heaven. Good thing I had these earmarked for someone else – I could’ve eaten them all!
Thank you to all my fans, subscribers, supporters, and readers. You all make blogging fun and worthwhile. Every comment, “like,” new subscribe, Twitter mention, etc. makes me smile. I love hearing your feedback, what you think of a recipe or photo and how it goes when you try one of my recipes. You guys are amazing!

Recipe:

“Better than Sex” Chocolate Nutella Cupcakes
Adapted from Cupcake Project and Chockylit
Makes 15-16 cupcakes
  • 1/2 C butter, room temperature
  • 1 1/4 C sugar
  • 2 large eggs, room temperature
  • 3/4 C flour
  • 1/2 t baking powder
  • 1/4 t baking soda
  • 1/4 t salt
  • 1/2 C unsweetened cocoa powder
  • 1/2 C milk
  • 1 t vanilla
Preheat oven to 350°F.
In a mixing bowl, beat butter until softened and smooth. Add sugar and beat for a few minutes, until light and fluffy. Add eggs one at a time, beating after each until well combined.
In a small bowl, combine flour, baking powder, baking soda, salt and cocoa powder. In a separate small bowl, combine milk and vanilla.
Add about 1/3 of dry ingredients to butter and sugar and mix until combined. Add about 1/2 of wet ingredients to mixture and mix until combined. Continue alternating dry and wet, mixing in between (finish with the remaining dry ingredients).
Fill cupcake tins about 1/2 full (don’t overfill – you only need 1/2) and bake for around 20-25 minutes, until a toothpick inserted in center comes out clean. They will come out flat.

Nutella Buttercream
  • 1/2 C butter, room temperature
  • 1 C Nutella
  • 1 C powdered sugar, sifted
  • 1-2 T milk
Beat butter until smooth. Add Nutella and beat together until thoroughly combined. Slowly add powdered sugar, mixing until combined. Add 1 tablespoon of milk. Add additional milk or powdered sugar as needed to reach desired consistency.   http://www.52kitchenadventures.com/2011/07/18/chocolate-nutella-cupcakes/

Heart Cake Pops

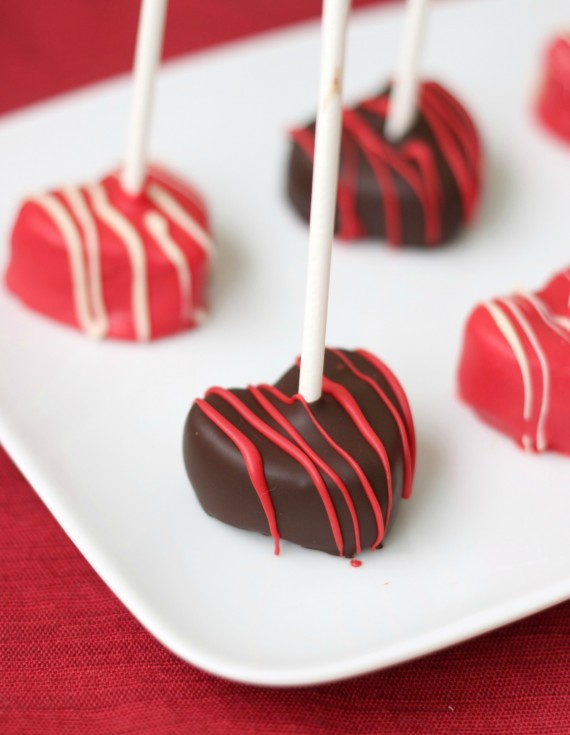
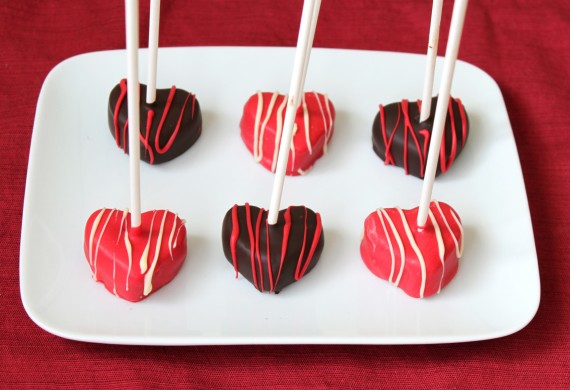
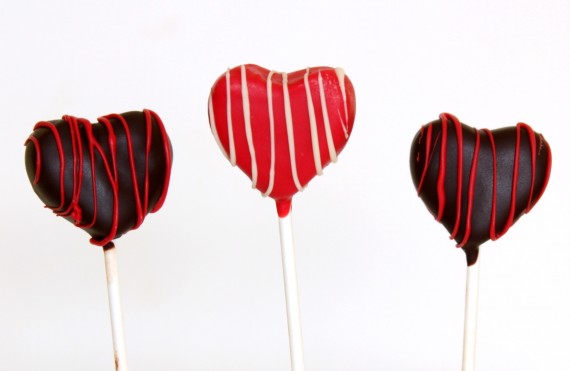
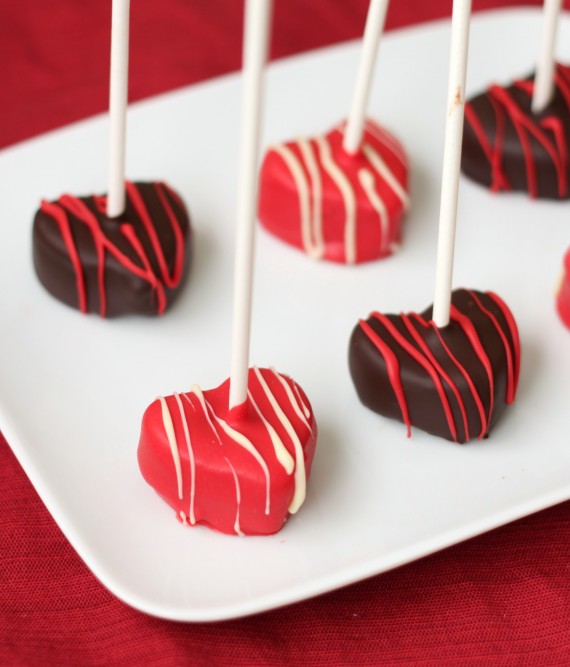
It’s almost Valentine’s Day and I spent last weekend baking up a storm. These cake pops, plus heart shaped sugar cookies and some special flourless cupcakes with pink frosting are all coming your way.
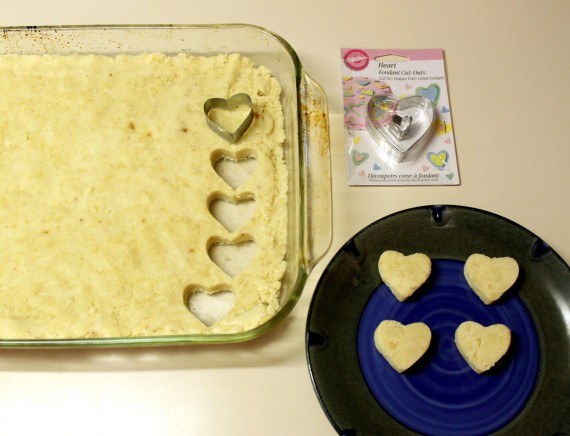
Each time I make cake pops, I find more ways to make them more easily and quickly (I’ll have to compile all my tips into a post soon). These heart shape cake pops are even easier to make than they seem. After I combined the cake and frosting together, I pushed it flat into the bottom of a casserole dish. Then I just used cookie cutter to cut the cake pops into hearts (see photo in the recipe below).
So easy and much faster than shaping each heart by hand!
Then you can either push the lollipop sticks in to make them standing up (above) or flat on a dish (below). I like making them like the ones below because you don’t need anything to hold them up.
Are you making anything special for Valentine’s Day?

Recipe:

Heart Cake Pops

Makes around 40 cake pops
Vanilla Cake
Adapted from King Arthur’s Flour
Makes 1 9″x13″ cake
  • 2 cups sugar
  • 3 1/4 cups flour
  • 2 1/2 teaspoons baking powder
  • 1 teaspoon salt
  • 3/4 cup unsalted butter, soft
  • 1 1/4 cups milk, at room temperature
  • 2 teaspoons vanilla extract
  • 4 eggs
  1. Preheat the oven to 350°F and lightly grease a 9″ x 13″ pan.
  2. In a large mixing bowl, combine sugar, flour, baking powder, and salt.
  3. Add butter to the dry ingredients and mix at low speed until the mixture looks sandy.
  4. In a small bowl or measuring cup, combine milk and vanilla. Add to sand-like mixture and mix for a couple of minutes at low speed.
  5. Turn mixer to low speed and add 1 egg while it’s running. Increase speed to medium and beat for 30 seconds. Repeat method 3 more times with each egg.
  6. If needed, scrape the sides of the bowl and mix for at medium-high speed for 30 more seconds.
  7. Pour batter into prepared pan and bake for around 27 minutes. Cake will be golden brown and just beginning to pull away from edges of pan when done. You can also test it by inserting a toothpick, which should come out clean.
Vanilla Frosting
  • 3/4 cup unsalted butter, at room temperature
  • 1 teaspoon vanilla extract
  • 3 cups powdered sugar
  • 1-2 tablespoons of milk
  1. In a large bowl, cream butter and vanilla until combined.
  2. Adding 1 cup of sugar at a time, mix into butter until thoroughly combined.
  3. Mix in milk until you reach the desired consistency.
Assembling the cake pops:
  • Chocolate or red or pink candy melts for coating
  • 6″ lollipop sticks
  • Heart shaped cookie cutter
  • Optional: white chocolate or red candy melts to drizzle on top
  1. Once cake is completely cooled, cut into 6 pieces. Using your hands, crumble each piece into a large bowl (or you could use a food processor instead).
  2. Add frosting to bowl and mix with the back of a spoon or your clean, dry hands until thoroughly combined. Press into a large dish so it’s about 1″ thick. Use a small heart shaped cookie cutter to cut cake pops out and place on a baking sheet covered in wax paper.
  3. Chill for several hours in the refrigerator or for 15 minutes in the freezer. (If you chill them in the fridge, put them in the freezer for 10 minutes right before you coat them.)
  4. In a double boiler or in a microwave, melt the chocolate or candy melts, stirring until all lumps are gone. Once melted, remove from heat and pour into a cup. Let cool for a few minutes.
  5. Remove cake pops from freezer. Dip the tip of a lollipop stick in melted coating and push straight into the cake pop.
  6. Holding the lollipop stick, dip the cake pop in to the coating until it’s completely covered, then quickly remove. Hold over cup while excess drips off (if needed, tap your wrist with the opposite hand to help the process).
  7. Place on wax paper or into a syrofoam block to dry.
  8. Optional: melt white chocolate or red candy melts. Using a piping bag or a plastic bag with the corner cut off, drizzle over cake pops.
  9. Store covered in fridge until ready to serve.   http://www.52kitchenadventures.com/2012/02/01/heart-cake-pops/

Double Chocolate Gingerbread Cupcakes

So, it turns out I’ve been on a bit of a gingerbread kick lately…
I love sugar and spice and everything nice, and gingerbread (in any form) is such an old-fashioned treat that I can’t seem to get enough of (even though I seem to eat the entire year’s worth between December 1-December 31st). I make some form of gingerbread every year over the holidays, but yet it never dawned on me that pairing it with chocolate would be so delightful and that it would just all make so much sense…until, of course, I made Gingerbread Swiss Meringue Buttercream. Being an SMB (or SMBC) lover, I couldn’t resist tossing some gingerbread spices into a big fluffy batch of Brown Sugar Buttercream, making it the gingerbread variation, for swirling onto holiday cupcakes. I suddenly seem to be using Brown Sugar Buttercream often lately, because it’s such a wonderful base for so many variations (such as here and for the deliciousness that was Peanut Butter Buttercream. The thing was, I knew I wanted to make little gingerbread cookie toppers, and if I had made gingerbread cupcakes to go along with the gingerbread buttercream, that would have made them triple gingerbread cupcakes which seemed a bit, well, spicy (although, that may not be a bad thing–I will try this and get back to you). For this round, adding some rich dark chocolate to the idea just felt right.
Then I remembered how much I’d wanted to try the chocolate cupcake recipe from a book I recently received: Making Cupcakes with Lola, which was written by the talented baker duo from Lola’s in the UK. This is one of the loveliest cupcake books I’ve read, and I’ve studied it for weeks–the cupcakes are a mix of classic and creative and the gorgeous photography & styling just brings it all to life. I am eager to try many of their more unusual, or as they call it, “over the top” cupcakes (think Masala Chai Tea cupcakes, Gingerbread Latte cupcakes and more), but I couldn’t resist starting with their classic chocolate cupcake recipe. It stood out to me because they use both melted chocolate and cocoa powder and calls for no other liquid ingredient aside from 4 eggs. I was kind of intrigued! It’s a lighter, fluffier chocolate cake as opposed to the more fudgy oil-based chocolate cake I often use, which was a fun change, and I loved the double chocolate result.
So once I had my heart set on dark chocolate & gingerbread cupcakes, it dawned on me that my little gingerbread cookie toppers simply must be dipped in the finest dark chocolate–just makes good sense, right? I actually love making tiny gingerbread folk versus the standard size, because they are so cute and they are a perfect kid-sized treat. I was pretty excited when I remembered Reese having a teeny tiny house cutter in her playdough tool bin that was the perfect size for little chocolate gingerbread house toppers. So then we had a wee gingerbread girl and her wee gingerbread house. As far as we were concerned, it was kind of awesome. Why do things like this excite me so much? I’ll never know.
I hope you’re having a wonderful Saturday filled with holiday baking and hopefully, for your sake, no shopping! Personally, I like to keep the circus element of my day in our own four walls at this time of year, just as I am today. This thought would comfort me, if it weren’t for the fact that I have barely started my holiday shopping. Minor detail!
I’ll be back very soon with another holiday delight!
P.S. I’m pretty sure we’d jingle Santa’s bells if we left him a plate of these and a tall glass of milk. Maybe we could even add a pretty wrapped box of the chocolate dipped gingerbread cookies for his elves?
Double Chocolate Gingerbread Cupcakes          {click to print}
Double Chocolate Gingerbread Cupcakes = Lola’s Chocolate Cupcakes + Gingerbread Swiss Buttercream + Chocolate-Dipped Gingerbread Cookie Toppers
Lola’s Bakery Chocolate Cupcakes
*written (with permission) as it reads in the book, Making Cupcakes with Lola
Ingredients
100 g/3 1/2 oz dark bittersweet chocolate, chopped (I used Callebaut Dark Chocolate Callets)
175 g/1 1/2 sticks butter, cubed
225 g/1 cup plus 2 tablespoons (caster) sugar
4 eggs
100 g/3/4 cup self-rising flour
2 1/2 tablespoons cocoa powder (I used Cacao Barry Extra Brute Cocoa Powder)
a pinch of salt
Method
Preheat the oven to 180°C/350°F/Gas 4.
1. Put the chocolate and butter in a heatproof bowl over a pan of simmering water. Do not let the base of the bowl touch the water. Heat, stirring, until the chocolate melts and you have a smooth, glossy mixture. Remove from the heat and stir in the sugar. Let cool for 10 minutes.
2. Now beat with an electric hand mixer for 3 minutes. Add the eggs, one at a time, beating for 10 seconds between each addition.
3. Sift the flour, cocoa and salt into the bowl and beat until blendid.
4. Divide the mixture between the muffin cases. Bake in the preheated oven and let cool completely on a wire rack before decorating.
Sweetapolita’s Notes
*Caster/castor sugar is also known as superfine sugar. You can create your own superfine sugar by substituting regular granulated sugar and processing it in a food processor until very fine.
**As with any cake or cupcake recipe I bake, I used room temperature eggs (not cold).
***I filled the cupcake liners a little more than I typically do, as I divided the batter evenly among the 12 liners, as directed. They were just over 2/3 full. I typically don’t prefer a ”muffin-top” cupcake, but because I knew I wanted a wider cupcake to hold very billowy swirls of buttercream, I went with it. I may never look back.
Gingerbread Swiss Meringue Buttercream
Yield: ~5 cups, enough for filling and frosting an 8-inch round cake, or frosting 12+ cupcakes.
Ingredients
5 large egg whites (~150 grams/5 ounces)
1 1/4 cup (250 grams/8.5 ounces) dark brown sugar (you can also use light brown sugar)
1 1/2 cups (3 sticks,  340 grams/12 ounces/3/4 lb) unsalted butter, softened and cut into cubes
1/2 teaspoon ( mL) pure vanilla extract (I use Nielsen-Massey Vanillas 8-oz. Madagascar Bourbon Vanilla Extract)
1/2 teaspoon ground ginger
1/4 teaspoon ground cinnamon
a pinch of ground nutmeg
a pinch of salt
Method
1. Wipe the bowl and whisk attachment of an electric mixer with paper towel and lemon juice, to remove any trace of grease. Add egg whites and brown sugar and simmer over a pot of water (not boiling), whisking constantly but gently, until temperature reaches 140-160°F, or if you don’t have a candy thermometer, until the sugar has completely dissolved and the egg whites are hot, about 5 minutes if you used room temperature egg whites. About 8+ minutes if they were cold.
2. With whisk attachment of mixer, begin to whip until the meringue is thick, glossy, and the bottom of the bowl feels neutral to the touch (this can take up to 10 minutes or so and is so important–never add butter to warm meringue). Switch over to paddle attachment and, with mixer on low speed, add softened butter in chunks until incorporated, and mix until it has reached a silky smooth texture (if curdles, keep mixing on medium-low and it will come back to smooth).
3. Add vanilla, salt and spices, continuing to beat on low speed until well combined.
Sweetapolita’s Notes on Swiss Meringue Buttercream:
* Can make buttercream ahead and keep in an airtight container in refrigerator for up to one week, leaving out at room temperature when needed, re-whipping in mixer for 5 minutes.
** Can freeze for up to 6-8 weeks. To thaw, place on counter overnight, and rewhip for 5 minutes with paddle attachment in an electric mixer.
***If not satiny enough upon rewhip, take 1/3 of buttercream and microwave in a microwave-safe container for ~8 seconds, then add back to mixing bowl and remix with remaining buttercream.
****For more detail about making Swiss Meringue Buttercream, you can find my FAQ here and photo tutorial here.
Chocolate-Dipped Gingerbread Cookies
1. Bake your favourite gingerbread cookie dough, and cut desired shapes–I prefer bite-size cookies in general, especially when using them for cupcake toppers. For these cookies, I tried Martha’s Molasses-Gingerbread Cookies recipe, and I followed it to the letter. I love them because they are dark and have a very deep molasses taste. The dough is gorgeous–just note that you will likely need to add quite a bit of flour while rolling and you will need to flour your cutter often, otherwise it is quite sticky. Once baked, let cookies cool on wire rack. *I found my little house and gingerbread doll cutters in my little girl’s playdough tool box, so don’t feel you have to stick with traditional cookie cutters.
2. Melt some (depending on how many cookies you are covering) quality chocolate in the microwave, and if you follow this easy tempering process (when, using the microwave, your chocolate will be tempered in seconds, which is how we get the chocolate to harden with a nice sheen. For these cookies, I used Callebaut Dark Chocolate Callets, which is rich, dark and perfect for covering cookies and is intended for melting down.
3. Dip cookies into chocolate using two forks (or if you have a chocolate-dipping fork), covering entire cookie, or even just half, depending on the look you want to achieve, letting the excess chocolate drip back into bowl.
4. Place on Silpat or wax paper-lined cookie sheet.
5. Place filled sheet in the refrigerator for about 20 minutes to set.
Place upon cupcakes or simply eat them as they are. Or both! Store at room temperature.  http://sweetapolita.com/2011/12/double-chocolate-gingerbread-cupcakes/
Love Letter & Scripted Heart Cookies


Happy love-month, everyone! I’ve been having so much fun exploring different love-themed treats, now that the Valentine’s spirit is upon us. I have a seemingly endless list of lovey sweets in my blog-ideas notebook, so I hope to somehow make it through several more before Valentine’s Day. I feel, though, that so many of these designs would also make for gorgeous wedding, bridal shower, or anniversary confections, because where there is love, oh please, let there be cookies!
While browsing a recent issue of Martha Stewart Living, I was beyond inspired (as usual). This time, though, things were really clicking. Every time I turned the page, I felt creative nudge upon creative nudge, resulting in some quick scribbles and sketches in my pink Moleskine notebook (I should be buying the notebooks by the dozen these days!). One of the most inspiring images, to me, was a gorgeous set of pastel letters with wine-coloured seals, created by a fabulous paper company called OrangeArt. Seeing as I don’t think in paper, but in sugar, I immediately started to design this collection of love letter cookies.
As a hopeless romantic, love letters get me every time. Lucky for me, Grant is an exceptional writer, and sure knows how to speak from the heart. I still have some of his first love letters to me, and I will admit that the written word affects me more than anything else (particularly his, of course!). It seems we’re all enchanted by the love letters–no matter whose they are, really. I noticed this after Grant and I watched our third Nicholas Sparks (clearly a deep and sensitive author who has a real adoration for love letters) movie last weekend–all of which have a cameo appearance (or more) by a big stack of gorgeously tattered and heartfelt letters. The Notebook, of course, which is centered around the tragic pile of letters intercepted and hidden by the mother of a girl in a star-crossed love affair; Dear John, which also focuses on the written word of love between a young couple parted by war; and finally, our most recent watch, The Last Song–another story of love, but with a heap of unread letters from a father to his daughter. It all reminds me how inspirational and beautiful words really are; even the simple aesthetic of script, to me, is so lovely and artful.

I suppose that’s why I was so taken with the script rubber stamp I found the other day. The effect when impressed upon the fondant is simple, but I think it’s so pretty, textural, and perfectly antiquated.
So here we have a happy little family of scripted love cookies. You know, speaking of family and love letters, I wanted to share a really neat book/idea with you. Shortly after our first daughter, Reese, was born, Grant’s mom bought me a beautiful book called “Love, Mommy: Writing Love Letters To Your Baby.” The author, Judy Siblin-Librach, encourages and inspires the reader to do just that: to write heartfelt love letters to your baby. This gives them something amazing to cherish when they’re older, and they can learn all about specific, day-to-day reasons why you love them so. So, every night, for an entire year, I wrote Reese a love letter in a journal. I’ve put it away so that I can wrap it up and give it to her either on her wedding day, or when the time is right. I’ve also started this for Neve, and I’m so thrilled that Mary Lou (my mother-in-law) gave me this fabulous book. I can’t wait to sit down with the girls, years from now, and read each of their love letters again.
Once I started creating these cookies, I began imagining endless possibilities–there may even be a part two to this post, if I can’t resist the urge to create the next part of my vision! I hope you run with this theme. If you’d like to re-create what I’ve done above, here is the how-to:
Love Letters:
1. Using large rectangular cookie cutter (these are 4.5″ x 3″), cut out/bake/cool desired number of “letters.”
2. Colour fondant (I use Satin Ice brand) desired colours. I used ivory fondant and added the following colours (in tiny amounts):
Pink: Sugarflair “Pink” and a small amount of grey petal dust
Mauve: AmeriColor “Mauve” and a small amount of grey petal dust (I originally used a drop of Electric Purple, but Mauve is already muted, so it’s a better choice)
Ice Teal: AmeriColor “Teal” and a small amount of grey petal dust
Burgundy (for the seal): Sugarflair “Red” and AmeriColor “Electric Purple” and bit of AmeriColor “Super Black”
3. Roll out your fondant to about 1/8″ thickness, one cookie at a time, keeping the remaining fondant covered, and cut rectangle using same cookie cutter you used for cookie. When rolling fondant for cookies, I like to sprinkle icing sugar on counter surface before rolling, and then let the cut-out sit for a moment or two before lifting up with an artist’s palette knife. This way the fondant doesn’t get stretched in any way.
4. Spread a very, very thin layer of royal icing onto the inner surface of the cookie with an offset palette knife, and gently place your fondant cut-out on top, gently smoothing with your fingers.
5. Cut a top flap (any style you like–I used real envelopes for reference) and adhere to your “envelope” with a dab of water. Using a knife, create two angled envelope lines.
6. For scripted detail piece: roll out ivory fondant, then press the rubber stamp firmly down upon the fondant and lift straight up. Using a knife, cut a rectangular piece, let dry for about 15 minutes, and adhere to envelope with royal icing.
7. Using a #2 tip, pipe string onto envelope.
8. Roll a small ball of burgundy fondant, and emboss with wax seal, then place in centre of cookie.
Let cookies dry for several hours, preferably overnight, before packaging.
Scripted Heart Cookies:
These are so simple!
1. Cut out/bake/cool any heart shapes you desire.
2. Roll pastel coloured fondant as with letter cookies, and impress script using rubber stamp. Using same cutters as used for making cookies, cut scripted fondant hearts.
3. Adhere to corresponding cookie using very thin layer of royal icing and an offset palette knife.
I can see these making for fabulous event favours, gifts for loved ones & friends, dessert table details, and more.  http://sweetapolita.com/2011/02/love-letters-scripted-heart-cookies/

Artist’s Palette & Paintbrush Cookies (with a special “Twist”)

Happy Friday! Okay, I won’t lie: this is one of the happiest Fridays I’ve had in quite some time (and I really have had some lovely Fridays in my day!). I’ll warn you that this paragraph really has nothing to do with the artist palettes, paintbrushes, paints, or even cookies, but I feel that you should know as I sit here typing, I keep clicking back to The Pioneer Woman’s Photography website. This week she is having another one of her amazing Photo Assignments, and the theme is Food Photography…you may see where this is going! Being such a newbie food photographer and submitting among so many outstanding photographers, I’m so excited to report that 2 of my cake photos were selected by Ree to be in the running: one in yesterday’s group and another tonight. Somebody, pinch me, please. Truly, I didn’t know it would affect me so much, but I am downright giddy, and I hope you don’t mind my sharing that with you. If you’d like to see those photos, along with so many unbelievable entries, you can click here for Group 3 and here for Group 4.  Now, let’s talk colourful artist confections!
A few months back, I noticed a comment on one of my blog posts from “A Fanciful Twist.” I have to say that it jumped out at me, and I was curious as to who was behind this enchanting name. After clicking the link, I was suddenly immersed in an artistic world like none I had ever seen before. I knew whoever was behind all of this beauty, magic, and intrigue had to be pretty special. Well, she is, and her name is Vanessa Valencia. She is the kindred spirit behind A Fanciful Twist. We became fast friends, and her talent astounds me daily. Not only is she talented, but she is the most unique and curiously mysterious girl I’ve ever come to know.
Her artistic range is broad, including original paintings, prints, cards, dolls, jewelry, pottery, and so much more. Her portfolio is seemingly endless, as she is experienced in the art world, yet each piece she creates is fresh and captivating. I immediately connected with her confection-themed pieces, in particular, and wanted to share some of my favourites with you. Here are some of the pieces that truly inspire me:

At the Patisserie


Cupcake Macaron Fete


A Perfectly Sweet Day

 Sweet Cake
  
The Party
And, ah yes, my current favourite:  The Party. Now that’s my kind of party! And that cake? She’s just so beautiful, and I love everything about this–the entire piece speaks to me. Reese (my 3 1/2 year old) fell in love with her at first glance too. She, being the painter she is, ran for her brushes, paint, palette, and paper, and said “Mommy, I want to paint her too!” And so she did. In about 2 minutes flat, she brought me this perfect little painting–her version of Vanessa’s The Party:  
 Oh dear me. Let us not even speak of the unmeasurable pride and joy that this painting brings me, or I may cry. Mama-love x infinity.

Between my sweet and infinitely creative friend, Vanessa Valencia, and my little Reese, painting inspiration surrounds me. Not a day goes by at our house when there isn’t a handful of paintbrushes, open jars of colourful paint, and a string of finished works of art hanging on the fridge to dry; Reese simply cannot get through the day without painting a picture. I think these artist palette and paintbrush cookies are so much fun, and they fit right in at our house. Both of these cookie designs are decorated with a combination of fondant and royal icing. Now, I will admit that they are not a quick and easy design; they’re not difficult, but just a wee bit time-consuming (but worth it, if you ask me), particularly the brush cookies. However, to me, life is in the details!
A potentially confusing tidbit: I painted the paint and paintbrushes with paint and paintbrushes. Ouch; my brain hurts.
If you’d like to make these artist cookies, here’s the how-to:
Let me start by saying that I wish I had a photo tutorial for you! I believe, though, that if you are going to give these a try, that you won’t have trouble with these steps:
Artist’s Palette Cookies:
1. Bake & cool round (or oval) sugar cookies. Roll out white fondant to approximately 1/8″ thickness, and cut out circle (or oval) using the same cookie cutter as you did the cookie itself. Cut a small “bite” out of the side and, using your fingers, shape and smooth edges to look resemble a palette (I use a bit of shortening on my fingers.). While the fondant is still soft, take a small round cutter and score 5 circles in fondant. You can set the entire piece aside, or you can attach to cookie now. I prefer to do all of the palettes and then adhere to the cookie all at once.
2. Using an offset palette knife, spread a very thin layer of royal icing onto one cookie, then lay the fondant circle on top and very gently press onto cookie. Set aside.
3. Colour royal icing any “paint” colours you like, and pipe little swirls onto each circle. For this project, I filled a small disposable Ziploc-style bag with a small amount of each colour and cut a small triangle out of corner, rather than using piping bags or tips. For the gold “paint” I let the white royal icing swirl dry, and I painted it with gold non-toxic paint. I won’t lie to you: it was my 24 karat gold paint. I cannot stop using this stuff.
And there you have bright and colourful artist palette cookies! Now, onto the paintbrushes:
Artist’s Paintbrush Cookies:
For the wooden brush handle:
1. Bake and cool 7″ x 1/2″ (or so) sugar cookie “sticks.”
2. Dye some white fondant (depending on how many you’re making) light brown, and taking equal parts white fondant, make two long rope-shapes using each colour. Twist loosely into braid, then roll into ball, followed by long handle shape pieces. I did about 7″ wooden handles. Cut one end of flush. Set aside.
*Tip: When rolling fondant or gumpaste into long uniform pieces or “snakes,” I roll with my hands until it takes on the basic sausage shape, and then I hold a big plastic cutting board and roll the piece underneath in a back and forth motion. This ensures it’s of uniform diamater.
3. Using white fondant, make a tear drop shape for each brush tip. Using a knife, or other sharp tool, make little tip lines to create the illusion of the brush tip. Set aside.
4. Mix a drop of brown gel colour with some clear lemon extract or vodka, and with a paintbrush (yep, painting-the-paintbrush-with-a-paintbrush thing again: weird.) brush the liquid onto each handle. Because woodgrain is characteristically imperfect, this can be a very quick paint job. It looks great no matter what you do! Set aside to dry completely.
5. Once dry, using a dab of royal icing, on end  of handle and secure to the straight end of the handle. Let dry.
6. Roll small and very thin piece of fondant for the metal wrap, and cut it to about 1 1/2″ length, wrapping around the joint between the tip and handle, using a few dabs of water to adhere. Taking a pin or toothpick, make small dot markings and lines for realistic finish (see photo of paintbrush). Let dry.
7. Paint the wrap piece with a metallic non-toxic paint (lustre dust mixed with clear lemon extract or vodka). Because I have been sniffing too many paint fumes around here lately, I, again, used my 24 karat gold paint. I just love the look. Then, if desired, paint the very end of the paintbrush tip with corresponding colours to your palettes).
8. Using a very thin bit of royal icing, gently secure the paintbrush to the cookie. Let dry and voila!
A little bit of extra work, but I think these cookies are worth it.
To be properly dazzled and mystified by the wonder that is Vanessa Valencia from A Fanciful Twist, visit her on her official website, or her blog, or over at her Etsy shop. She’s exceptional. I promise.
Have a wonderful (and colourful) weekend!  http://sweetapolita.com/2011/01/artists-palette-paintbrush-cookies-with-a-special-twist/

How to Make a Fondant Asparagus Cake {a Tutorial}


This post makes me giggle. Well, not the actual post, since I haven’t written it yet, but the fact that I am still inflicting innocent and unsuspecting passersby with what seems to be the endless life of the Asparagus Cake–the trompe l’oeil cake I made as, really, just a joke for Grant’s sister, Mary, or as we call her, Mar. When I initially shared this crazy cake idea back when I first started this blog just over a year ago, and then again when I recreated and revisited it (above) this past May, I never really expected that anyone else would want (or have a good reason) to make this cake themselves, which is why I didn’t include tutorials in either of those posts. Then, something unexpected happened: I began getting emails from readers asking me for a tutorial and explaining that they indeed have the perfect reason to make this cake. This makes me very happy! I love that some of you actually have reasons to make one, and that some of you simply want to. Yep, I kind of love that. Long live Asparagus Cakes!
Just to recap on why I made this cake the first time, Mar had been training for a fitness competition for many months prior to her show in November, and this poor foodie, fellow lover-of-sweet had been eating more asparagus than one could even fathom. She’s amazing, though, and stayed more focused and disciplined than most of us (and by most of us, I mean me) could even dream of, so the girl earned herself some serious post-show cake. So, for fun, during her training months we would chat about all of the delicious things she couldn’t wait to eat after the show, and more specifically at our house the next day for a celebratory lunch. When I asked her what she wanted for dessert, she said “I’d love something with chocolate cake and vanilla buttercream, but other than that, whatever you think!” So, my first thought was something pink and girly, you know, a real show-stopping dessert for a fitness queen, but then it dawned on me: Asparagus! It simply could be no other way and, if you know me, you know that nothing was going to stop me from making this happen. It just made too much sense, and I love a challenge. I was so excited with the way it turned out, and it was actually a little easier than I expected.

The real asparagus I referred to while making this cake–this photo is not fondant asparagus, and I promise I would not put this real asparagus, or any other real asparagus, onto a cake!
Referring to actual asparagus (above) was the most important step in the process of creating this cake. I learned a few things the first time around and made some notes on what I would do the next time to improve it. My main issue with the first one was that I felt the spears still looked a bit too green, even though I did add hints of red, because if you look, I mean really look, at real raw asparagus, they are filled with some neat red and many purple tones. Since I wanted them to look as realistic as possible, I knew that they had to look raw, because cooked asparagus takes on that bright green colour, and well, cooked asparagus wouldn’t be presented in a bunch–it was definitely about the details. Life is in the details!

I think the key to making this cake look hyper-realistic, aside from the rolling and snipping, is the shading, which I achieved by brushing on a few different petal dust colours (those typically used to create very realistic sugar flowers) once the “asparagus” were dry–that is when this cake came to life. If you look at the photo above, you’ll see that, when I took that photo, I’d shaded the full spears but not the tips yet–do you see the dimension that gives? I think had I gone with the straight green and undusted asparagus on the cake, it would have looked like a neat cake that looks like a bundle of asparagus. By shading it all, it took it to looking much like an actual bundle of asparagus, which is what you want if you’re looking to wow some folks. I’ll tell you a secret: I continue to get very passionate emails from people who believe this cake is a farce, and who swear I have manipulated it, or the photos, in some way. They can’t believe that it’s not real asparagus and are so angry with me for trying to get away with Asparagus Cake fraud (who knew that was a thing?) that they send me hate mail. Can you imagine? I swear this to be true. So, I suppose the moral of the story here is that, if you want to make people really angry and get Asparagus Cake fraud hate mail too, you really better shade those spears!

So, believe it or not, this cake is not difficult to make, and it’s a very simple process, albeit time consuming. Essentially, your making fondant asparagus and attaching them to the outside of a green cake, followed by covering the top of the cake with small 2″ fondant asparagus tips that fill in every inch of exposed cake on top. Once all of the spears and tips are on the cake, you will see it magically transform into a life-like bundle of asparagus. The finishing touch, for both function and form, is the ribbon–it holds the asparagus in place while they are setting on the cake (and while displayed), and it also mimics the string or elastic that typically ties real life bunches together.
If time is on your side, I recommend making your fondant asparagus over the course of days or even weeks, to break it up. Once made, you can keep them in a dry open-air spot, out of the sun, indefinitely. If you are creating the entire cake all at once, you would let the asparagus dry overnight, if possible, and then you would dust to shade them, and assemble. I covered my buttercream covered cake with green fondant, but you can also skip this step by colouring your buttercream green and simply pressing the asparagus straight onto the cake–this may even be easier, but I have yet to do it this way. Since wet fondant becomes a glue of sorts, attaching the asparagus to your fondant-covered cake does work. One thing I would do differently next time would be taper the tops of the full stalks a little less, so that there is no under-cake showing through. I think the slightly tapered top is important, but just a bit less would have been perfect.
A note about your choice of fondant for this cake: When I made this the second time (above), I used my favourite brand of fondant, Satin Ice. One of the reasons I normally love Satin Ice brand the best is because it dries the most porcelain-like on my cakes, but in this instance, for the fondant asparagus, I would have preferred them to be a little less porcelain like, as they were the first time I made the cake. I found they were so firm with the Satin Ice that they didn’t adhere to the cake as well as the first time I made the cake. So, in this case, I would recommend using any other brand for this project, as every other brand I’ve tried is softer, even when dry. This also makes slicing the cake a bit easier–that coupled with the fact that Satin Ice is the most $$, it’s just a great idea to avoid it for this cake.

What you do on the inside of the cake is totally up to you, of course, but I personally feel that a rich dark chocolate cake, paired with vanilla buttercream offers a pleasing contrast for all of that green. And, as always, splitting your layers to create a 6 or even 8-layer cake will add even more drama to an already dramatic cake. This cake is just too much fun to not make. If you have someone in your life, like Mar, who is an asparagus-eating king or queen, then it just makes good sense.
A few more reasons for when to make this cake and have it make even a little bit of sense (Sweetapolita *chanting* let’s make, let’s make, let’s make an asparagus cake!):
  • For someone who simply takes healthy eating very seriously
  • For someone who just happens to love asparagus
  • Fitness enthusiasts
  • For kids! This is a hilarious joke to play on a kid who isn’t quite as passionate about vegetables as they are about cake–birthday or not
  • A garden party
  • For anyone who works with veggies for a living: chef, farmer, grocer
  • For those who love to garden
  • For a quirky wedding, garden wedding or groom’s cake (I almost cried when I saw this wedding online–oh, how perfect this cake would have been for them and their perfectly quirky wedding)
  • Just because!
So, now that we have many reasons to run to the kitchen and whip up this asparagus confection, let me explain how we do it. This may look like a lot of steps, but honestly, this cake isn’t about complexity, it’s about time. Sweet, precious time. Simply put, it takes a lot of it (how much time depends on how fast you work, of course), but it is pretty straightforward, and it’s worth it.
Here we go (and wheee!):
How to Make an Asparagus Cake         {click to print}


You will need:
  • a round layer cake–~4-5″ high and diameter up to you (the one in photo was 8″ round) either covered in green fondant (~1 lb + 12 oz) or green buttercream
  • fondant for asparagus (this depends on the size of your cake, but ~1.5 lbs–I recommend having an extra lb or more, just in case)
  • gel colours: AmeriColor Leaf Green, Sugarflair Gooseberry
  • petal dust colours: Foliage Green or Moss Green Petal Dust, African Violet Petal Dust, Flame Red Petal Dust
  • fondant work mat (I use Ateco 24 x 36 Inch Fondant Work Mat for all of my fondant work and more), optional
  • a small sharp knife
  • 3 wire racks or cookie sheets lined with parchment paper
  • pair of small scissors (such as manicure scissors you designate for food)
  • 3 small-medium paint brushes for dusting colour, 1 medium-large brush for water
  • ribbon of choice
  • cornstarch or icing sugar for dusting work surface (if not using fondant work mat)
Method
Make your fondant asparagus (you can make these as far in advance as you wish):
  1. Colour your fondant 3 shades of green using the AmeriColor Leaf Green & Sugarflair Gooseberry. Make 1/3  of your fondant 50/50, then make two additional shades: 1 with the slightest bit more Leaf Green and the final with the slightest bit more Gooseberry. Keep all your 3 shades of green fondant well-sealed (I use medium plastic seal bags) while not in use, and only work with small amounts at once.
  2. Removing only a golf-ball-sized bit of fondant from the bag, soften it by working it in your hands for a moment, and then, on a fondant work mat or clean countertop, roll into a long, even rope, about 1/2″ thick or so, using your hands or a cookie sheet (this creates a very even rope) in a back-and-forth rolling motion. *If your fondant sticks to your countertop, use a light dusting of icing sugar or cornstarch. If you use a fondant mat, you won’t have this issue.
  3. Cut into 5″ long pieces (you should get 3 or so per rope) and cut remaining “rope” into 2″ pieces. Using the palm of your hand, roll “neck’ of each piece gently, so that it tapers a small bit and then do the same to the very tip, so it becomes slightly pointed. Don’t worry if they aren’t all the exact same length, as we’ll be trimming them a bit before putting them on the cake.
  4. Working quickly, and while keeping the pieces on the counter, make many tiny snips the tapered ends of each piece and sporadically along the stalks. *Be sure to not actually cut the flaps of fondant off when using the scissors, as you want the little “triangle” flaps to pull away from the spear, but not come off. So now you have your first spears and tips (woohoo!). Now, simply repeat a few hundred times. Kidding! Sort of. Set each one on a wire rack or parchment-lined cookie sheet (they simply dry faster on rack, but if you are doing ahead of time, use cookie sheets as they are easy to move around) to dry. The quantity needed depends on the diameter of you cake and how thick you rolled your asparagus stalks. I believe I used about 75 full spears (for the outside of the cake) and ~400 tips to fill the center. Let dry overnight (or up to weeks in advance) in a cool, dry place–exposed to air.
  5. Using small dry paintbrushes, generously dust each spear with green dust at the tip and randomly over stalk (where you snipped), then with hints of African Violet and Flame Red. *Refer to your real bunch of asparagus as much as possible. You will be adding a final round of dust after the cake has been assembled, so you don’t need to go overboard with the dusting.
  6. Pat yourself on the back and celebrate with a fancy beverage of some kind, because the worst, my friends, is over–you have just made hundreds of fondant asparagus + tips!
Assemble the Asparagus Cake:
  1. Cover your cake in either green vanilla buttercream or vanilla buttercream covered with green fondant. *I used green fondant that I coloured white fondant using leaf green to gooseberry green 50/50. Don’t stress too much about your fondant or buttercream job being perfect, because not one inch of this part of the cake will be visible, but do your best to start with a fairly smooth and even surface. Place cake on the plate or pedestal you plan to serve it on, and chill cake for 30 minutes, or so.
  2. If you finished your cake with green vanilla buttercream, that will essentially be your glue–you can go ahead and places your full spears, one by one, directly around the cake, as close together as possible. You may want to trim the bottom of certain spears before sticking them to the cake, to ensure they all sit at the same height–you want your spears to sit about 2″ above the top of your cake (see photo). If you finished your cake with green fondant, you will use a medium-large paint brush or pastry brush and wet sections of the cake before gently pressing the asparagus to the sides–the wet fondant is your glue. You may have to hold each one or few for a moment until it sticks, or tie a ribbon around the outside of the spears and cake to set (see photo).
  3. Once you have placed spears all the way around the perimeter of the cake, tie the ribbon firmly around the cake to help them set.
  4. You will now place the tips tightly together on the top of the cake, one by one. Remember that you don’t want any of the under-cake exposed, as this is what makes it look so real. Fill every inch you can with the tips, trimming the bottoms before placing on the cake, if necessary (you want them to be as close to the same height as possible).
  5. Add any last shading with your petal dusts to enhance the tips, bases and spots where you snipped.
  6. Voila! Now, please, have another fancy beverage and piece of cake to celebrate (Asparagus Cake, anyone?). You did it!
Sweetapolita’s Notes for a successful Asparagus Cake:
  • Use real asparagus as your guide–this was key for me. Had I gone by memory, I never would have thought to include red and purple shading, which I think makes it.
  • Make all of the spears fairly consistent (in terms of length and diameter), but each one should be slightly different (shading, snips, etc)–think organic shapes and colours–not overly engineered.
  • Sugarflair Gooseberry green gel is the best I’ve found for a realistic green shade of base fondant. If you can’t find this, try adding a tiny bit of black to your Leaf Green colour gel, or experiment with mixing different shades of green.
  • Shading, shading, shading–this gives the cake that real trompe l’oeil dimension that freaks people out (hehe).
Love Asparagus? Check out these lovely handmade asparagus finds:
Good luck, enjoy & Happy Asparagus Cake Day (not really, but imagine if I had the power to create such a thing?)!  http://sweetapolita.com/2012/01/how-to-make-an-asparagus-cake-a-tutorial/

Couture Cake Class with The Caketress


Sujin, Kate, Rafia, Lori (The Caketress), and Alice
Happy November (almost)! Since discovering the gorgeous work of Lori Hutchinson (The Caketress), I’ve been fascinated with the concept of  “couture cakes,” which means using couture gowns as inspiration for cake design. When I saw that she was teaching a course on Haute Couture Cakes at Bonnie Gordon School in Toronto, where I have taken all of my previous cake courses, I signed up right away. Although there are, and have been, other cake designers who incorporate couture-type details into their cakes, it seems that The Caketress has become synonymous with this type of design, and I’m sure no one would argue that she owns this style. So much so, that students travel from all over the world, literally, to take instruction from her. Lucky me lives only45 minutes away! 

This is Lori, The Caketress, and she was so inspiring and helpful. The vibe in this class was highly creative-yet-casual, and I felt that made it really easy to open up, ask any question whatsoever, and just have fun. I’m speaking from my perspective, but I would bet the other girls would agree. For such an accomplished artist, Lori is so warm and down-to-earth. I have so much respect for her and her work. Here are some of the highlights from my time in class:

On Saturday morning we pretty much dove right into learning and watching Lori demonstrate some of her favourite techniques (above), including several types of pleating, ruffling, draping, and more. Although we each brought our sketched cake designs based on couture gown inspiration, we tweaked and altered our cake designs after learning some new techniques. Now it was time to start working on our cakes…
This is Kate, and she came in from London, Ontario for the class. Here she is working on one of her wedding cake designs–let me say, this girl does beautiful work and is super speedy. She completed two cakes to our one, well, actually, everyone else’s one and my half of one, but we’ll get to that…

  
And…voila! I’m not sure I was even done drinking my morning coffee when I turned around and Kate has whipped this up: a gorgeous pleated 3-tier wedding cake. I love the pearl medallion she created and added as a final design detail. Go Kate!

   
This is the cake Kate created on the first day of class, perfectly pearled and ruffled. Gorgeous.

This couture wedding cake is Alice’s creation. Alice sat beside me for the two days, and it was so great chatting with her. Alice recently finished schooling at Le Cordon Bleu in California, and she flew in from L.A. for this class. She really incorporated so many of the techniques we were taught into this elegant cake.

Here’s a side-view Rafia’s feminine ruffle cake. I personally really loved the little touch-of-Tiffany she added with the robin’s-egg-blue rosette and cake board. The hints of gold with the use of the dragees placed whimsically on the top tier really create such interest. I haven’t known Rafia long, but I can tell you this cake is so her! She’s lovely and feminine, and was so sweet to chat with.

This is Sujin. She traveled all the way from Korea for this and two other classes at the school that week. She had a translator and friend, Esther (who was so friendly and entertaining, I might add), accompany her for the first day to assist with language, but I have a feeling that Sujin’s instincts, undivided attention to Lori’s technique demonstrations, and her quiet intensity during class served her perfectly well.
 
Here is Sujin’s completed wedding cake. She used a Korean couture bridal gown as inspiration, which really makes this cake stand out to me. She’s clearly an amazing artist, and although we weren’t able to really talk to each other, it was easy to see she’s also such a wonderful person. Who knows, maybe she’ll come back from Korea to Bonnie Gordon School again. It was great to meet her.
Well, we’ve established that all of my classmates designed and created amazing cakes by the end of the 2-day course. Thing is, I actually ran out of time and didn’t complete my cake during class, but after returning home I revamped my cake and completed it (finally!) closer to my original design. I think I may have designed something a wee bit too time-consuming for the weekend course, but that’s okay. I spent some time changing what I did and was able to really focus on figuring out how to achieve what I wanted. I based my cake design on a gown by my favourite designer (and my wedding dress designer too!), Monique Lhuillier.  Oh, if I could have a wedding do-over, this would be the dress! Here’s a quick shot of what I went into class with:

 
I did this sketch based on the photo of the dress–an amazing pleated, ruched, rosetted ball gown.  As you can see in the group shot above, I ended up only having time for a few of the roses and then I did a light pink draped detail on the top tier. The reason I changed it afterwards, is because I really wanted to challenge myself with a more structured-style pleating and layering on the top tier, just as my sketch suggests. 

Here’s a photo of my cake in progress…
  
And here’s my finished cake. I ended up putting my time into layering varying size fabric-inspired rosettes around the cake and creating a ruffled wrap for interest and more structure. It’s a slight departure from my initial sketch, but I find that happens sometimes, and the design can just take its own shape as I go along. The best cakes can happen this way!

Here’s a detail shot of the ruffled fabric-like brooch detail and the pleating I did on the top tier, inspired by the bodice of the gown. This cake was definitely a change from my typical style, but couture cake techniques are so inspiring, and I learned a lot.
Working with Lori, and the whole gang in this class, was so much fun. I look so forward to using the couture techniques on future designs–the possibilities are endless!  http://sweetapolita.com/2010/10/couture-cake-class-with-the-caketress/