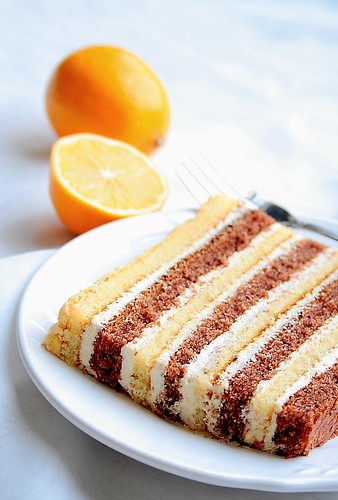
This recipe was given to me long ago, during my refugee years spent in a refuge center in Kosovo. Life was not easy in a center like that, however, you sure can learn a lot about life, and appreciate it more forever when you have to rebuild it. Also, I have gained a great friend, who was a refugee from Lika, Croatia. I have lost contact with her, now that I am here in the States, but I cherish this recipe, as it is a great reminder of the good days we were able to make out of those tough times.
This is a traditional, old recipe from Lika. Simple sponge cake layers, with vanilla butter cream. I always add some citrus aroma to the sponges, which makes for a real nice touch.
Lika Pie - Licka Pita
You’ll need 3x this for three sponges:
3 eggs
7 tbsp sugar
100 ml oil
100 ml milk
8 tbsp flour
2 tsp baking powder
Couple of citrus fruit for sprinkling the sponges
1 tbsp cocoa, just for one of the sponges
For the filling:
500 ml/ 2 cups milk
9 scant tbsp flour
10 tbsp sugar
2 tsp vanilla sugar
250g unsalted butter or margarine
Some powdered sugar at the end if you want it sweeter
For the sponges, mix 3 egg yolks with sugar, then add egg whites which you have mixed until stiff.
Mix well, then add oil, milk, and flour mixed with baking powder. Do this three times, and add 1 tbsp cocoa powder into one of them, or two if you like two dark, and one yellow sponge.
Bake them in a parchment paper lined pan, or oiled and greased pan ( this is normally done in a square baking pan about 10x14 inches in size, but you can also make the cake round) at 395°F for about 15-20 minutes, or until toothpick comes out clean.
For the filling, heat milk a little, and take some of it to mix flour with it, and do so with a hand held mixer, by hand you‘ll get too many lumps. I also strain the mixture to avoid any lumps.
The remainder of milk, set to boil with sugar and vanilla sugar in it. When it reaches boiling point, remove from heat, and reduce heat to medium low, mix in flour mixture, and stir constantly. Place back on the stove, and cook for a few minutes, until it thickens. Careful not to burn it. Really doesn’t take long, plus as it cools it will thicken more. Cool, then chill in the fridge, and when completely cooled down, mix in the butter cut into thin slices. Do this in a mixer, I use a stand mixer.
Assemble the cake by sprinkling each of the sponges with some citrus fruit juice (fresh, just squeeze straight from the fruit), like oranges lemons, Meyer lemons, and spread filling evenly in between, if you made two yellow sponges, then put the dark one in the middle, and vice versa.
Decorate as you wish, the original recipe just calls for some filling on the outside, a
Now, what I did for the cake pictured: I used jelly roll pan, and made only 2 sponges, one yellow, and one brown. Then I cut each of the sponges into four, and voila, I got a small, but pretty tall cake. The rest is same, I used Meyer lemons to sprinkle each sponge. Then I decorated with inspiration I got from a Family Fun magazine, The Princess and the Pea Cake. I didn’t follow their instructions, just sort of played with what I had readily available at home. Not at all happy with the looks, but then again I am famous for my inability to decorate, and take on big projects like this!!! :))) Kids liked it, and I think I’ll try this one again. I won’t be using many colors though, as I really like to keep it simple. http://cafechocolada.blogspot.com/search?updated-max=2009-03-15T12%3A52%3A00-04%3A00&max-results=4
No comments:
Post a Comment