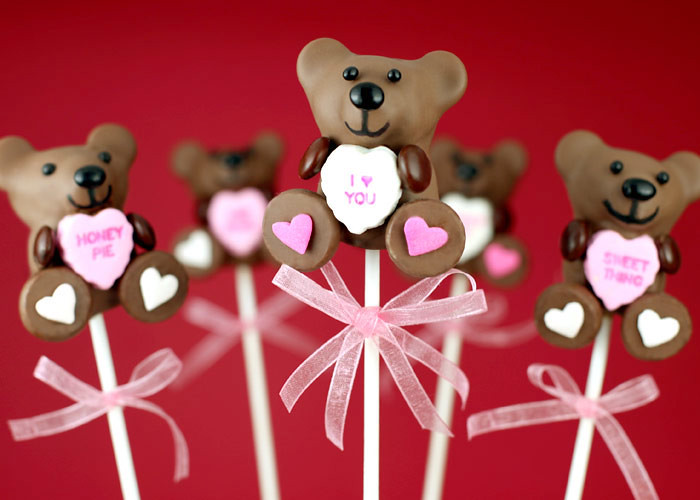
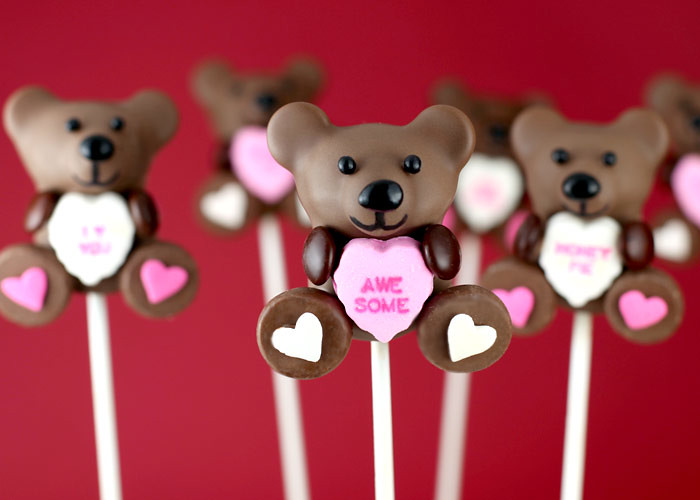
I’ve already made some cake pops that look like conversation hearts, using pastel candy coatings and a heart-shaped cutter. They’re in my Cake Pops book. But, this weekend I wanted to try using real conversation heart candies to make some cute teddy bears look awesome.
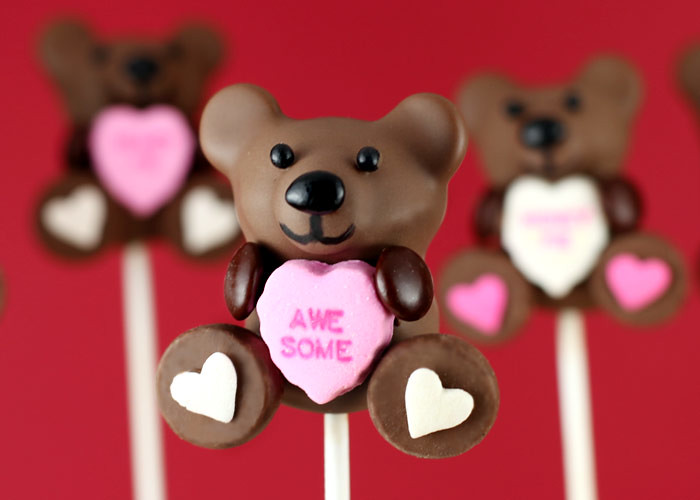
Awe. Some.
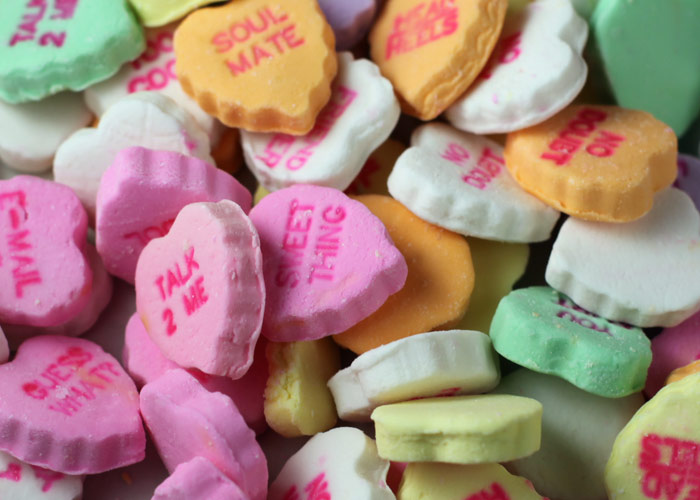
These are large conversation heart candies. Not the little ones you usually see. They are about 1 inch tall and just the right size to place in front of teddy bear’s belly. (Found at Hobby Lobby craft store by the way.)
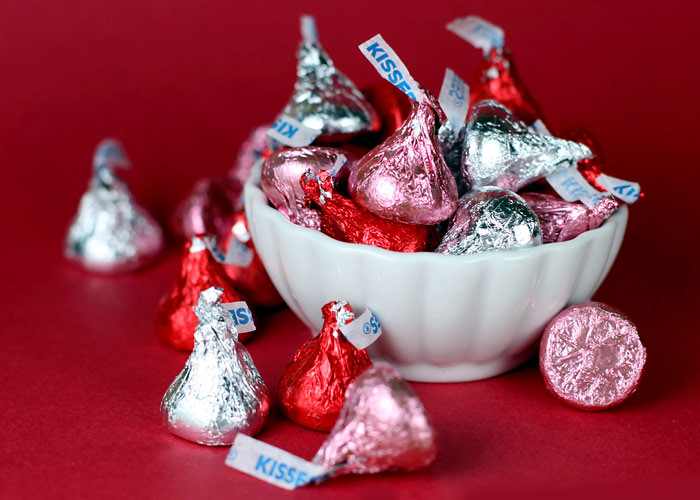
I’ve also already made teddy bear cake pops. They are in the book, too. But they aren’t the entire body… just the head.
So for these I thought Hershey’s Kisses would make perfect legs. Perfect enough to resemble a plush doll anyway.
For his arms, his front paws… I used brown M&M’s candies. I could have used a slightly larger candy, but these were pretty close to the color of the Kisses and the chocolate candy coating that I used for the bodies, so I rolled with it. Besides, it’s all I had on hand that was close enough to work and also look like he was holding the heart.
For the rest of the details I used the following…
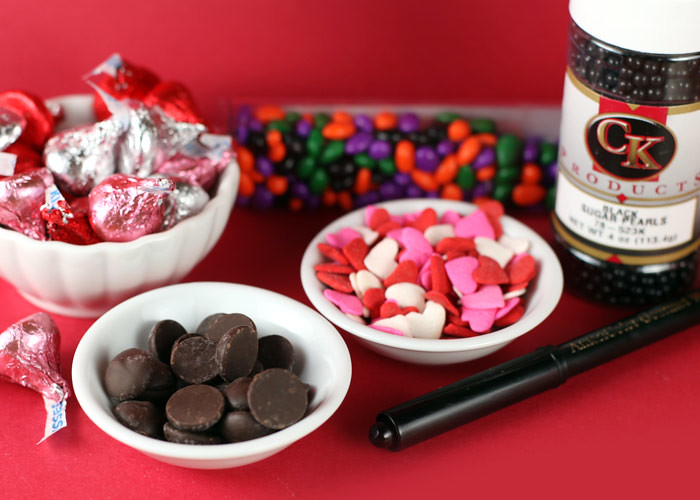
Large jumbo heart sprinkles on the legs.
Black coated sunflower seeds for noses.
Black sugar pearls for eyes
A black edible ink pen for smiles.
Oh and chocolate chips to help shape the bear’s structure. (FYI – These are Ghiradelli chips. They are larger chocolate morsels and worked great since I was going for bigger ears. They are also a bit flatter, so they weren’t too pointy when placed in position for the nose.)
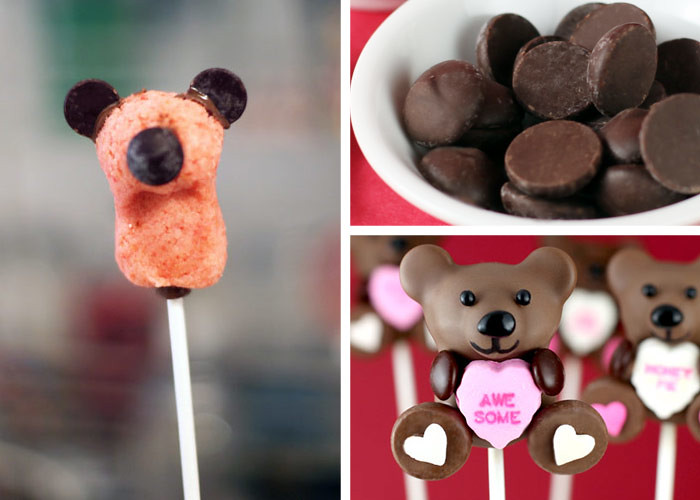
After rolling out your cake balls (see basic cake pop instructions here), chill in the freezer to get them firm and easier to shape. Take your ball and shape it kind of like a peanut. Use one of your heart candies to press on the front and flatten out the bear’s belly on the lower half.
Melt some chocolate candy coating. Dip the edge of two chocolate chips in the melted coating and insert into the bear cake pop shape for ears. Attach a third chip to the front of the bear’s face to help his nose protrude a bit. Insert your lollipop stick into the coating and then insert about halfway into the shaped cake ball. Return pops to the freezer to firm up again for just a couple of minutes.
After chilling, dip the entire body into the bowl of melted candy coating. Make sure the bowl is deep enough to dip and remove in one motion. The coating should also be thin enough to completely coat the pop without having to stir it in the bowl.
Gently tap off any excess coating. Attach nose, conversation heart and legs while the coating is still wet.
Place in a styrofoam block to dry.
When dry, you can dip your toothpick into some of the leftover melted coating and dot some in position for the eyes. Then just attach the sugar pearls. Dot some on the legs and attach the jumbo heart sprinkles. Apply a little bit of coating to one side of the M&M’s candies and attach them to the body so they appear to be holding the hearts.
Then just draw on some sweet smiles.
Voila. Huggable lovable bears.
Have fun!
No comments:
Post a Comment