▼
Saturday, March 24, 2012
Как сделать волосы крепкими и шелковистыми?
Как превратить любую, даже довольно жидкую или потрепанную жизнью и средствами для окраски шевелюру в свою красу и гордость. Здесь вам помогут рецепты, давным-давно изобретенные нашими бабушками, многие из которых, как известно, имели косу до пояса в кулак толщиной.
Рецепт 1. Самый простой
Купите себе бутылочку настоящей МИНЕРАЛЬНОЙ ВОДЫ. По отзывам самых терпеливых, уже через две недели ополаскивания свежевымытой шевелюры, волосы становятся крепче, приобретают здоровый блеск и гораздо легче укладываются в самую сложную прическу.
«Живая» вода приносит дополнительную пользу вашим волосам летом. Как известно, в жару волосы быстро пересыхают на солнце. Оживить их можно, ОБИЛЬНО СБРЫЗГИВАЯ каждый вечер минеральной водой. Для этой цели, кстати, подойдет и пульверизатор для полива цветов.
Рецепт 2. Вкусный
Чтобы порадовать себя шевелюрой «как в кино», подогрейте ПИВО до комнатной температуры, а затем тщательно смочите им волосы. Через 10-15 минут уже можно смывать. Говорят, запаха не остается. Странно, но каждый раз после того, как я выхожу после такой маски из ванной со свежевымытыми волосами, все мужское население в доме начинает водить носами и спрашивать, а чем это таким вкусненьким пахнет.
Рецепт 3. Очень полезный
Маска из СВЕЖЕГО КЕФИРА до сих пор часто выручает меня после окрашивания волос, когда они становятся особенно уязвимыми и хрупкими. Секрет прост: втираете ПОДОГРЕТЫЙ КЕФИР в корни волос, затем распределяете по всей длине и минут 15 стараетесь не шевелиться, чтобы кефир не стек вам за шиворот. Для самых аккуратных могу порекомендовать обернуть волосы пленкой или полотенцем.
Эффект от такой маски, кстати, просто сногсшибательный. Ваши волосы после кефира будут выглядеть просто отлично. Конечно, если вы тщательно его смоете.
Рецепт 4. Никак не рискну попробовать
Уже много раз наблюдала ВОЗДЕЙСТВИЕ СОЛИ на корни волос, но до сих пор не смогла придумать для себя хоть сколько-нибудь логичное объяснение этого явления. Итак, отдаю рецепт на ваш суд.
Моете голову, разбираете волосы на прядки и аккуратно, нежными массирующими движениями начинаете втирать крупную поваренную соль в кожу головы.
На моих глазах через несколько таких сеансов волосы на макушке начали расти даже у лысеющего мужчины «далеко за». Ощущения во время такого массажа, как говорят, приятные. Да, кстати, не забудьте после этой процедуры повторно вымыть голову – высохшая соль может осыпаться с вас, притворяясь особо крупной перхотью.
Рецепт 5. Собственно бабушкин
Взбиваете 1 яйцо, добавляете столовую ложку репейного масла (продается в любой аптеке) и еще одну столовую ложку шампуня. Перемешиваете, вливая в получившуюся болтанку чайную ложку сока свежего лимона. Все это наносится на сухие волосы на срок от получаса до сорока минут, а затем тщательно смывается.
После этой маски эффект будет самый неожиданный – как минимум весь следующий день вы будете тянуться к своим волосам. Просто потрогать. После этой маски волосы становятся настолько мягкими и шелковистыми, что прикасаться к ним одно удовольствие.
Завершая этот короткий экскурс в мир давно известных, но от этого не менее полезных рецептов могу пожелать вам только одно: будьте красивы!
Saturday, March 3, 2012
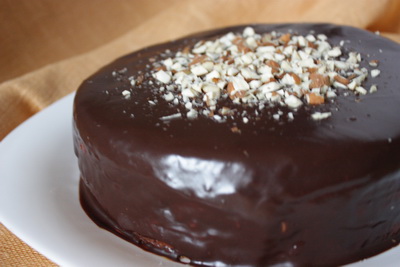
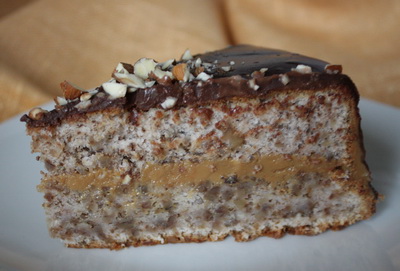
Венесуэльский ореховый торт
Этот торт готовится проще, чем многие другие кондитерские изделия. По сути, самые большие трудозатраты идут на приготовление бисквита - крем готовить вообще не надо, а шоколадный ганаш делается вообще на раз. Торт получается очень насыщенным по вкусу, но даже несмотря на это некоторые не особые любители сладкого умудрились съесть сразу по два куска подряд.
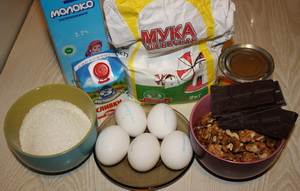
Ингредиенты:
Для бисквита:
5 яиц
125 г измельченных грецких орехов
140 г муки
200 г сахара
120 мл молока
1 ст.л. оливкового масла
Для ганаша:
100 г горького шоколада
140 мл сливок жирностью 20-22%
+ банка вареной сгущенки (400 г)
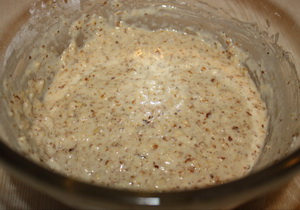
Белки отделяем от желтков. Желтки взбиваем с маслом и молоком, добавляем муку и орехи, перемешиваем до однородности.
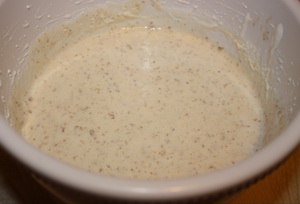
Белки взбиваем с сахаром в крепкую пену.
Теперь нам нужно соединить 2 смеси. Кладем в миску с белками половину теста и аккуратно размешиваем движениями снизу вверх. Затем добавляем остатки и снова размешиваем.
Форму (у меня 21 см) смазываем маслом и выкладываем в нее тесто. Выпекаем в разогретой до 160 градусов духовке в течение 1 часа. даем остыть 10 минут в открытой духовке, перекладываем на решетку и полностью остужаем.
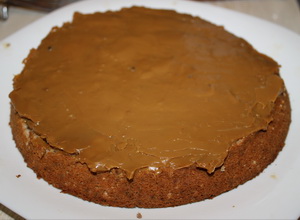
Разрезаем корж вдоль на 2 части. Одну кладем на блюдо и смазываем слоем вареной сгущенки.
Накрываем второй половиной.
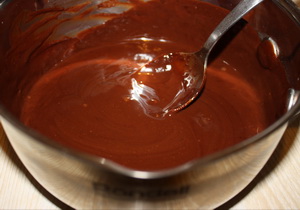
Готовим ганаш. Сливки доводим до кипения и снимаем с огня. Шоколад ломаем на маленькие кусочки, кладем в сливки и размешиваем, пока шоколад не растает.
Поливаем торт ганашем. Сверху можно посыпать нарубленными орехами.
Даем торту постоять часа 4 в холодильнике.
Приятного чаепития!
http://blog.kp.ru/showjournal.php?journalid=3208812&tag_name=%F2%EE%F0%F2&page=2
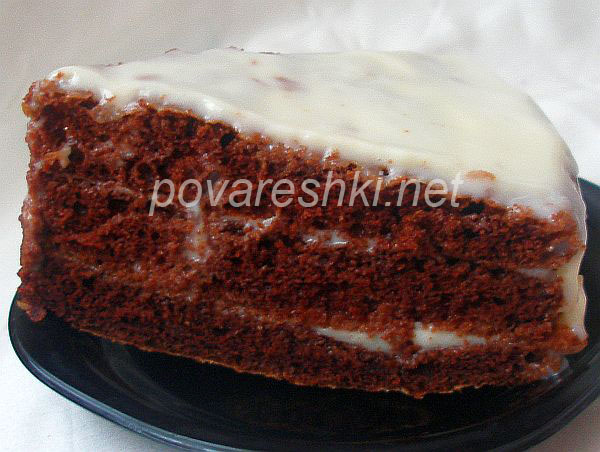
Торт СПАРТА
Вкусный и красивый тортик! Для всех праздничных событий!
Тесто:
50г масла,
3 ст. муки,
2 ст.л. какао,
2 ст.л. меда,
1 ст. сахара,
1 ч.л. соды,
1 яйцо,
6 ст.л. молока
Крем:
300г масла,
1,5 ст. сах. пудры,
1 небольшой лимон,
0,75 л молока,
3 яйца,
3ст.л. муки
Смешать 3 ст. муки, 2 ст.л. какао и 1 ч.л. соды.
Отдельно смешать 6 ст.л. молока, 2 ст.л. меда, 1 ст. сахара, 1 яйцо и добавить 50г масла. Поставить на водяную баню и варить, пока не растворится сахар, постоянно помешивая. Снять с огня и немного охладить (тесто должно оставаться теплым).
Как только тесто немного остынет, смешать с мукой, какао и содой. Замесить тесто (тесто получается нетугое).
Тесто разделить на 12 частей. Тонко раскатывать коржи и сразу вырезать под круглую тарелку. Переносить на противень аккуратно (при помощи скалки), т.к. коржи тонкие.
Выпечь все коржи.
Крем: смешать 0,75 литра молока, 3 яйца и 3 ст.л. муки. Поставить на водяную баню и, непрерывно помешивая, варить, пока масса не начнет густеть. Снять с огня и охладить.
300г масла растереть с сах. пудрой. Добавить тертый лимон и охлажденную массу. Все хорошо перемешать.
Перемазать коржи и украсить по желанию.
P.S.
1.Коржей у меня получилось 10 шт. диаметром 25 см.
2. В следующий раз лимона положу меньше и возможно только сок.
3. Коржи после выпечки немного подсыхают, но после того как промажем кремом они станут мягче.
4. Торт получается очень нежным.
http://blog.kp.ru/users/3208812/post136192430/
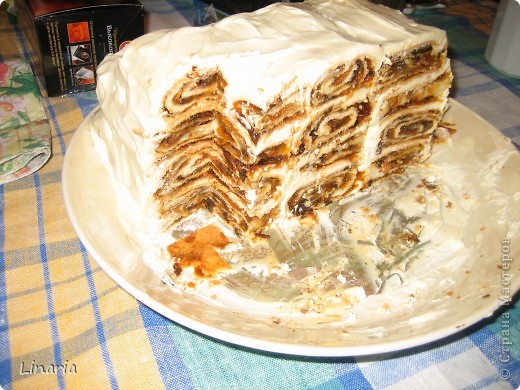
С тарелкой есть нельзя! Новогодний торт.
Вид на фотографии может и не совсем презентабельный, но вкус...!
Итак, нам понадобится:
Для теста:
1 стакан сметаны;
1 яйцо;
1/2 стакана сахара;
1/2 ч.л. соды (гасить не надо);
4-5 стаканов муки.
Для начинки взять по 300 г. кураги и чернослива.
Крем: сметана+сахар. На крем уходит примерно 1 литр сметаны. Сахар по вкусу
Приготовление:
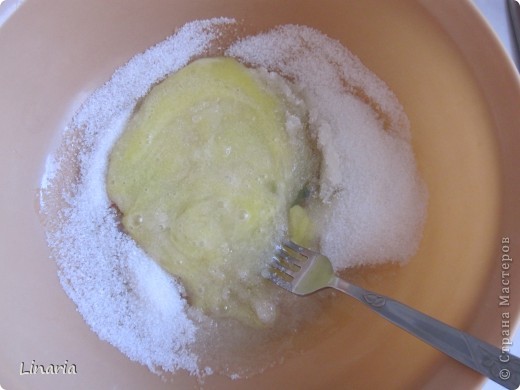
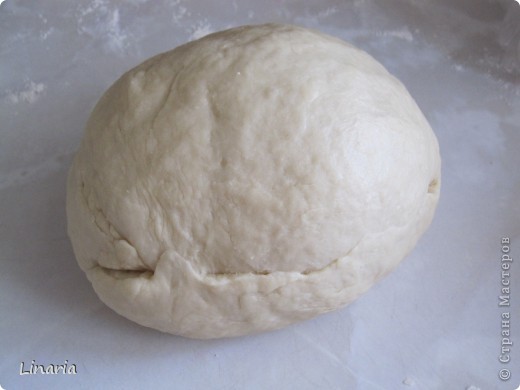
Замешиваем тесто. Оно должно получиться чуть слабее пельменного, иначе раскатывать будет очень тяжело. Сначала взбиваем яйцо с сахаром.
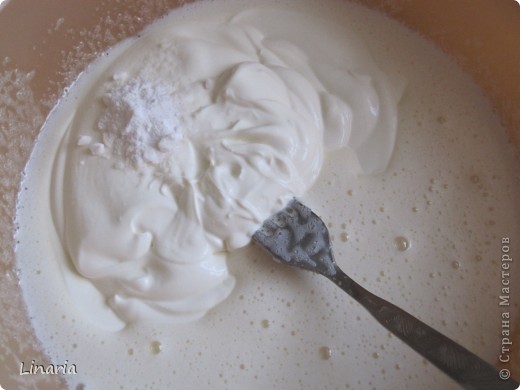
Добавляем сметану, соду, хорошо размешиваем и всыпаем муку.
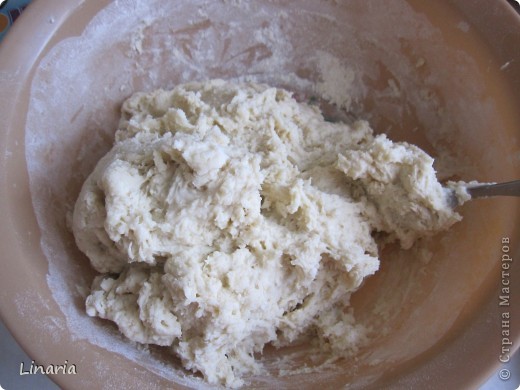
Всю муку сначала лучше не высыпать, последний стакан подмешивать постепенно, чтобы регулировать плотность теста.
Вымесить хорошенько руками и оставить минут на 30.
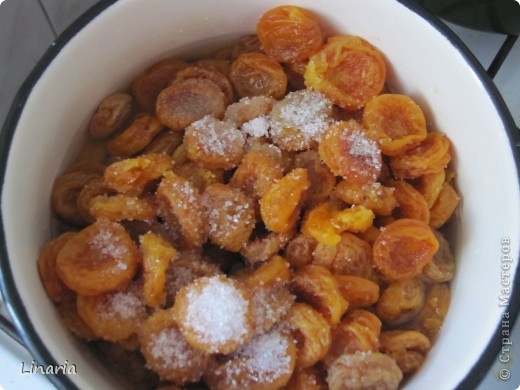
Теперь можно заняться начинкой. Курагу и чернослив немного отварить (минут 5-10) с добавлением сахара (если фрукты кислые).
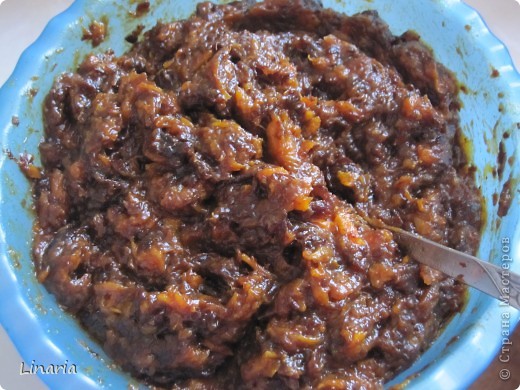
Затем пропустить через мясорубку или измельчить в блендере. Смешать. Если густо, то добавить немного отвара. Начинка должна легко размазываться. Попробовать - если кажется кислой, то посахарить. Тут все индивидуально, кто-то любит послаще, а кто-то покислее.
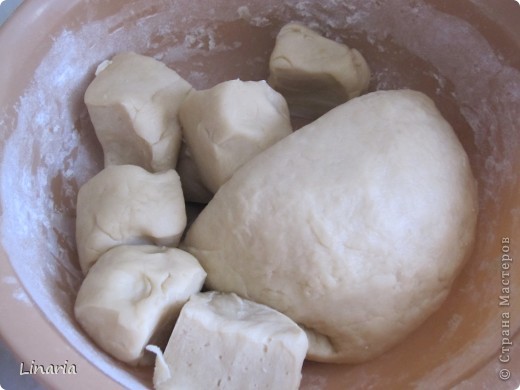
Затем тесто разделить на 8 частей. Я делала сразу на две порции, поэтому пусть количество вас не смущает.
<
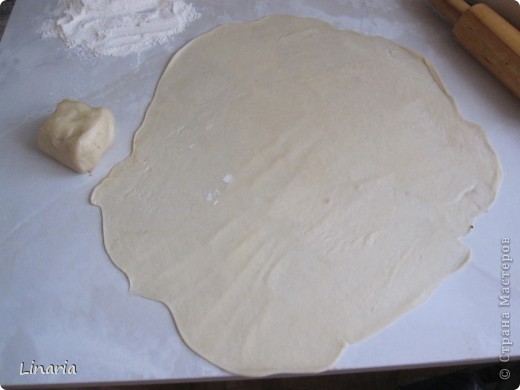
Каждый кусочек нужно раскатать как можно тоньше (примерно 1,5 -2 мм). Вот тут видно, до какого размера раскатывать. Не нужно стремиться к идеальному размеру, главное - толщина.
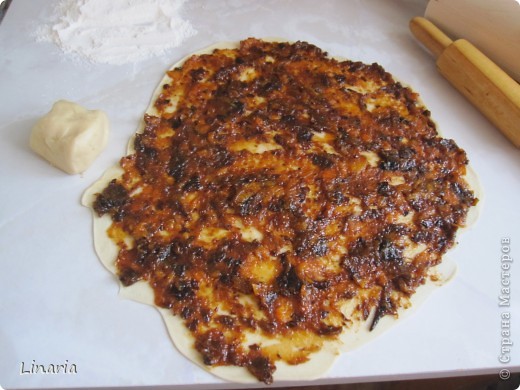
Намазываем фруктовый фарш.
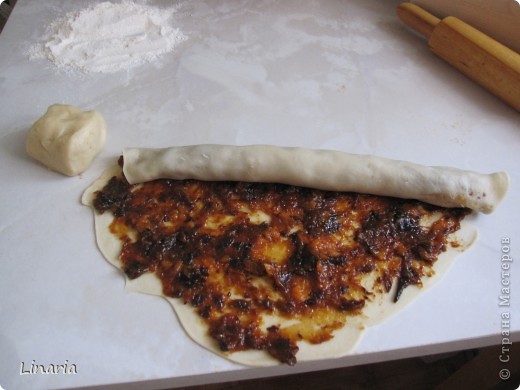
Затем сворачиваем в рулетик.
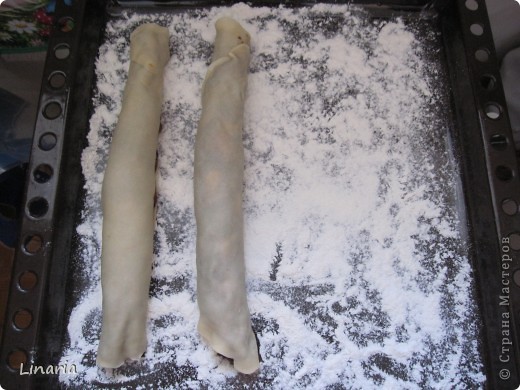
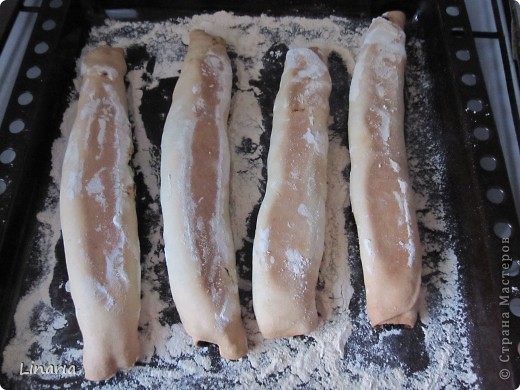
Укладываем на противень, посыпанный мукой. Маслом не смазываю.
В процессе выпекания можно перевернуть на другую сторону. Выпекать при температуре 220 оС до зарумянивания. Я периодически проверяю готовность. После того, как выните из духовки, муку нужно стряхнуть.
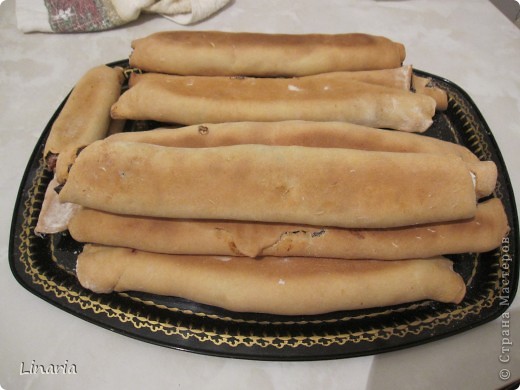
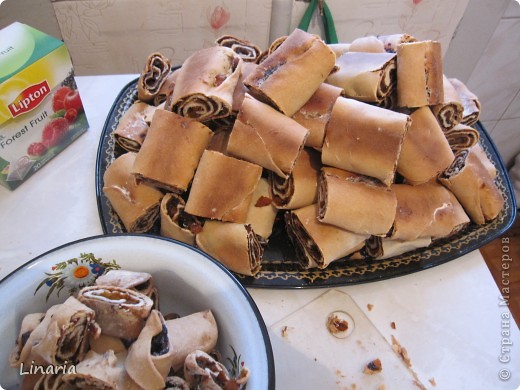
Вот такая гора рулетиков у меня получилась.
Затем нужно нарезать их на небольшие прямоугольные или квадратные кусочки. Обрезки съедаются сразу же :)
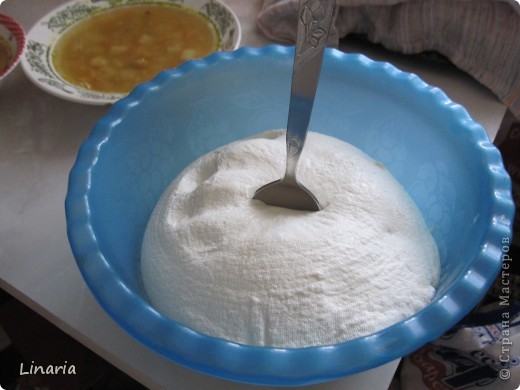
Теперь крем. Сметану я откидываю на марлю и ставлю на ночь в холодильник, чтобы стекла сыворотка. Утром достаю - ложка стоит, можно делать крем. Сахар опять же сыплю по вкусу.
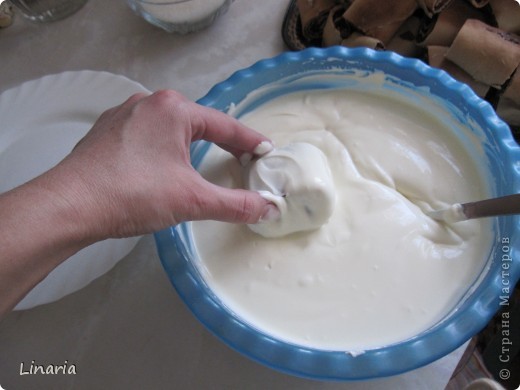
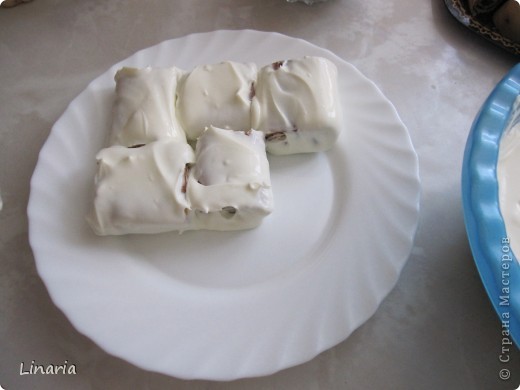
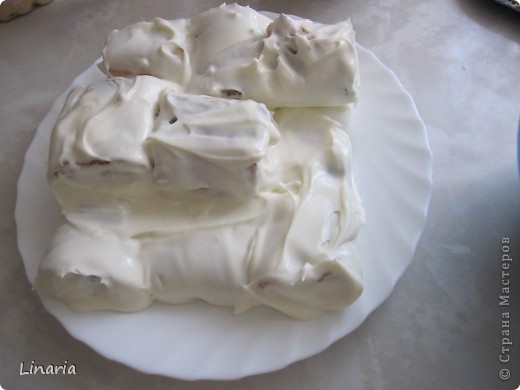
Затем просто окунаю кусочки в крем и выкладываю рядами в шахматном порядке.
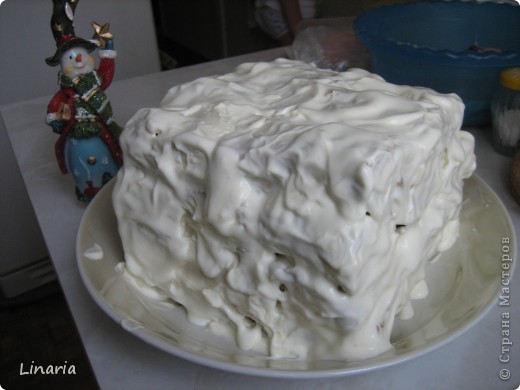
И вот ОН! Ничем не украшаю, люблю просто белоснежный, хотя какой-нибудь новогодний мотив, вроде красных ягод и зеленой веточки, смотрелся бы очень нарядно.
ВАЖНЫЙ МОМЕНТ: торт нужно поставить для пропитки минимум часов на 12, а лучше на сутки!
Приятного аппетита!
Источник
Friday, March 2, 2012
Self-Frosting Pumpkin Nutella Cupcakes
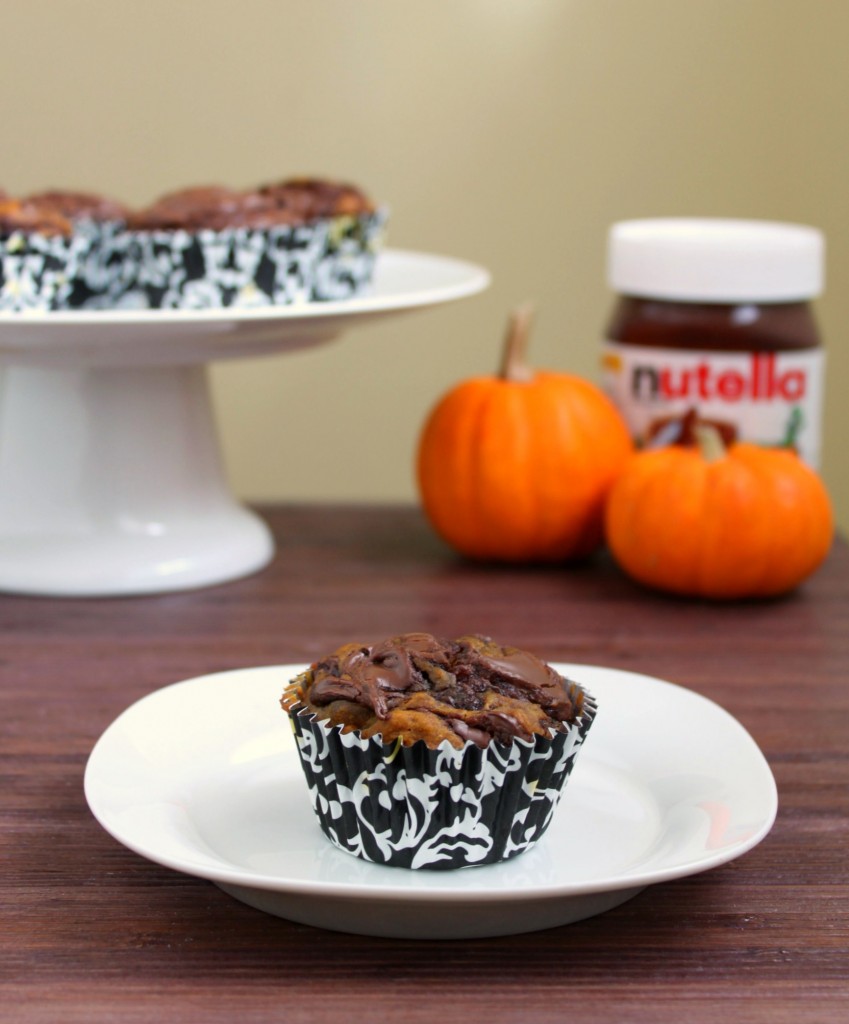
Today is the day my wonderful friend Hannah was born. It’s the first time in many years that we haven’t been together on her birthday, so last week I sent her some goodies in the mail. I needed something that would ship easily and I considered brownies or cookies until I discovered something better: self-frosting cupcakes!
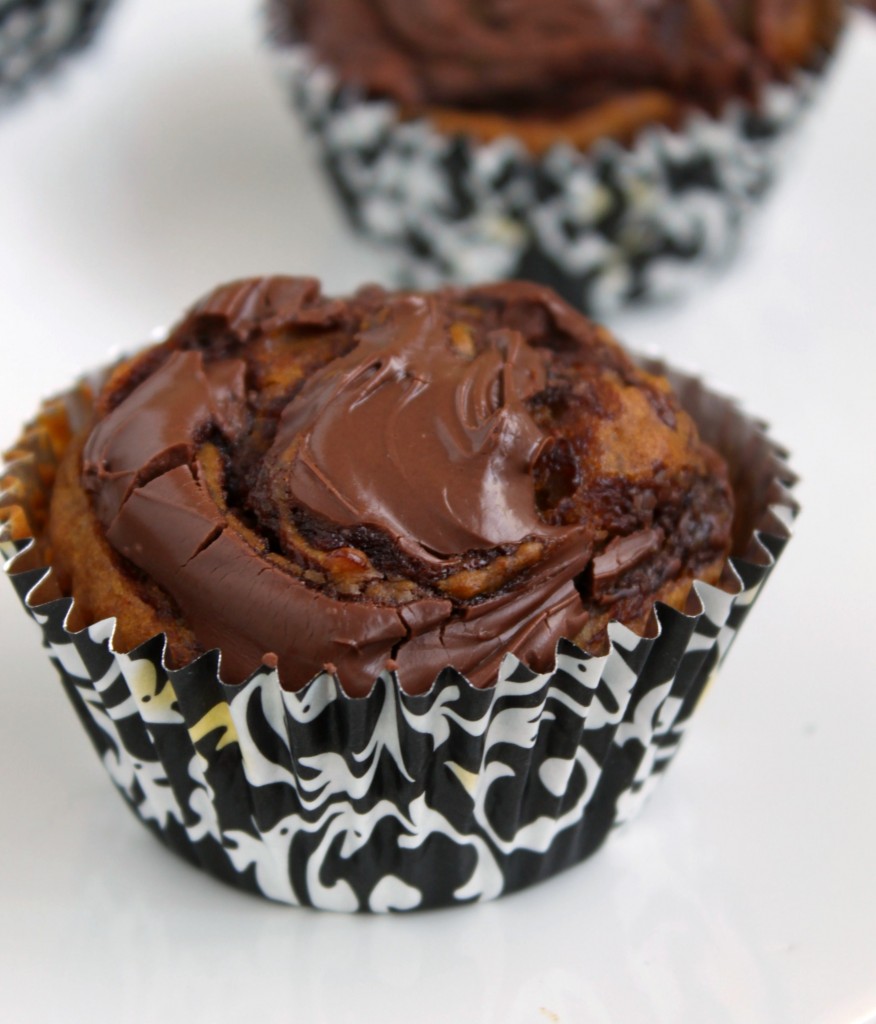
These pumpkin cupcakes have a spoonful of Nutella mixed onto the top of them before they’re baked. They come out with a creamy Nutella swirl on top, making frosting unnecessary! I put them into a large container without worry of frosting smearing everywhere. Plus, no frosting = less calories (but not less flavor), and the cake part is moist and full of spiced pumpkin goodness. These are perfect for a fall treat!
Happy birthday Hannah!!
Adapted from Phenomenon
Makes 12-15 cupcakes
Place the pumpkin, oil, eggs, vanilla and brown sugar in a large bowl. Beat to combine.
In a separate large bowl, whisk the flour, cinnamon, ginger, nutmeg, baking powder, baking soda and salt together. Add to wet ingredients and stir until just combined.
Fill muffin cups around 3/4 full. Place a couple of teaspoons of Nutella on top of each cupcake. Use a toothpick to swirl the Nutella around the top of the batter.
Bake 25-30 minutes or until a toothpick inserted in the middle comes out clean. http://www.52kitchenadventures.com/2011/10/30/pumpkin-nutella-cupcakes/
These pumpkin cupcakes have a spoonful of Nutella mixed onto the top of them before they’re baked. They come out with a creamy Nutella swirl on top, making frosting unnecessary! I put them into a large container without worry of frosting smearing everywhere. Plus, no frosting = less calories (but not less flavor), and the cake part is moist and full of spiced pumpkin goodness. These are perfect for a fall treat!
Happy birthday Hannah!!
Recipe:
Self-Frosting Pumpkin Nutella CupcakesAdapted from Phenomenon
Makes 12-15 cupcakes
- 1 15-oz. can pumpkin puree
- 1/2 cup vegetable oil
- 2 large eggs
- 1 tablespoon pure vanilla
- 1/4 cup light brown sugar, packed
- 1/4 cup sugar
- 2 cups all-purpose flour
- 1 1/2 teaspoons ground cinnamon
- 1/2 teaspoon ground ginger
- 1/2 teaspoon nutmeg
- 1 teaspoon baking powder
- 1/2 teaspoon baking soda
- 1/2 teaspoon salt
- Nutella for topping
Place the pumpkin, oil, eggs, vanilla and brown sugar in a large bowl. Beat to combine.
In a separate large bowl, whisk the flour, cinnamon, ginger, nutmeg, baking powder, baking soda and salt together. Add to wet ingredients and stir until just combined.
Fill muffin cups around 3/4 full. Place a couple of teaspoons of Nutella on top of each cupcake. Use a toothpick to swirl the Nutella around the top of the batter.
Bake 25-30 minutes or until a toothpick inserted in the middle comes out clean. http://www.52kitchenadventures.com/2011/10/30/pumpkin-nutella-cupcakes/
Chocolate Nutella Cupcakes
Hey, remember when I said I’d be posting healthy recipes in July? Ha! Since then I’ve shared recipes for mojito popsicles, chocolate cupcakes, blood orange sorbet, and now chocolate Nutella cupcakes (also, next up: carrot cake cupcakes). So, lesson learned: don’t listen to me and don’t expect anything healthy when you visit this blog!
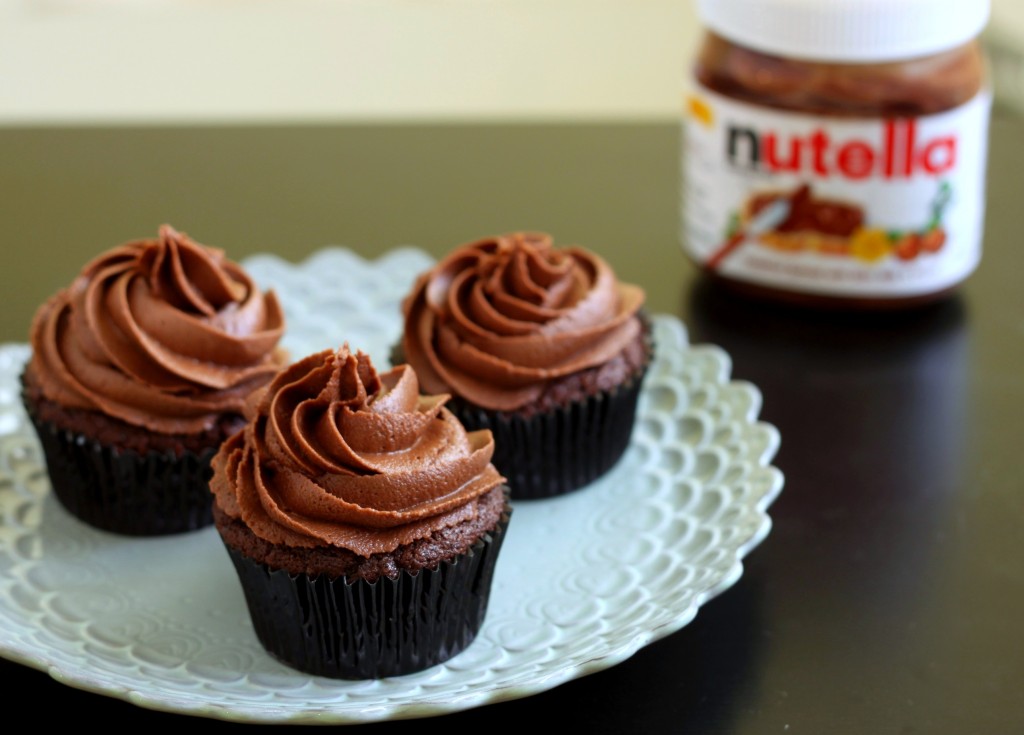
These cupcakes were made in honor of my 300th Facebook fan, Rachel. I actually know Rachel – she was my student intern last year. I knew she was a big fan of my desserts so to celebrate hitting a big number on Facebook, I decided to bake her something special. She asked for cupcakes and told me that she likes chocolate and Nutella.
In a mixing bowl, beat butter until softened and smooth. Add sugar and beat for a few minutes, until light and fluffy. Add eggs one at a time, beating after each until well combined.
In a small bowl, combine flour, baking powder, baking soda, salt and cocoa powder. In a separate small bowl, combine milk and vanilla.
Add about 1/3 of dry ingredients to butter and sugar and mix until combined. Add about 1/2 of wet ingredients to mixture and mix until combined. Continue alternating dry and wet, mixing in between (finish with the remaining dry ingredients).
Fill cupcake tins about 1/2 full (don’t overfill – you only need 1/2) and bake for around 20-25 minutes, until a toothpick inserted in center comes out clean. They will come out flat.
Nutella Buttercream
These cupcakes were made in honor of my 300th Facebook fan, Rachel. I actually know Rachel – she was my student intern last year. I knew she was a big fan of my desserts so to celebrate hitting a big number on Facebook, I decided to bake her something special. She asked for cupcakes and told me that she likes chocolate and Nutella.
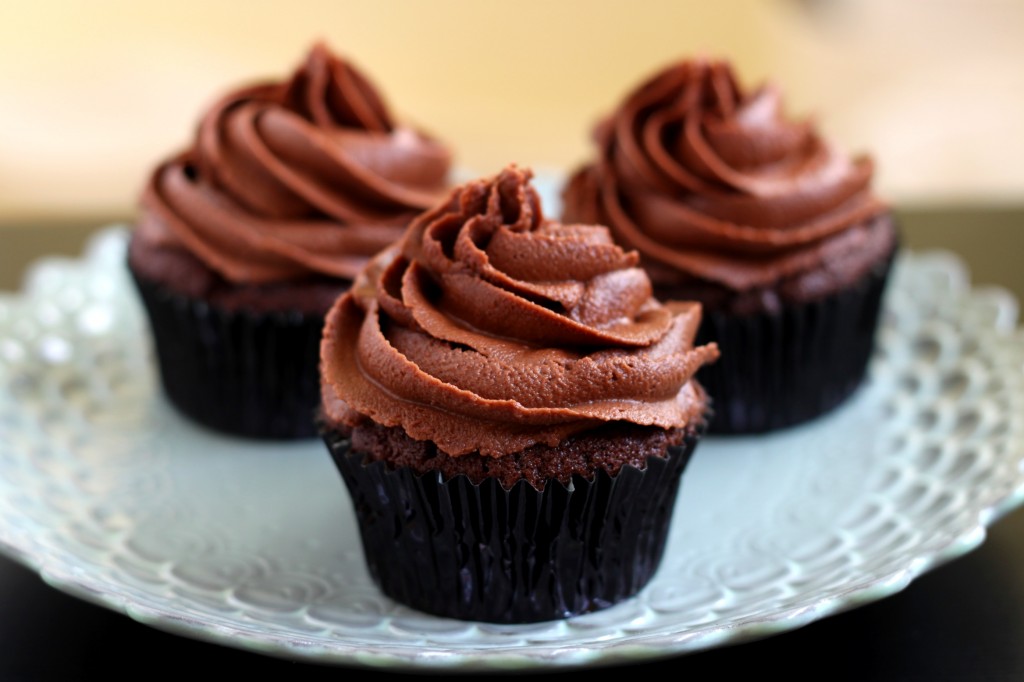
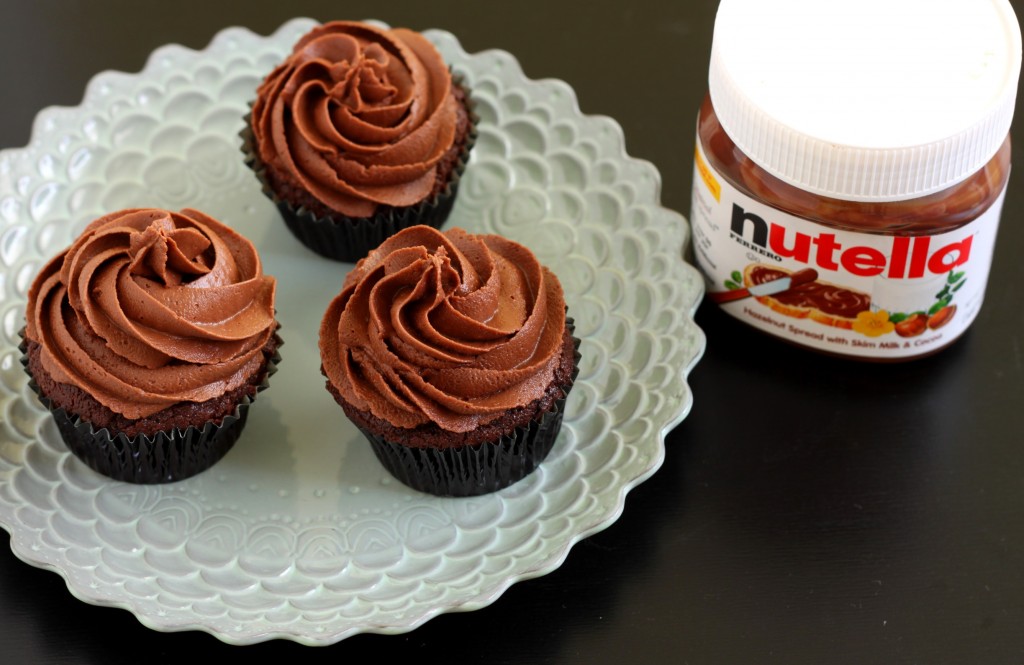
I took the “better than sex” chocolate cupcakes (think moist, very chocolatey cake) and topped them with my own Nutella buttercream. Other recipes use a little Nutella with more butter and powdered sugar, but that just didn’t do it for me. I ended up using that entire jar that’s in the photos. It was perfect: creamy, thick frosting with the distinctive flavor of the hazelnut chocolate spread. I ate one (you know – just to make sure they were okay) and was in chocolate/Nutella heaven. Good thing I had these earmarked for someone else – I could’ve eaten them all!
Thank you to all my fans, subscribers, supporters, and readers. You all make blogging fun and worthwhile. Every comment, “like,” new subscribe, Twitter mention, etc. makes me smile. I love hearing your feedback, what you think of a recipe or photo and how it goes when you try one of my recipes. You guys are amazing!
Recipe:
“Better than Sex” Chocolate Nutella Cupcakes
Adapted from Cupcake Project and Chockylit
Makes 15-16 cupcakes
- 1/2 C butter, room temperature
- 1 1/4 C sugar
- 2 large eggs, room temperature
- 3/4 C flour
- 1/2 t baking powder
- 1/4 t baking soda
- 1/4 t salt
- 1/2 C unsweetened cocoa powder
- 1/2 C milk
- 1 t vanilla
In a mixing bowl, beat butter until softened and smooth. Add sugar and beat for a few minutes, until light and fluffy. Add eggs one at a time, beating after each until well combined.
In a small bowl, combine flour, baking powder, baking soda, salt and cocoa powder. In a separate small bowl, combine milk and vanilla.
Add about 1/3 of dry ingredients to butter and sugar and mix until combined. Add about 1/2 of wet ingredients to mixture and mix until combined. Continue alternating dry and wet, mixing in between (finish with the remaining dry ingredients).
Fill cupcake tins about 1/2 full (don’t overfill – you only need 1/2) and bake for around 20-25 minutes, until a toothpick inserted in center comes out clean. They will come out flat.
Nutella Buttercream
- 1/2 C butter, room temperature
- 1 C Nutella
- 1 C powdered sugar, sifted
- 1-2 T milk
Heart Cake Pops
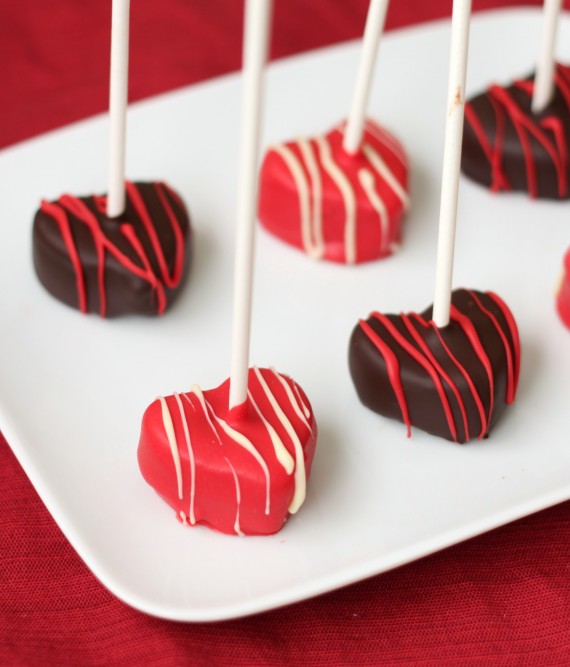
It’s almost Valentine’s Day and I spent last weekend baking up a storm. These cake pops, plus heart shaped sugar cookies and some special flourless cupcakes with pink frosting are all coming your way.
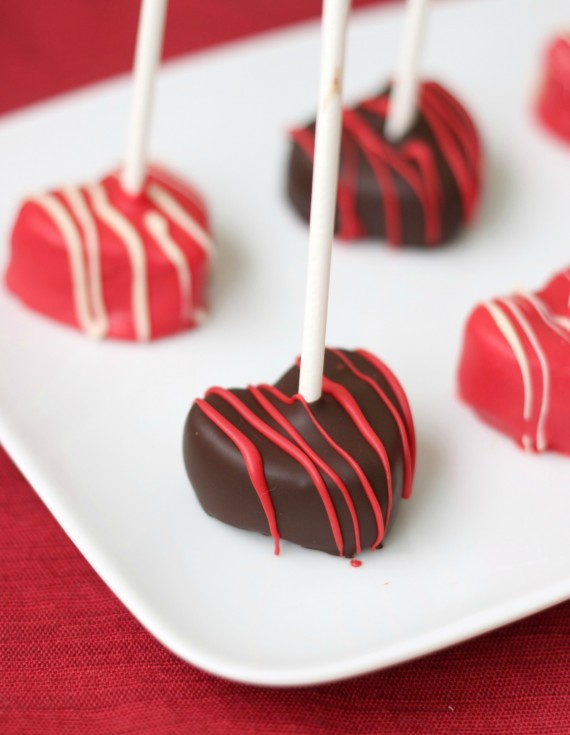
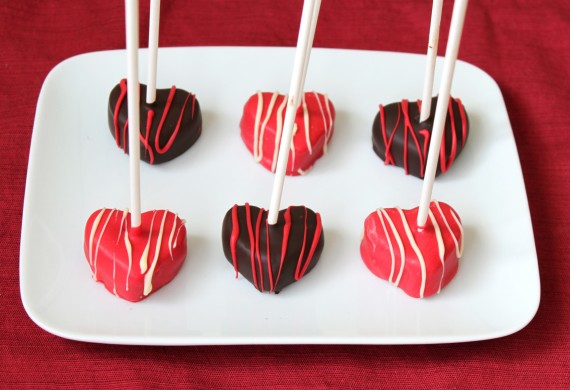
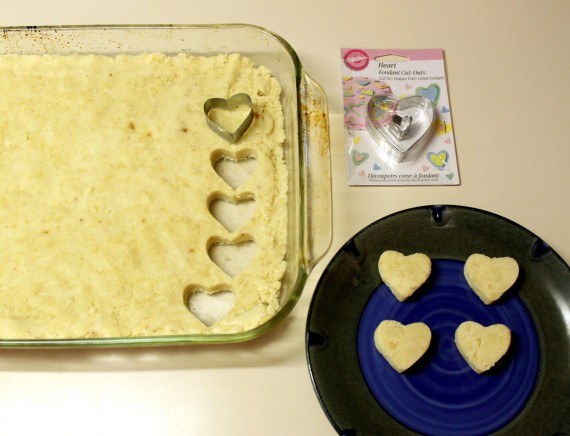
Each time I make cake pops, I find more ways to make them more easily and quickly (I’ll have to compile all my tips into a post soon). These heart shape cake pops are even easier to make than they seem. After I combined the cake and frosting together, I pushed it flat into the bottom of a casserole dish. Then I just used cookie cutter to cut the cake pops into hearts (see photo in the recipe below).
So easy and much faster than shaping each heart by hand!
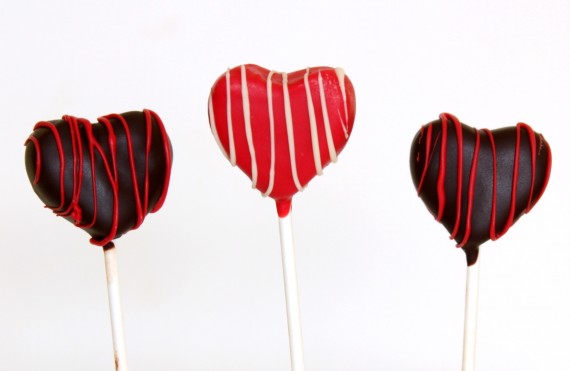
Then you can either push the lollipop sticks in to make them standing up (above) or flat on a dish (below). I like making them like the ones below because you don’t need anything to hold them up.
Are you making anything special for Valentine’s Day?Recipe:
Heart Cake Pops
Makes around 40 cake popsVanilla Cake
Adapted from King Arthur’s Flour
Makes 1 9″x13″ cake
- 2 cups sugar
- 3 1/4 cups flour
- 2 1/2 teaspoons baking powder
- 1 teaspoon salt
- 3/4 cup unsalted butter, soft
- 1 1/4 cups milk, at room temperature
- 2 teaspoons vanilla extract
- 4 eggs
- Preheat the oven to 350°F and lightly grease a 9″ x 13″ pan.
- In a large mixing bowl, combine sugar, flour, baking powder, and salt.
- Add butter to the dry ingredients and mix at low speed until the mixture looks sandy.
- In a small bowl or measuring cup, combine milk and vanilla. Add to sand-like mixture and mix for a couple of minutes at low speed.
- Turn mixer to low speed and add 1 egg while it’s running. Increase speed to medium and beat for 30 seconds. Repeat method 3 more times with each egg.
- If needed, scrape the sides of the bowl and mix for at medium-high speed for 30 more seconds.
- Pour batter into prepared pan and bake for around 27 minutes. Cake will be golden brown and just beginning to pull away from edges of pan when done. You can also test it by inserting a toothpick, which should come out clean.
Vanilla Frosting
- 3/4 cup unsalted butter, at room temperature
- 1 teaspoon vanilla extract
- 3 cups powdered sugar
- 1-2 tablespoons of milk
- In a large bowl, cream butter and vanilla until combined.
- Adding 1 cup of sugar at a time, mix into butter until thoroughly combined.
- Mix in milk until you reach the desired consistency.
Assembling the cake pops:
- Chocolate or red or pink candy melts for coating
- 6″ lollipop sticks
- Heart shaped cookie cutter
- Optional: white chocolate or red candy melts to drizzle on top
- Once cake is completely cooled, cut into 6 pieces. Using your hands, crumble each piece into a large bowl (or you could use a food processor instead).
- Add frosting to bowl and mix with the back of a spoon or your clean, dry hands until thoroughly combined. Press into a large dish so it’s about 1″ thick. Use a small heart shaped cookie cutter to cut cake pops out and place on a baking sheet covered in wax paper.
- Chill for several hours in the refrigerator or for 15 minutes in the freezer. (If you chill them in the fridge, put them in the freezer for 10 minutes right before you coat them.)
- In a double boiler or in a microwave, melt the chocolate or candy melts, stirring until all lumps are gone. Once melted, remove from heat and pour into a cup. Let cool for a few minutes.
- Remove cake pops from freezer. Dip the tip of a lollipop stick in melted coating and push straight into the cake pop.
- Holding the lollipop stick, dip the cake pop in to the coating until it’s completely covered, then quickly remove. Hold over cup while excess drips off (if needed, tap your wrist with the opposite hand to help the process).
- Place on wax paper or into a syrofoam block to dry.
- Optional: melt white chocolate or red candy melts. Using a piping bag or a plastic bag with the corner cut off, drizzle over cake pops.
- Store covered in fridge until ready to serve. http://www.52kitchenadventures.com/2012/02/01/heart-cake-pops/
Double Chocolate Gingerbread Cupcakes
So, it turns out I’ve been on a bit of a gingerbread kick lately…
Ingredients
5 large egg whites (~150 grams/5 ounces)
1 1/4 cup (250 grams/8.5 ounces) dark brown sugar (you can also use light brown sugar)
1 1/2 cups (3 sticks, 340 grams/12 ounces/3/4 lb) unsalted butter, softened and cut into cubes
1/2 teaspoon ( mL) pure vanilla extract (I use Nielsen-Massey Vanillas 8-oz. Madagascar Bourbon Vanilla Extract)
1/2 teaspoon ground ginger
1/4 teaspoon ground cinnamon
a pinch of ground nutmeg
a pinch of salt
Method
1. Wipe the bowl and whisk attachment of an electric mixer with paper towel and lemon juice, to remove any trace of grease. Add egg whites and brown sugar and simmer over a pot of water (not boiling), whisking constantly but gently, until temperature reaches 140-160°F, or if you don’t have a candy thermometer, until the sugar has completely dissolved and the egg whites are hot, about 5 minutes if you used room temperature egg whites. About 8+ minutes if they were cold.
2. With whisk attachment of mixer, begin to whip until the meringue is thick, glossy, and the bottom of the bowl feels neutral to the touch (this can take up to 10 minutes or so and is so important–never add butter to warm meringue). Switch over to paddle attachment and, with mixer on low speed, add softened butter in chunks until incorporated, and mix until it has reached a silky smooth texture (if curdles, keep mixing on medium-low and it will come back to smooth).
3. Add vanilla, salt and spices, continuing to beat on low speed until well combined.
Sweetapolita’s Notes on Swiss Meringue Buttercream:
* Can make buttercream ahead and keep in an airtight container in refrigerator for up to one week, leaving out at room temperature when needed, re-whipping in mixer for 5 minutes.
** Can freeze for up to 6-8 weeks. To thaw, place on counter overnight, and rewhip for 5 minutes with paddle attachment in an electric mixer.
***If not satiny enough upon rewhip, take 1/3 of buttercream and microwave in a microwave-safe container for ~8 seconds, then add back to mixing bowl and remix with remaining buttercream.
****For more detail about making Swiss Meringue Buttercream, you can find my FAQ here and photo tutorial here.
Chocolate-Dipped Gingerbread Cookies
1. Bake your favourite gingerbread cookie dough, and cut desired shapes–I prefer bite-size cookies in general, especially when using them for cupcake toppers. For these cookies, I tried Martha’s Molasses-Gingerbread Cookies recipe, and I followed it to the letter. I love them because they are dark and have a very deep molasses taste. The dough is gorgeous–just note that you will likely need to add quite a bit of flour while rolling and you will need to flour your cutter often, otherwise it is quite sticky. Once baked, let cookies cool on wire rack. *I found my little house and gingerbread doll cutters in my little girl’s playdough tool box, so don’t feel you have to stick with traditional cookie cutters.
2. Melt some (depending on how many cookies you are covering) quality chocolate in the microwave, and if you follow this easy tempering process (when, using the microwave, your chocolate will be tempered in seconds, which is how we get the chocolate to harden with a nice sheen. For these cookies, I used Callebaut Dark Chocolate Callets, which is rich, dark and perfect for covering cookies and is intended for melting down.
3. Dip cookies into chocolate using two forks (or if you have a chocolate-dipping fork), covering entire cookie, or even just half, depending on the look you want to achieve, letting the excess chocolate drip back into bowl.
4. Place on Silpat or wax paper-lined cookie sheet.
5. Place filled sheet in the refrigerator for about 20 minutes to set.
Place upon cupcakes or simply eat them as they are. Or both! Store at room temperature. http://sweetapolita.com/2011/12/double-chocolate-gingerbread-cupcakes/
I love sugar and spice and everything nice, and gingerbread (in any form) is such an old-fashioned treat that I can’t seem to get enough of (even though I seem to eat the entire year’s worth between December 1-December 31st). I make some form of gingerbread every year over the holidays, but yet it never dawned on me that pairing it with chocolate would be so delightful and that it would just all make so much sense…until, of course, I made Gingerbread Swiss Meringue Buttercream. Being an SMB (or SMBC) lover, I couldn’t resist tossing some gingerbread spices into a big fluffy batch of Brown Sugar Buttercream, making it the gingerbread variation, for swirling onto holiday cupcakes. I suddenly seem to be using Brown Sugar Buttercream often lately, because it’s such a wonderful base for so many variations (such as here and for the deliciousness that was Peanut Butter Buttercream. The thing was, I knew I wanted to make little gingerbread cookie toppers, and if I had made gingerbread cupcakes to go along with the gingerbread buttercream, that would have made them triple gingerbread cupcakes which seemed a bit, well, spicy (although, that may not be a bad thing–I will try this and get back to you). For this round, adding some rich dark chocolate to the idea just felt right.
Then I remembered how much I’d wanted to try the chocolate cupcake recipe from a book I recently received: Making Cupcakes with Lola, which was written by the talented baker duo from Lola’s in the UK. This is one of the loveliest cupcake books I’ve read, and I’ve studied it for weeks–the cupcakes are a mix of classic and creative and the gorgeous photography & styling just brings it all to life. I am eager to try many of their more unusual, or as they call it, “over the top” cupcakes (think Masala Chai Tea cupcakes, Gingerbread Latte cupcakes and more), but I couldn’t resist starting with their classic chocolate cupcake recipe. It stood out to me because they use both melted chocolate and cocoa powder and calls for no other liquid ingredient aside from 4 eggs. I was kind of intrigued! It’s a lighter, fluffier chocolate cake as opposed to the more fudgy oil-based chocolate cake I often use, which was a fun change, and I loved the double chocolate result.So once I had my heart set on dark chocolate & gingerbread cupcakes, it dawned on me that my little gingerbread cookie toppers simply must be dipped in the finest dark chocolate–just makes good sense, right? I actually love making tiny gingerbread folk versus the standard size, because they are so cute and they are a perfect kid-sized treat. I was pretty excited when I remembered Reese having a teeny tiny house cutter in her playdough tool bin that was the perfect size for little chocolate gingerbread house toppers. So then we had a wee gingerbread girl and her wee gingerbread house. As far as we were concerned, it was kind of awesome. Why do things like this excite me so much? I’ll never know.
I hope you’re having a wonderful Saturday filled with holiday baking and hopefully, for your sake, no shopping! Personally, I like to keep the circus element of my day in our own four walls at this time of year, just as I am today. This thought would comfort me, if it weren’t for the fact that I have barely started my holiday shopping. Minor detail!
I’ll be back very soon with another holiday delight!
P.S. I’m pretty sure we’d jingle Santa’s bells if we left him a plate of these and a tall glass of milk. Maybe we could even add a pretty wrapped box of the chocolate dipped gingerbread cookies for his elves?
Double Chocolate Gingerbread Cupcakes {click to print}
Double Chocolate Gingerbread Cupcakes = Lola’s Chocolate Cupcakes + Gingerbread Swiss Buttercream + Chocolate-Dipped Gingerbread Cookie ToppersLola’s Bakery Chocolate Cupcakes
*written (with permission) as it reads in the book, Making Cupcakes with Lola
Ingredients
100 g/3 1/2 oz dark bittersweet chocolate, chopped (I used Callebaut Dark Chocolate Callets)
175 g/1 1/2 sticks butter, cubed
225 g/1 cup plus 2 tablespoons (caster) sugar
4 eggs
100 g/3/4 cup self-rising flour
2 1/2 tablespoons cocoa powder (I used Cacao Barry Extra Brute Cocoa Powder)
a pinch of salt
Method
Preheat the oven to 180°C/350°F/Gas 4.
1. Put the chocolate and butter in a heatproof bowl over a pan of simmering water. Do not let the base of the bowl touch the water. Heat, stirring, until the chocolate melts and you have a smooth, glossy mixture. Remove from the heat and stir in the sugar. Let cool for 10 minutes.
2. Now beat with an electric hand mixer for 3 minutes. Add the eggs, one at a time, beating for 10 seconds between each addition.
3. Sift the flour, cocoa and salt into the bowl and beat until blendid.
4. Divide the mixture between the muffin cases. Bake in the preheated oven and let cool completely on a wire rack before decorating.
Sweetapolita’s Notes
*Caster/castor sugar is also known as superfine sugar. You can create your own superfine sugar by substituting regular granulated sugar and processing it in a food processor until very fine.
**As with any cake or cupcake recipe I bake, I used room temperature eggs (not cold).
***I filled the cupcake liners a little more than I typically do, as I divided the batter evenly among the 12 liners, as directed. They were just over 2/3 full. I typically don’t prefer a ”muffin-top” cupcake, but because I knew I wanted a wider cupcake to hold very billowy swirls of buttercream, I went with it. I may never look back.
Gingerbread Swiss Meringue Buttercream
Yield: ~5 cups, enough for filling and frosting an 8-inch round cake, or frosting 12+ cupcakes.Ingredients
5 large egg whites (~150 grams/5 ounces)
1 1/4 cup (250 grams/8.5 ounces) dark brown sugar (you can also use light brown sugar)
1 1/2 cups (3 sticks, 340 grams/12 ounces/3/4 lb) unsalted butter, softened and cut into cubes
1/2 teaspoon ( mL) pure vanilla extract (I use Nielsen-Massey Vanillas 8-oz. Madagascar Bourbon Vanilla Extract)
1/2 teaspoon ground ginger
1/4 teaspoon ground cinnamon
a pinch of ground nutmeg
a pinch of salt
Method
1. Wipe the bowl and whisk attachment of an electric mixer with paper towel and lemon juice, to remove any trace of grease. Add egg whites and brown sugar and simmer over a pot of water (not boiling), whisking constantly but gently, until temperature reaches 140-160°F, or if you don’t have a candy thermometer, until the sugar has completely dissolved and the egg whites are hot, about 5 minutes if you used room temperature egg whites. About 8+ minutes if they were cold.
2. With whisk attachment of mixer, begin to whip until the meringue is thick, glossy, and the bottom of the bowl feels neutral to the touch (this can take up to 10 minutes or so and is so important–never add butter to warm meringue). Switch over to paddle attachment and, with mixer on low speed, add softened butter in chunks until incorporated, and mix until it has reached a silky smooth texture (if curdles, keep mixing on medium-low and it will come back to smooth).
3. Add vanilla, salt and spices, continuing to beat on low speed until well combined.
Sweetapolita’s Notes on Swiss Meringue Buttercream:
* Can make buttercream ahead and keep in an airtight container in refrigerator for up to one week, leaving out at room temperature when needed, re-whipping in mixer for 5 minutes.
** Can freeze for up to 6-8 weeks. To thaw, place on counter overnight, and rewhip for 5 minutes with paddle attachment in an electric mixer.
***If not satiny enough upon rewhip, take 1/3 of buttercream and microwave in a microwave-safe container for ~8 seconds, then add back to mixing bowl and remix with remaining buttercream.
****For more detail about making Swiss Meringue Buttercream, you can find my FAQ here and photo tutorial here.
Chocolate-Dipped Gingerbread Cookies
1. Bake your favourite gingerbread cookie dough, and cut desired shapes–I prefer bite-size cookies in general, especially when using them for cupcake toppers. For these cookies, I tried Martha’s Molasses-Gingerbread Cookies recipe, and I followed it to the letter. I love them because they are dark and have a very deep molasses taste. The dough is gorgeous–just note that you will likely need to add quite a bit of flour while rolling and you will need to flour your cutter often, otherwise it is quite sticky. Once baked, let cookies cool on wire rack. *I found my little house and gingerbread doll cutters in my little girl’s playdough tool box, so don’t feel you have to stick with traditional cookie cutters.
2. Melt some (depending on how many cookies you are covering) quality chocolate in the microwave, and if you follow this easy tempering process (when, using the microwave, your chocolate will be tempered in seconds, which is how we get the chocolate to harden with a nice sheen. For these cookies, I used Callebaut Dark Chocolate Callets, which is rich, dark and perfect for covering cookies and is intended for melting down.
3. Dip cookies into chocolate using two forks (or if you have a chocolate-dipping fork), covering entire cookie, or even just half, depending on the look you want to achieve, letting the excess chocolate drip back into bowl.
4. Place on Silpat or wax paper-lined cookie sheet.
5. Place filled sheet in the refrigerator for about 20 minutes to set.
Place upon cupcakes or simply eat them as they are. Or both! Store at room temperature. http://sweetapolita.com/2011/12/double-chocolate-gingerbread-cupcakes/