Labels

"Погребок"- заготовки на зиму(canning) (82) Afternoon Tea-recipes and tradtions (41) All about Sushi rolls and more (2) appetizers (61) Baby Shower (2) Barbecue (45) Beauty (29) Bread and pizza (67) Breakfast Sunday Brunch (18) Bridal Shower and Wedding (8) burgers sandviches and toasts (22) Cake decorating and gum paste flowers (144) Cake pops and balls (35) cakes (197) canning (31) cheesecakes (31) Chocolate (38) Christmas (102) Coffee and Latte Art (22) Coffee cakes pies sweet breads (74) cookies (226) Cupcake Muffin Пирожное (62) Decorated cookies tutorials (48) Decorating Easter Eggs (19) Dessert (46) Easter (52) Easter and Spring (29) eggplants (3) eggs (11) Father's Day (4) Fish and seafood (30) French cooking (14) fresh fruits (6) gingerbread (68) Healthy Eating (32) Homemade gifts (3) Hапитки (30) Italian food (39) jams and jellies (33) Jello salads and desserts (17) Kашки (4) Kонфеты и другие сладости (42) Kремы-Buttercream-Frosting (4) Kрымские блюда (14) Main course (36) Main Dish (53) meringues зефир marshmallow pastilage (40) Mexican-Spanish food (34) Mothers Day (7) Mяско (59) Nutella (5) Olive Garden recipes (3) oranges (3) Oriental food (8) Oформление салатов (41) Pasta (16) plums (2) Potluck (6) Poultry (31) pumpkin (19) Pецепты Джейми Оливера (5) Pецепты Сталика Ханкишиева (37) Quinoa (5) Risotto Jambalaya Плов Paella (27) salads (123) Sauces Dips and Spreads (38) Saving money in the kitchen (4) Side Dish- гарнир (15) Slow-Cooker (9) soups (105) Summer recipes (12) Table setting etiquette(Сервировка стола) (67) Tagine-cuisine of Morocco (13) Thanksgiving and Fall (46) Tатарская кухня (6) Tесто (17) Valentines Day (36) Video-рецепты (20) Блины блинчики и оладушки (44) блюда в горшочках (23) Блюда из курицы (60) Блюда из теста (56) булочки (103) Вкусности из детства (63) Вкусные местечки-Sweet places (7) Детский праздник (29) Заготовки-полуфабрикаты (44) заливное и холодец (13) Запеканки и омлеты (11) история блюд и кулинарные истории (24) Котлеты Тефтели Голубцы и Перчики (58) Мороженое-Ice Cream (15) овощные заготовки (18) пирожки чебуреки беляши и т.д. (42) Пляцок (2) рулеты мясные и овощные (36) Сосиски и домашние колбаски (26) Старинные русские рецепты (38) Творожная выпечка (13) Узбекская кухня и Среднеазиатская (66) Хворост Крепли вергуны Пончики (25)
Showing posts with label Chocolate. Show all posts

Monday, June 18, 2012

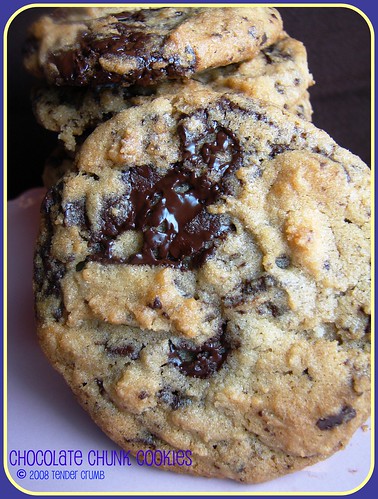
My FAVORITE Chocolate Chip Cookie

I have experimented with countless recipes searching for that perfect chocolate chip cookie. The characteristics of the perfect cookie are a very personal matter, and here are my preferences:

texture: chewy w. medium thickness --- everyone has their preference, and this is mine!

chocolate to cookie ratio: 50/50 --- I really enjoy having a lot of chocolate in every bite

chips vs. chunks: chunks --- I like sizeable pieces of chocolate in my cookie.

type of chocolate: bittersweet --- I like using Valrhona 61% extra bitter

nuts or other add-ins: NONE!!
With the above criteria in mind, this recipe is the closest I've come to experiencing CCC perfection. It's the "not so secret" secret recipe from Jacque Torres, and I'm sure many of you have read about this or already tried this at home. I've been making this recipe countless times, and have found that the following tips make this cookie absolutely perfect:
- Don't substitute the pastry and bread flours w. AP flour. I really believe that the combination of the pastry and bread flours give the cookie a nice slightly crunchy exterior giving way to a really tender middle.
- Hand chopped chocolate chunks, NOT premade chips - I will purchase a hunk of the best bittersweet chocolate that I can afford and hand cut them into chunks. The easiest method to chop a block of chocolate: nuke the block at 50% power for a few seconds, no more. It softens the chocolate just enough. Then take a large kitchen knife and chop away! Your effort will be rewarded with really nice ribbons of melted chocolate throughout the cookie.
- Chill the cookie dough at least 24 hours (I let my dough sit anywhere from 2-3 days) before baking. This is not for taste reasons that were recently written about in an article from NY Times (god forbid we're aging cookie dough...let's leave that for wine and cheese). IMHO, refrigeration makes a difference with the look and texture. I think the dough sets in a way so when you bake the cookies, you end up with the lovely wrinkles and folds as the balls of dough spread and bake. Until I encounter another recipe that will move mountains, I think have finally found my perfect chocolate chip cookie!
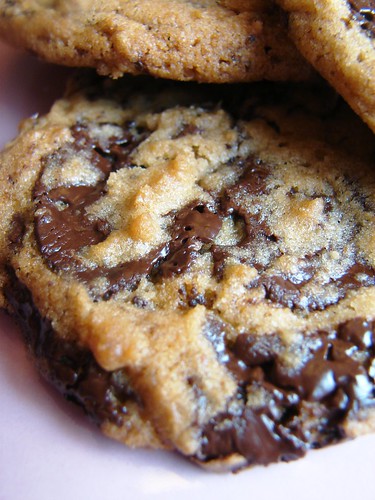
I would love to hear about your favorite chocolate chip cookie recipe, so do share! :)

Jacques Torres' Secret Chocolate Chip Cookie Recipe
Makes twenty-six 5-inch cookies or 8 1/2 dozen 1 1/4-inch cookies
Ingredients
1 pound unsalted butter
1 3/4 cups granulated sugar
2 1/4 cups packed light-brown sugar
4 large eggs
3 cups plus 2 tablespoons pastry flour
3 cups bread flour
1 tablespoon salt
2 teaspoons baking powder
2 teaspoons baking soda
1 tablespoon pure vanilla extract
2 pounds bittersweet chocolate, coarsely chopped
Directions
- Preheat oven to 350 degrees. Line baking sheets with parchment paper or nonstick baking mats; set aside.
- In the bowl of an electric mixer fitted with the paddle attachment, cream together butter and sugars.
- Add eggs, one at a time, mixing well after each addition.
- Reduce speed to low and add both flours, baking powder, baking soda, vanilla, and chocolate; mix until well combined.
- Using a 4-ounce scoop for larger cookies or a 1-ounce scoop for smaller cookies, scoop cookie dough onto prepared baking sheets, about 2 inches apart.
- Bake until lightly browned, but still soft, about 20 minutes for larger cookies and about 15 minutes for smaller cookies.
- Cool slightly on baking sheets before transferring to a wire rack to cool completely.  http://tendercrumb.blogspot.com/2008/09/my-favorite-chocolate-chip-cookie.html

Tuesday, May 15, 2012

Espresso Chocolate Truffles and a wish for a very Happy Holidays!


Every year around this time the same question starts popping up into my mind: what should I make for the holiday gatherings? I think everyone has atleast a few dashing staple stars; these are the dishes that you can whip up with no worries at-all, with very less preparation and they are sure to please every tummy! I am always awed by all the fellow food-bloggers who whip up these delightfully scrumptious baked goodies; seeing the pictures of which make me wish I had more of a baking woo-doo :) But with my limited baking talent all I feel comfortable taking to any holiday gatherings is usually a banana nut bread or some fruit cake!

This year though when I saw this chocolate truffles post on Yasmeen's blog I knew exactly what I wanted to make! Chocolate truffles are a type of chocolates made with a chocolate ganache inside and coated with various coatings, the most ubiquitous of which is cocoa powder but powdered sugar and toasted nuts are common coatings too. Ganache is just a fancy name for smooth melted chocolate with cream (low-fat milk or heavy cream). Occasionally ganache is flavored with flavorings such as vanilla and espresso. Chocolate truffles are named for the look-alike wild truffle fungus/mushroom variety which is a delicacy. Now the truffle-police will insist that the real chocolate truffles must be uneven and rustic to resemble the mushrooms they are named after.. but I am raised in a round and perfect laddoo tradition and what the heck I took pride in making my truffles perfectly circular and round so the pictures will look better (don't tell the truffle-police!) :D
Anyway, so here is how I made my truffles:
Recipe source: multiple truffle posts mainly Yasmeen's post, an old Joy-of-Baking article describing anatomy of a truffle and a step-by-step photo post from here.
Ingredients:
For ganache:
8.5 ounces of dark chocolate (I used Trader Joe's Belgium chocolate brand with 54% cocoa)
1/2C cream (I used mixture of heavy cream and 2% reduced fat)
1/2tsp vanilla extract
1tsp instant espresso coffee
For coating:
cocoa powder
toasted crushed slivered almonds
powdered sugar
Recipe:
(The posts linked above have a much detailed description of the method, but here is what I did in a nutshell).
  1. Cut the chocolate into as many thin pieces as possible. My chocolate slab was very thick and so I chopped it very roughly into big pieces.
  2. Heat the cream just until the boiling point. Add espresso and mix well.
  3. Pour the cream over the chocolate pieces and let it stand for a minute. At this time if your chocolate was very finely chopped then the cream will be able to melt the chocolate. If instead you had big chocolate chunks like mine, you will need a double-boiler method to melt the chocolate. For double boiler method: heat water in a large pan to barely simmering. Place the pan holding the chocolates and cream over the simmering water and continue stirring until the entire chocolate is melted.
  4. Add vanilla extract to the melted chocolate and mix it really well to get a smooth consistency. This is your ganache, cover and let it chill in refrigerator for overnight.
  5. Remove from fridge when you are ready to make truffles. Place each of the coating ingredients in a separate plate.
  6. Using a mellon scooper scoop out a chocolate bowl. Roll in your hands for a smoother round shape. (Heat from your hand will start to melt the chocolate making it easy to reform into a round ball).
  7. Roll the chocolate balls in one of the coating plates making sure the truffle is thoroughly coated. Place  the truffle on a parchment paper.
  8. Ready to serve! Serve them at room temperature or refrigerate for later use.
These were heavenly and had a perfect truffle byte! I forgot to take a photo of the truffle byte, may be next time :-)
These chocolate truffles go straight to S of the wonderful blog Art, Food and Travel Chronicles for giving me my first food blog award here! Thanks S!
   http://ginger-and-garlic.blogspot.com/2009/12/espresso-chocolate-truffles-and-wish.html

Friday, March 2, 2012

Love & Luxury: Boxed Chocolate Mini Cakes

Since this is my first-ever Valentine’s Day post, I have to admit I was a  little overwhelmed with the endless (and glorious) love-inspired confection inspiration out there. As with every year, right around this time I start to dream about luxury boxes of chocolates. Big boxes of chocolates, and well, come to think of it, they need not be luxury, but just chocolate! During the rest of the year, strangely, I don’t crave them and I rarely indulge in them (I’m too busy indulging in cake, I suppose!). So, this year I thought it would be fun to recreate a luxury box of chocolates, using mini rich chocolate cakes. When I started doing some research online for real boxed chocolates (colours, textures, etc.), I came across a few other amazing spins on Valentine’s chocolate: Bakerella’s adorable red heart box made of cake, as well as the sweetest heart boxed cupcakes from Hello, Cupcake! What I really loved about making these mini cakes, though, is that you can truly create any shape, style, “flavour,” and design you like, since no two chocolates are the same–definitely a custom assortment. This was one of the most enjoyable baking projects I’ve ever done!
I took a sort of an “anything goes” approach to decorating them, and some are wackier than others, but like I said, it seems there could be  no rules when recreating boxed chocolates. I’m always drawn to the square chocolates when I dive into a new box, or, of course, the ones that are heart shaped and foil wrapped! How about you? I think you can learn a lot about someone by what chocolate they select (and neglect) from a big assorted box. I think I avoid the round ones for fear of biting into a syrupy cherry concoction, or the like, and I’m certain I grab the square ones due to the likelihood of it being crunchy or caramel-y.
Here’s an image (above) I found online of a real box of chocolates, and I just love everything about this: the heart, the square chocolates, the gold detail, the photo itself–everything!
This “A” chocolate of my assortment is simple, but I really like it. I just rolled the fondant over a silicone baking mat to get a subtle waffly texture, covered the mini cake, and then used a wee ball of fondant to create a “white chocolate” monogrammed medallion using a wax seal embosser.
I do have to say that the 24 karat gold (yes, it’s possible I have an addiction to confectioning with gold!) “foil-wrapped” heart chocolates are my favourite of the bunch. For these, I heaped up the buttercream when coating the cakes, to make a more realistic dome-style top. Then, I rolled out ivory fondant on top of a crinkled up piece of wax paper, to get the wrapper-like crease impressions. Once I started painting them gold, using my favourite 24 karat gold luster dust and clear lemon extract, the paint just seeped into those creases so beautifully. I really love the effect!
Luxury love cake for two (or one!).
Which one would you choose?
To make these Boxed Chocolate Mini Cakes, I used a batch of my Rich Chocolate Cake, as a sheet cake (using a baker’s half-sheet) and cupcakes, being sure to fill the cupcakes about 80% full, so they would dome (unlike how I normally fill no more than 2/3). Once the sheet cake was cool, I placed in the freezer for about 30 minutes, then used different size circle cookie cutters and heart cutter. Using Swiss Meringue Buttercream, I filled two layers and then covered with a generous layer to seal in crumbs and coat, smoothing the edges and top using an offset palette knife. I then placed the iced cakes in the freezer for about 20 minutes, before covering with different shades of chocolate fondant. (I use dark chocolate Satin Ice fondant, then knead in white fondant to get varying shades of brown). I created a marbled chocolate effect by combining dark chocolate and white fondant and rolling out after just a moment of kneading. I used melted Lindt chocolate and piped crazy squiggles and swirls on a few, and added ground nuts to another for colour.
You can do pretty much anything decorative and it will look fabulous, in my opinion–as I mentioned, that is one of my favourite parts of this project. Just have fun and run with it!
Have a wonderful weekend, everyone!  http://sweetapolita.com/2011/01/love-luxury-boxed-chocolate-mini-cakes/

Saturday, November 26, 2011

Hector's Magnificent Chocolate Rose

Here is a chocolate rose that is actually delicious to eat as it is made with 100% tempered chocolate. It is tricky to make as it requires a cool room and great care to keep the chocolate petals from melting but the results are well worth the effort. These excellent photos and instructions are from Hector himself. He suggested working in a very cool room, ideally a walk in refrigerator!
CHOCOLATE ROSE PETALS
1- use a fresh rose that is near fully open. a closed rose bud will be near impossible to assemble.
Rose1.jpg
2- disassemble the rose and place the petals in gradual order on a baking sheet lined with silpat. 30 to 40 petals are needed, if the rose has more petals, discard a few petals every now and then as you disassemble the rose: don't just discard all the small petals or all the large petals because the completed rose will look unnatural. discard the very small center core rose petals growing near the pistils; these petals are ruffled and very hard to peel.
Rose2.jpg
3- brush the outside of the petals with melted chocolate (never above 91˚F/32˚C to prevent the chocolate from loosing its temper). for sturdiness and easier handling, coat the petal bases thicker; the bases aren't visible when the rose is assembled. for the most natural effect, coat the petal edges thinner; the edges are visible. a few "rough/hollow" brush strokes are desirable, this gives the illusion of translucency on the completed rose. chocolate side down, place the petals on a baking sheet lined with silpat. it is perfectly fine if the chocolate sticks to the silpat, this will facilitate peeling the rose petal. also, the area that has stuck to the silpat won't be noticeable on the completed rose. freeze for 30 to 60 minutes.
4- with tweezers, peel off the rose petal from the chocolate. the rose petal will be 'fairly easy' to peel since it has been frozen and when thawing it becomes softer and wilted. to minimize breakage, have on hand a variety of tweezers: some tweezers with pointed edges, some slanted, some flat, some round! exchange tweezers as needed, to best fit the part of the rose petal that you are peeling. about 25% of the chocolate petals are discarded due to breakage. return your petals to the freezer if working in warm weather.
Rose3&4.jpg
5- line a turntable with plastic wrap or silpat. place a 1/4 tsp of melted chocolate on the center of the turntable and attach 3 to 4 petals. start with the smaller petals. the objective is to create a rose core "glued" to the turntable and work around it. continue adding 1/4 tsp of melted chocolate on the turntable and attach the rest of the petals. by adding chocolate on the turntable, a solid chocolate base is created which makes the completed rose easier to handle. peel the completed rose from the plastic wrap or silpat and store in a cool room.
Rose5.jpg
6- to prevent melting, avoid handling the petals with your fingers or hands. use a small icing spatula to "lift and drop" petals from the baking sheet to the rose core. use tweezers to "spin and toss" the position of the petals around the rose core. use the back of a spoon to "push and drag" the petals if they were dropped too far from the rose core.
Rose6.jpg
7- this is the chocolate rose decorating a Chocolate Oblivion Torte.
Rose7-Oblivion.jpg
8- the sliced cake shows that only the petal edges are thin while the petal bases are thick!
Rose8-Oblivion.jpg

Tuesday, November 22, 2011

Chocolate Pinecone Cake and How-to


This week I got to do a wedding cake that had sugared pine cones on it. It was based on a design from MS weddings, but the original cake had real pine cones and pine needles, which just made me think "eeeew" to myself.


I made the cones and needles out of chocolate, and I wanted to share the method that I used, since it gave a more realistic pine cone than the methods I've seen before. This is the finished cake...The icing was a pale ice blue with bands of blue chocolate at the base of the tiers.


When I see tutorials on how to make pine cones, they always start with making a cone shape out of fondant or marzipan, then sticking slivered almonds into the cone. If you look at a real pine cone, though, that isn't how they're shaped. The scales, which are the "leaves" so to speak, are attached to the center stem, and the size of the scales themselves is what gives the cone its shape. The center stem isn't cone shaped, it's fairly cylindrical.


So, I decided to try it a different way. I piped a bunch of chocolate scales and let them cool off. The trick to this, though, was that I heated the chocolate up way too much, in order to make it bloom when it cooled off. The bloom is the powdery look that chocolate gets when it hasn't been tempered correctly. For pine cones, I wanted a rough, woody look, so the bloom was what I wanted in this case.


When they cooled off, I shaped some center stems from chocolate clay and started attaching the scales with melted chocolate. When they cooled off I turned them over and did the other side so that they were actually cone-shaped.


After the cones were completely cooled off, I used some meringue powder dissolved in water to attach sugar to the ends of the scales for the sugared look.


And this is the final product, with the chocolate pine needles also added. I like the way that these cones look, as opposed to the usual way that I see them done. Everyone at the reception site came over to look at them because they looked so realistic, and I was very happy with how the cake turned out.  http://acaketorememberva.blogspot.com/2009/12/chocolate-pinecone-cake-and-how-to.html

Wednesday, November 16, 2011

Шоколадные конфеты "Фисташки в марципане"

Сегодня первый, по настояшему зимний день..очень холодно и дождь...Я,уже,и забыла как ето..Но ладно..сегодня "ля-ля-фа-фа-" не будет,потому что у нас впереди очень большая тема,которую,чтобы  она не слишком надоела, я разделила на два поста..Короче.. помните  о конфетном раунде в сообшестве [info]gotovim_vmeste  (так Вы,гражднка Бухгалтер,не дали никому о нем забыть:)),так вот.. Отчитываюсь..Я , все таки , их сделала..Да,да.."революция  о необходимости которой так долго говорили бухгалтера..свершилась"  .Вот они..конфеты.."Получите и распишитесь"..
Получилось ,в некоторых местах вкусно..в некоторых очень вкусно..и  для первого раза(имею ввиду работу с формочками для пралине) неплохо..Но о конфетах в формочках мы поговорим завтра.,а сегодня мы поговорим о марципановых пралине..Кстати,вы знаете ,что пралине делятся на два вида:бельгийские,которые делаются в специальных формочках и  лично у меня ассоциируется с такими знакомыми с детства коробками   конфет "Ассорти"(открою вам маленький секрет..ето они и есть:)) и с французские,которые делаются по технологии:начинка(обычно затвердевшая)+ "шоколадные обертывания":)
Так вот сегодня у нас разговор о французских пралине..Ети конфеты мне дались намного легче,чем "завтрашние"..скорее  всего потому что такая технология приготовления шоколадных конфет была для меня не новой..Мы уже с вами делала..трюфели из белого шоколада и пассифлоры buxgalter-sofia.livejournal.com/192874.html,марципановые "бомбочки" buxgalter-sofia.livejournal.com/170712.html  и "мягкий грильяж"  buxgalter-sofia.livejournal.com/207210.html ...а теперь мы будем делать:


Шоколадные конфеты "Фисташки в марципане"


(опять на фотографии бутылка..А шо делать..если они такие фотогеничные:)))


Read more... )

Monday, May 16, 2011

rum chocolate cake


This is my hubby's FAVORITE cake and it is so yummy and easy that you will LOVE it too!!

1 Package chocolate cake mix (2 layer size)
1 Jell-o chocolate instant pudding mix (4 serving)
4 Eggs
1/2 c Bacardi dark rum
1/4 c Cold water
1/2 c Wesson oil
1/2 c Slivered almonds, optional

Filling
1 1/2 c Cold milk
1/4 c dark rum
1 Jell-o chocolate instant pudding mix (4 serving)
1 Dream whip topping mix

Preheat oven 350 degrees F. Grease and flour 2 - 9 inch layer cake pans. Combine all cake ingredients together in a large bowl. Blend well, then beat at medium speed for 2 minutes. Turn into prepared pans. Bake for 30 minutes or until cake tests done. Do not under bake. Cool in pans for 10 minutes. Remove from pans, finish cooling on racks. Split layers horizontally. Spread one cup filling between each layer and over top of cake. Stack. Keep cake well chilled. Serve cold.

Filling: Combine milk, rum, pudding mix and topping mix in deep, narrow bowl. Blend well at high speed for 4 minutes, until light and fluffy. Makes 4 cups.  http://whiskusaway.blogspot.com/search/label/Desserts?updated-max=2009-08-10T10%3A35%3A00-06%3A00&max-results=20

chocolate tuxedo cake


This is a hit whenever I make it, it is a favorite to take to parties!!
White Cheesecake Layer
1 1/2 lb cream cheese - softened
2 cup confectioner's sugar (powdered sugar)
1/2 cup sour cream
1 tsp vanilla extract
6 oz white baking chocolate - melted and cooled
2 envelopes unflavored gelatin
1/4 cup cold water

Chocolate Layers
1 1/2 cup semisweet chocolate chips
1/2 cup butter - softened
1/2 cup granulated sugar
2 lg eggs
1 tsp vanilla extract
1 1/2 cup all-purpose flour
1 tsp baking soda
1/2 tsp salt
1 cup sour cream

Chocolate Sour Cream Frosting
1 1/3 cup semisweet chocolate chips
6 Tbsp butter
2/3 cup sour cream
1 tsp vanilla extract
3 cup confectioner's sugar

FOR THE WHITE CHOCOLATE CHEESECAKE LAYER:
Beat cream cheese with confectioners sugar until smooth. Blend in sour cream, vanilla extract and white chocolate. Stir the gelatin into the cold water in a small saucepan and allow mixture to stand several minutes to soften. Then heat mixture gently over a low setting until thoroughly dissolved. Cool briefly, then blend into the cream cheese mixture. Line bottom of a 9-inch spring form pan with foil, then coat pan and foil well with a nonstick spray. Pour mixture into prepared pan, cover top of pan and chill until firm.
This cheesecake layer can be prepared up to two days in advance, and held in the refrigerator.

FOR THE CHOCOLATE LAYERS:
Melt chocolate chips in a small heavy gauge saucepan over low heat. Remove from heat and cool slightly. Preheat oven to 350F and arrange rack to the center position. Grease and flour two 9-inch round cake pans. Cream the butter with the sugar until very light and fluffy. Add the eggs, one at a time, beating well after each addition. Stir in the vanilla extract and the cooled, melted chocolate. Whisk the flour with the baking soda and salt and gradually stir into the batter. Blend in the sour cream and divide batter evenly between the two prepared pans. Bake at 350F about 25 minutes or until layers spring back when lightly pressed in their centers. Cool layers in pans 10 minutes, then loosen and turn out onto a rack to complete cooling.

Makes Two 9-inch layers

CHOCOLATE SOUR CREAM FROSTING:Melt chocolate chips and butter in a small, heavy gauge saucepan over low heat, stirring until smooth. Transfer mixture to a large mixing bowl and cool 10 minutes. Stir in sour cream and vanilla extract. Gradually add confectioners sugar, beating until frosting is smooth.

TO ASSEMBLE THE CAKE:
Arrange one of the cooled chocolate cake layers in center of a cake plate, top side down. Placing top side (because of its moist surface) down will help to secure cake to plate, preventing layers from slipping after cake is assembled. Release rim of the spring form pan. Holding cheesecake in one hand and chocolate cake layer (on plate) in other hand, quickly invert chocolate layer (plate and all) on top of the cheesecake. Quickly flip the two, now attached layers back over, so chocolate layer is again on bottom. Now, you can easily remove spring form pan bottom from (now top) of cheesecake layer. Arrange the remaining chocolate cake layer (top side down) on top of cheesecake layer. Using a long sharp knife and a slight sawing motion, carefully cut around rim of cheesecake layer to make it even with chocolate layers. Frost sides and top of cake and serve. The cheesecake layer will hold at room temperature several hours.

For best results, serve cake within 3 hours of assembling. Refrigeration will cause the frosting to loose its beautiful sheen. http://whiskusaway.blogspot.com/search/label/Desserts?updated-max=2009-08-10T10%3A35%3A00-06%3A00&max-results=20

olson's old fashioned chocolate sauce


1 c. butter
12 oz. package of semisweet chips (2 cups)
4 c. powdered sugar
2 cans evaporated milk
2 tbsp. vanilla

Melt butter and chips in large saucepan. Add sugar and milk. Stir and bring to a boil. Boil 8 minutes stirring constantly. Remove from heat and add vanilla  http://whiskusaway.blogspot.com/search/label/Desserts?updated-max=2009-11-08T15%3A58%3A00-07%3A00&max-results=20

chocolate zucchini cake


I got this yummy recipe from my friend Liz. Talk about a great way to hide veggies.... it is so yummy and moist that your kiddos (or anyone else for that matter) won't even notice the zucchini!!

1 cup butter
1 tsp baking soda
2 1/2 cups sugar
3/4 tsp salt
2 tsp vanilla extract
1 cup buttermilk
3 cups flour
3 cups shredded zucchini
1/2 c cocoa
2 tsp baking powder
4 eggs

In a mixing bowl, cream butter and sugar. Add the eggs one at a time, beating well after each one. Beat in vanilla. Combine flour, cocoa, baking powder, baking soda, and salt. Add to the creamed mixture alternately with buttermilk. Stir in zucchini. Pour into a jelly roll pan or a 9 x 13 pan for thicker slices. Bake at 350 for 25-30 minutes or until a cake tester comes out clean. Cool for 10 minutes. Frost with your favorite homemade chocolate frosting. Enjoy!!!   http://whiskusaway.blogspot.com/search/label/Desserts

Thursday, May 5, 2011

Chocolate Raspberry Torte


Here’s some happy news to brighten your day: It’s berry season! Raspberries, in particular, are looking plump and juicy right about now. Which is why I love to use them as the finishing touch on this showcase dessert. What we have here is a chocolate layer cake wrapped in a band of solid chocolate and topped with fresh raspberries. The prep and assembly require a bit of effort, no doubt, but it’s well worth it. And if you love the combination of chocolate and raspberries (ummm… how could you not?!), then this is the dessert for you.
Oh — and while we’re on the subject of the berries, let me just point out my own little food styling misjudgment: In the photo (if you look closely… really closely… zoom in if you have to) you can see that I dusted the berries with a bit of powdered sugar. But… you know what? I don’t really like that idea. Fresh berries are beautiful just as they are. I say, resist the temptation to dust them or drizzle them or do whatever it is you are thinking of doing to them. Just leave them be.
Before you begin, you might want to read about making the chocolate band enclosure in “Valentine’s Chocolate Ruffle Cake.” It’s messy but fun! And I’m telling you, once you learn how to do this you will want to wrap everything in chocolate.

Make the Cake Layers:
1 3/4 cups all-purpose flour
1 cup cocoa powder
1 1/2 teaspoons baking soda
1/4 teaspoon salt
3/4 cup unsalted butter, room temperature
2/3 cup granulated sugar
2/3 cup light brown sugar, packed
2 large eggs
2 teaspoons pure vanilla extract
1 cup buttermilk
1/2 cup sour cream
2 tablespoons freshly brewed coffee
Preheat the oven to 350F. Butter two eight-inch round cake pans and line the bottoms with parchment paper. In a medium bowl, sift together the flour, cocoa, baking soda, and salt.
In the bowl of an electric mixer fitted with the paddle attachment, cream the butter, granulated sugar, and brown sugar until fully whipped and light in color. (This will take 3-5 minutes.) Add the eggs and vanilla and beat until incorporated. In a separate bowl, whisk together the buttermilk, sour cream, and coffee. With the mixer on low speed, add the flour and buttermilk mixtures to the butter mixture in alternating 1/3 batches, starting with the buttermilk mixture and ending with the flour mixture. Mix the batter until fully blended.
Divide the batter between the two pans and smooth the tops with a spatula. Bake on the middle rack of the oven for 25-30 minutes, or until the centers spring back when pressed lightly. Cool for 10 minutes on a rack, then remove from pans and allow to finish cooling.
Make the Buttercream:
10 ounces bittersweet chocolate
8 ounces semisweet chocolate
4 egg whites, at room temperature
1 cup granulated sugar
pinch cream of tartar
1/2 teaspoon salt
1 pound unsalted butter, cool room temperature
2 teaspoons instant espresso powder, dissolved in 1 teaspoon water
1 tablespoon vanilla
2 tablespoons dark rum (optional)
Chop the chocolates and melt in a bowl over simmering water until smooth. Allow to cool.
Mix the egg whites, sugar, cream of tartar, and salt in the bowl of an electric mixer fitted with the whisk. Heat the egg whites in the bowl over simmering water until they are warm to the touch, about 5 minutes. Whisk on high speed for 5 minutes, or until the meringue is cool and holds a stiff peak.
Add the butter, 1 tablespoon at a time, while beating on medium speed. Scrape down the bowl, add the chocolate, vanilla, espresso, and rum and mix for 1 minute or until the chocolate is completely blended in. If the buttercream seems very soft, allow it to cool and beat it again.
Assemble the Cake:
Divide each cake into two layers horizontally using a sharp serrated knife. Attach the bottom layer to an 8-inch cardboard round with a dollop of buttercream. Spread more buttercream over the top of the base layer, then top with another cake layer. Continue until all four cake layers are stacked evenly. Spread buttercream over the top and sides of the cake.
To wrap the cake in a chocolate band (as pictured) follow the directions here for “Valentine’s Chocolate Ruffle Cake.” Be sure your chocolate band is at least 1/4 inch taller than the height of the finished cake.
Finish the cake with a layer of fresh raspberries, arranging the berries in concentric circles starting at the outside edge of the cake.
Note, you may also wish to use raspberries between the cake layers, but only if you are serving the cake on the same day. Otherwise, the berries may break down and become soggy inside the cake. Raspberries are very fragile!  http://www.mirileigh.com/2010/05/chocolate-raspberry-torte/

Valentine’s Chocolate Ruffle Cake


[I'm re-posting last year's Valentine's chocolate ruffle cake recipe since it was such a hit. If you didn't try it then, I hope you'll try it now! It's worth the effort... a labor of love for sure.]ruffle cake
If this isn’t the most romantic looking cake, I don’t know what is. All those ruffles and sex appeal. And that’s just the outside. Slice into it and you’ll find layers upon layers of chocolate genoise, fresh raspberries, and tangy vanilla creme fraiche.
Happy Valentine’s Day.
♥♥♥♥♥♥♥♥♥♥♥♥♥♥♥♥♥♥♥♥♥♥♥♥♥♥♥♥♥♥♥♥♥♥♥♥♥♥♥♥♥♥♥♥♥♥♥♥♥
Chocolate Ruffle Cake Assembly and Instructions:
1 eight-inch chocolate cake, baked and divided into three even layers (Genoise has a nice, light texture, but any chocolate cake will do. You can’t really go wrong, so just use your favorite recipe.)
1/2 cup sugar
1/2 cup water
1 tablespoon Frangelico (hazelnut liqueur) or other liqueur of your choice
2 cups creme fraiche (cold)
1/2 cup sugar
1 tablespoon pure vanilla extract
2 pints fresh raspberries
1 pound good-quality bittersweet chocolate, chopped into 1-inch pieces.
Materials:
Pastry brush
One 6-inch cardboard round
One sheet of .005 Mylar (available at art supply stores.)
One 18-by-13-inch jelly roll pan, washed and dried. Do not use nonstick.
Make the simple syrup: Combine the sugar and water in a small sauce pan and bring to a simmer, stirring just until the sugar is dissolved. Stir in the liqueur, remove from the heat, and set aside.
Prepare the creme fraiche filling: In the bowl of a stand mixer, combine the creme fraiche, sugar, and vanilla. Beat on medium speed until the creme fraiche is stiff.
Assemble the cake: Brush the bottom of the bottom layer of cake with simple syrup, using a pastry brush. Set the cake layer onto the cardboard round, syrup-side down. Brush the top of the same layer with more simple syrup, then spread about 1/2 cup of the whipped creme fraiche over the top. Arrange 8-10 raspberries over the layer, then push them down gently into the creme fraiche. Spread another 1/4 cup of whipped creme fraiche over the tops of the berries. Repeat with the remaining cake layers, filling, and raspberries, ending with a layer of creme fraiche over the top cake layer. Chill the cake in the refrigerator for at least 30 minutes before proceeding.
Make the chocolate band: Trim a band of Mylar to the exact circumference and about 1/2 inch higher than the assembled cake. Melt 1/4 of the chocolate in a bowl suspended over an inch of simmering water (or in the microwave in 10-second intervals on high) until the chocolate is smooth and spreadable. It should feel warm to the touch, but not hot, so be sure to remove it from the heat just as soon as the last bit of chocolate is melted. Lay the Mylar strip flat on a piece of wax paper and then, working with an offset spatula in one hand and the bowl of melted chocolate in the other, pour and spread the chocolate over the Mylar band, covering it completely and spreading the chocolate all the way over the edges. The layer of melted chocolate should be about 1/8 of an inch thick. Allow it to stiffen ever so slightly while you remove the cake from the refrigerator. Slip your fingers under the band, grip it at either end, and then affix the band to the cake by pressing the chocolate-coated side against the cake all the way around. Transfer the cake to the refrigerator (leaving the Mylar strip intact) once again and refrigerate for another 30 minutes while you make the ruffles.ruffle cake close
Make the ruffles: Melt the remaining chocolate in the same fashion (using a bowl suspended over an inch of simmering water or in the microwave) and pour it over the back of the jelly roll pan, spreading with an offset spatula to a thickness of about 1/16 inch thick. Transfer the jelly roll pan to the refrigerator for at least 20 minutes. Remove the pan from the refrigerator and slowly bring the chocolate back to room temperature. (The room should be cool and dry, about 68F is ideal.) At the point where the chocolate is malleable but not too soft, fashion ruffles with an offset spatula. Holding the spatula by the handle with one hand and gripping the tip in the other, push the edge of the spatula against the pan, starting at one edge and moving the spatula in an arcing motion. Transfer finished ruffles to a chilled plate or pan, moving them to the refrigerator in batches so they hold their shape.
Create the ruffle top:Remove the cake from the refrigerator and carefully peel away the Mylar strip. You should have a glossy, solid band of chocolate encasing the entire cake. Arrange the ruffles in concentric circles over the top of the cake starting at the outside edge, setting them into the creme fraiche at a slight angle so they are sticking up and jutting out in all directions. Finish the cake with one perfect raspberry in the center of the ruffles.
Final step (and this is essential): Eat it with someone you love.   http://www.mirileigh.com/2011/02/v-day2011/

Thursday, April 14, 2011

Chocolate Sculptures and Objects

Very sweet kind of art, chocolate art. On those pictures you will see some very nice sculptures made with chocolate, also some objects too. I don’t know how long those sculptures can be untouched but it seems that it is very tasteful. You can see flowers, roses and few more chocolate objects which really looks very nice. Take a look at those pictures, it maybe will give you an idea to like one of those and to give some person as a gift
chocolate sculptures 1
chocolate sculptures 2
chocolate sculptures 3
chocolate art
chocolate flower
chocolate rose 1

Wednesday, April 13, 2011

Embellished Chocolate Easter Eggs -video


Write a personalized Easter message on a hollow chocolate egg using a contrasting shade of melted chocolate.

 From Martha Stewart

Chocolate Egg How-To

Chocolate Egg How-To
We used Valrhona dark chocolate in this recipe because it is relatively easy to temper; the temperatures that are listed apply specifically to this brand.
Chocolate Egg How-To1. Using a pin, poke a hole in the bottom of a large raw egg; insert the tip of a utility knife, and turn to open the hole slightly. Using a rotary drill fitted with a 3/8-inch bit, carefully widen the hole to at least 1/2 inch in diameter.
2. Insert pin into the hole to pierce and "stir" the yolk. Hold the egg, hole down, over a bowl, and blow air into the hole with a rubber ear syringe (the air will displace and expel the egg). Rinse out egg. Repeat to make 12 blown eggs (you may want to make extras in case some break).

3. Sterilize eggs: Submerge them in a pot of cold water with 1 tablespoon white vinegar; bring to a boil, then simmer, skimming foam from surface, 10 minutes. Let drain on a pin board. If not dyeing eggs, let dry completely on pin board, 2 to 3 days (check insides for moisture).
4. If dyeing eggs: Mix 4 tablespoons vinegar and 12 drops of blue food coloring with 2 cups boiling-hot water in a heatproof glass or enamel bowl. Fill a separate cup with white vinegar. Using a plastic spoon, dip eggs in vinegar, then into the dye, 2 to 3 minutes. Pat eggs with paper towels to eliminate streaks. (If dye begins to cool while you're working, make a new batch.) Let the eggs dry as described above.
5. Using an offset serrated knife, very finely chop 3 pounds of chocolate. Reserve 1 cup chocolate; using a bench scraper, transfer remaining chocolate to a large heatproof bowl.

6. Temper chocolate: Set bowl over a pan of simmering water. Melt chocolate, stirring occasionally, until a chocolate thermometer registers 131 degrees. (Note: Many brands of dark chocolate should not be heated to more than 118 degrees.) Remove from heat; stir in reserved cup chocolate until completely melted. Pour 2/3 of the melted chocolate onto a clean smooth work surface (such as marble or stainless steel). Spread thinly with an offset spatula. Then gather together chocolate, and take temperature. Continue spreading and gathering chocolate until it cools to 82 degrees to 84 degrees.

7. Scrape chocolate back into bowl with remaining chocolate. Stir until it cools to 82 degrees to 84 degrees. Set bowl over a pan of warm water, and reheat to 88 degrees. To check consistency, dip a spoon in chocolate and remove; chocolate should set in about 2 minutes, turning shiny and hard. Note: This temperature must be maintained as you fill the eggs; keep a thermometer in the chocolate, and check frequently. Rest the bowl on a heating pad wrapped in a towel, or set bowl over the pan of warm (not hot) water.

8. Place eggshells in an egg carton. Place a disposable pastry bag in a tall glass, and fold top down. Fill bag with chocolate; cut tip to create a 1/4-inch opening.

9. For solid chocolate eggs: Insert tip of bag into each egg, and fill with chocolate (about 1/4 cup per egg; fill a new bag with chocolate as needed). Let set completely, about 4 hours.

10. Alternatively, fill eggs with ganache: Fill all eggs with chocolate, then let stand 5 minutes instead of letting chocolate set. Pour chocolate out of eggs into a glass measuring cup, tapping your hand against cup to let most of the chocolate drain out (do not add to tempered chocolate). Let chocolate "shells" set completely.

11. Fill a disposable pastry bag with ganache (recipe follows); cut tip to create a 1/4-inch opening. Insert tip into egg; fill with ganache. Tap egg gently, hole up, on a folded kitchen towel to eliminate air pockets; fill to top. Continue with remaining eggs. Refrigerate until set, about 4 hours. Ganache-filled eggs can be refrigerated up to 1 week; solid eggs can be stored in a cool, dry place until ready to serve.


To Make GanacheFor semisweet ganache, use 2 cups heavy cream and 1 pound semisweet chocolate. For milk-chocolate or white-chocolate ganache, use 1 1/4 cups heavy cream and 1 1/4 pounds milk or white chocolate. Bring cream just to a boil, then pour over finely chopped chocolate into a medium bowl. Let stand 5 minutes; stir until smooth. Press plastic wrap directly onto surface; let stand, stirring occasionally, until cool enough to pipe (no warmer than 80 degrees), 1 to 2 hours.
Note: The steps here are for tempering chocolate by hand. If you work with chocolate frequently, investing in a tempering machine will save time and make cleanup easier -- and the chocolate will be perfectly creamy, smooth, and shiny. Every brand of chocolate requires different tempering temperatures; see package instructions. For Valrhona, the following temperatures apply: milk chocolate, heat to 118 degrees, cool to 81 degrees to 82 degrees, then warm to 84 degrees to 86 degrees; white chocolate, heat to 118 degrees, cool to 79 degrees to 81 degrees, then warm to 82 degrees to 84 degrees.


Read more at Marthastewart.com: Chocolate Egg How-To - Martha Stewart Crafts