Labels

"Погребок"- заготовки на зиму(canning) (82) Afternoon Tea-recipes and tradtions (41) All about Sushi rolls and more (2) appetizers (61) Baby Shower (2) Barbecue (45) Beauty (29) Bread and pizza (67) Breakfast Sunday Brunch (18) Bridal Shower and Wedding (8) burgers sandviches and toasts (22) Cake decorating and gum paste flowers (144) Cake pops and balls (35) cakes (197) canning (31) cheesecakes (31) Chocolate (38) Christmas (102) Coffee and Latte Art (22) Coffee cakes pies sweet breads (74) cookies (226) Cupcake Muffin Пирожное (62) Decorated cookies tutorials (48) Decorating Easter Eggs (19) Dessert (46) Easter (52) Easter and Spring (29) eggplants (3) eggs (11) Father's Day (4) Fish and seafood (30) French cooking (14) fresh fruits (6) gingerbread (68) Healthy Eating (32) Homemade gifts (3) Hапитки (30) Italian food (39) jams and jellies (33) Jello salads and desserts (17) Kашки (4) Kонфеты и другие сладости (42) Kремы-Buttercream-Frosting (4) Kрымские блюда (14) Main course (36) Main Dish (53) meringues зефир marshmallow pastilage (40) Mexican-Spanish food (34) Mothers Day (7) Mяско (59) Nutella (5) Olive Garden recipes (3) oranges (3) Oriental food (8) Oформление салатов (41) Pasta (16) plums (2) Potluck (6) Poultry (31) pumpkin (19) Pецепты Джейми Оливера (5) Pецепты Сталика Ханкишиева (37) Quinoa (5) Risotto Jambalaya Плов Paella (27) salads (123) Sauces Dips and Spreads (38) Saving money in the kitchen (4) Side Dish- гарнир (15) Slow-Cooker (9) soups (105) Summer recipes (12) Table setting etiquette(Сервировка стола) (67) Tagine-cuisine of Morocco (13) Thanksgiving and Fall (46) Tатарская кухня (6) Tесто (17) Valentines Day (36) Video-рецепты (20) Блины блинчики и оладушки (44) блюда в горшочках (23) Блюда из курицы (60) Блюда из теста (56) булочки (103) Вкусности из детства (63) Вкусные местечки-Sweet places (7) Детский праздник (29) Заготовки-полуфабрикаты (44) заливное и холодец (13) Запеканки и омлеты (11) история блюд и кулинарные истории (24) Котлеты Тефтели Голубцы и Перчики (58) Мороженое-Ice Cream (15) овощные заготовки (18) пирожки чебуреки беляши и т.д. (42) Пляцок (2) рулеты мясные и овощные (36) Сосиски и домашние колбаски (26) Старинные русские рецепты (38) Творожная выпечка (13) Узбекская кухня и Среднеазиатская (66) Хворост Крепли вергуны Пончики (25)
Showing posts with label Cupcake Muffin Пирожное. Show all posts

Monday, June 11, 2012

Chick cupcakes

These were supposed to be ducks, but according to my husband and just about everyone else I asked, they look more like baby chicks.  I suppose I could pout about it, but I’ve decided to just embrace them for what they are…so here are my baby-shoulda-been-a-duck cupcake toppers. Say that three times fast.
I’m not even going to pretend to try to talk to you about cake baking.  I used the lemonade cake recipe from the latest issue Better Homes and Gardens for these cupcakes.  When it comes to cake, listen to ANYONE but me.  The recipe made a nice thick batter which is great for making perfectly uniform cupcakes.  Same for the frosting.  Straight out of the magazine.  Buy it.
Now to my area of expertise, cookies.

To make these cookies you will need:

I used quarter sized round cookies to make these toppers.  Begin by laying out the cookies, with plenty of space between.  To keep them from sliding around as you work, use a dot of yellow piping icing to “glue” them to the parchment.
Once they have adhered to the parchment, use the grass tip to add a little pouf of hair to the top of the chick.  For more explanation on this technique, click HERE.
After adding the top feathers, use 20-second icing to flood the face.
Quickly add candy bead eyes.  Let the cookie dry for a bit, and add a beak.
In the meantime, use a large tip {I think mine was a 1A} to create a swirl on the cupcake.  Once again, don’t take my word on this.  For a little in depth info on perfect cupcake swirls, head on over to Glorious Treats.
Stick the cookie toppers onto the icing, and you’re done!
Cute, even if they didn’t work out quite like I planned.  For future reference, if you want duck-looking ducklings, I would use a mini-skull cutter rather than a round and give it a way wider beak.
If you’re in the mood for even more cuteness, head on over to My Candy Crafts to see how easy it is to turn ordinary gumballs into adorable duckies chicks.
  http://www.sweetsugarbelle.com/blog/2012/04/cute-little-chick-cupcakes/

Thursday, May 17, 2012

Sweetheart Tarts

 
1/2 recipe Sugar Cookie Dough, at room temperature, chilled
Confectioner's sugar, for rolling
1/2 cup seedless raspberry or cherry jam
36 canned or jarred whole dark cherries in syrup, drained
Equipment: Non-stick mini-muffin tin
Preheat the oven to 375 degrees.
Sprinkle a work surface and rolling pin with confectioner's sugar and roll out dough to 1/8-inch thick. Move dough frequently to prevent it from sticking and add more confectioner's sugar to the work surface and rolling pin as needed.
Using a round cookie cutter the same diameter as the top of the muffin tin cups (about 2 inches), cut 36 rounds of dough. Gently press a dough round into each muffin cup and press evenly into the sides and bottom of the cup. Continue with remaining dough rounds. Bake until set and edges are light golden, about 10-12 minutes. Let cool in the pan completely before removing with a small offset spatula.
Heat the jam in a small saucepan over medium heat until melted. Add the cherries and stir gently to coat completely. With a small teaspoon, transfer a cherry into each tart shell and drizzle with a little more warm jam. Allow to cool and set.  http://www.foodnetwork.com/holidays-and-parties/valentines-day-cookie-recipes/index.html

Beehive Cupcakes

beehive cupcakes"A fun way to play up your everyday cupcake."

ingredients and directions:


  • 1 box (18 oz.) your favorite cake mix
  • 3 cups prepared vanilla frosting
  • Yellow food coloring
  • 24 pieces SNICKERS® Brand Miniatures
  • ½ cup orange STARBURST® Brand Jellybeans
  • 1 tube chocolate decorative frosting, with plain tip
  • ¼ cup sliced almonds
  • ¼ cup M&M’S® Brand Chocolate Candies
  • Resealable plastic bag
  • 24 paper cupcake liners classic
  • 2 12-cup muffin tins
  • 3 pieces construction paper, in bright, spring colors (orange, pink, green, etc.)
  • Serving tray, optional
  • Yield: Makes 24 cupcakes.
  • Prep Time: 20 min.
  • Bake Time: 21-25 min.
  • Decoration Time: 30 min.
  • Difficulty: Challenging
  • 1. Line the 2 muffin tins with the paper cupcake liners. Prepare the cake mix and bake according to the package directions.
  • 2. Let the cupcakes cool to room temperature.
  • 3. In the meantime, tint the frosting with yellow food coloring to the desired shade. Dab a teaspoon of frosting on the bottom of each SNICKERS® Brand Miniatures and place one on top of each cupcake.
  • 4. Frost the top of the cupcake, covering both the cupcake and candy. This will help support the frosting beehive.
  • 5. Spoon the remaining frosting into a resealable plastic bag. Using scissors, snip a small corner of the bag. Pipe the frosting in a spiral fashion, starting at the bottom of the hive and working your way up to the top.
  • 6. Place jellybeans randomly around the cupcake hives, and gently squeeze the chocolate frosting in a zigzag pattern on top of them.
  • 7. For the bee’s wings, place an almond slice on both sides of each jellybean.
  • 8. To serve, create flower cut-outs from the construction paper. Place the flowers on a table or serving tray, put a hive on each flower, and sprinkle with M&M’S® Brand Chocolate Candies.  http://brightideas.com/bright_idea.aspx?ID=41

Thursday, May 10, 2012

Песочные кольца с орехами по ГОСТу

Самые простые пирожные, которые были, наверное, в каждом буфете. Обычно их посыпали арахисом, хотя в ГОСТе точно вид орехов не указан, посыпайте, какими хочется.
Также в этом посте я даю базовый рецепт песочного теста, именно из него готовятся песочные торты, корзиночки и полоски.
В принципе, никаких секретов тут нет. Тесто после замеса поставьте ненадолго в холодильник, чтобы потом было проще раскатывать, а также не скупитесь на муку длоя подсыпки.
Тесто для колечек раскатывают толщиной 6-7мм, а диаметр их 8-9см. Традиционно выемка волнистая, но можно, конечно, вырезать и обычным стаканом. Внутренний диаметр 2см.
Чтобы орешки держались, кольца надо смазать либо разболтанным яйцом, либо желтком.
Остатки теста можно быстро слепить, раскатать и опять вырезать. Главное - долго не месить.
И еще пара замечаний - соль растолките в ступке, а вместо сахара рекомендую пудру, так как сахар долго растворяется.

Вспомнить! )

Пирожное "Буковинский орех"

Случайно увидела рецепт в сборнике и вспомнила, что мне про такое пирожное в комментариях к посту про "Картошку" писали. Сама я его не встречала, и судя по всему производилось оно где-нибудь на Украине или в Молдавии. Это крошковое пирожное (как и "Картошка"), делается из бисквита, какао, крема, грильяжа и глазируется шоколадом. Оказалось очень-очень вкусным!
Как обычно, опишу сразу несколько важных моментов.
Крема вам покажется поначалу маловато, но масса очень хорошо лепится, так что не переживайте.
При глазировании вам потребуется довольно глубокая и узкая посуда, чтобы удобно было окунать целые пирожные. И глазури я делаю в два раза больше, чем надо - именно для удобства. Глазурь хорошо хранится, и потом ей можно будет полить торт.

Не пожалеете! )

Пирожное "Орешек"

Очень вкусное заварное пирожное, которое появилось в 80-х годах. Специально для него был придуман отличный ореховый крем на желтках, а сверху оно глазируется помадой и посыпается орехами. Я их, пожалуй, люблю даже больше эклеров!


30 штук

Тесто:
Для теста:
200г муки
100г масла
180г воды
щепотка соли 2г
300г яиц (5шт крупных)

Крем:
285г масла
100г сахарной пудры
120г сгущенки
40г воды
4 желтка
100г орехов
1 ст.л. коньяка

Украшение:
300г помады 60г орехов

Тесто приготовить, как показано здесь. Через отверстие диаметром 20мм отсадить 30 шариков на противень, застеленный пекарской бумагой. А я в этот раз просто чайной ложкой выкладывала.


Испечь при 220С 10 минут, потом при 180 25 минут. Остудить, если не предполагаете сразу использовать, надо убрать в пакет, чтобы не зачерствели.


Орехи (и для посыпки и для крема) надо поджарить и измельчить.


Крем.
Чтобы желтки не свернулись при контакте со сгущенкой, их смешивают с водой и процеживают.


В кастрюльку кладут желтки, сгущенку и уваривают на медленном огне до загустения, как заварной крем. Можно уваривать на водяной бане, но не обязательно, можно просто сделать огонь поменьше. Остужают.


Размягченное масло надо взбить с сахарной пудрой до побеления, а затем понемногу добавлять желтковую смесь.


В почти готовый крем добавить коньяк и орехи, хорошо взбить.


Пирожные начинить кремом через дырку из корнетика, или разрезать и класть крем ложкой. Остудить.
Разогреть помаду, добавив воду или ликер (по ГОСТу ликер не предусмотрен, но ореховый тут отлично подойдет). Обмакивать пирожные в помаду, насадив на вилку.


И тут же посыпать орехами.

  http://chadeyka.livejournal.com/214913.html#cutid1

Картошка глазированная, но не по ГОСТу

Рецепт этого, в общем-то, незатейливого пирожного - один из самых популярных в моем журнале. Из трехсот комментариев к рецепту приблизительно треть составляют воспоминания о картошке всякой: домашней, из печенья, из хлеба, из сухарей, шоколадной, пропитанной и не слишком, с мороженым и с орехами. В общем, нет предела совершенству разнообразию вкусов.
С другой стороны, картошка - простейшее изделие для любого кулинара: все смешать и тщательно промесить - это ли не мечта нашего детства? Тем более, что на выходе можно получить нечто со вкусом не хуже, чем у торта.
И самое, пожалуй, главное. Это скромное пирожное спасет любого, прекрасно маскируя неудачи. Кривой или подгоревший бисквит? Не беда! Срежьте корочки и сделайте картошку! Но не забывайте народную мудрость, есть вещи, из которых конфеты не получатся. И потому ингредиенты для наших пирожных должны быть все-таки вкусными и качественными. А остальное - дело вашей фантазии.
Я предлагаю сделать бисквитную картошку с шоколадным кремом и орешками, а заглазировать шоколадной глазурью. Очень вкусно и просто!

Бисквит:

3 яйца
90г сахара
90г муки

Крем:
100г масла
50г сахара
40г сливок не менее 20% жирности
40г шоколада
2 ст.л. коньяка
1коф.л. ванильного экстракта

75г миндаля

Глазурь:
100г масла
100г шоколада

Приготовьте бисквит. (Подробно с мастер-классами ищите по тэгу "бисквит".) Взбейте желтки с половиной сахара до получения очень светлой густой массы. Взбейте белки до пиков, добавьте сахар и взбейте до плотности и блеска. Смешайте обе массы, всыпьте просеянную муку и аккуратно перемешайте. Переложите тесто в смазанную маслом и посыпанную мукой форму, выпекайте в заранее разогретой до 200С духовке 25 минут. Проверьте готовность - спичка должна выходить сухой из центра пирога.
Готовый бисквит остудите и оставьте на несколько часов.
Зачем выстаивать? Бисквит приобретает более упругую и прочную структуру. Он ни в коем случае не должен засохнуть! Если в доме очень сухо, накройте бисквит пленкой или уберите в пакет, когда остынет.
Орехи почистите, поджарьте 15 минут в духовке и порубите в не слишком мелкую крошку.


В комбайн же к орехам положите наломанный бисквит и порубите. Напоминаю, бисквит не должен быть сухим!


Пересыпьте крошку в большую миску.


Приготовьте крем. Насыпьте в кастрюльку сахар, добавьте сливки и нагрейте до растворения сахара.


Добавьте наломанный шоколад и размешайте до растворения шоколада. Остудите до комнатной температуры!


Взбейте масло до посветления, добавляйте понемногу шоколадную смесь. Тщательно взбивайте.


Влейте коньяк и ваниль, взбейте еще раз тщательно. Отложите полную столовую ложку крема в корнетик с фигурной насадкой.


Оставшийся крем смешайте с крошками в густую однородную массу.


Вылепите 15 пирожных, отправьте их в морозилку (чтобы потом глазурь быстрее застывала).


Растопите шоколад с маслом, окунайте в смесь пирожные (удобно их накалывать на двузубую вилку или зубочистку) и укладывайте на бумагу для выпечки. Следы от вилки потом легко замаскировать кремовыми украшениями. Если вы не планируете украшать, то капните на след маленькую каплю глазури. Поставьте в холодильник. Затывшие пирожные положите в бумажные подложки.


На глазированные пирожные отсадите крем.


Ешьте.

  http://chadeyka.livejournal.com/234739.html#cutid1

Friday, March 2, 2012

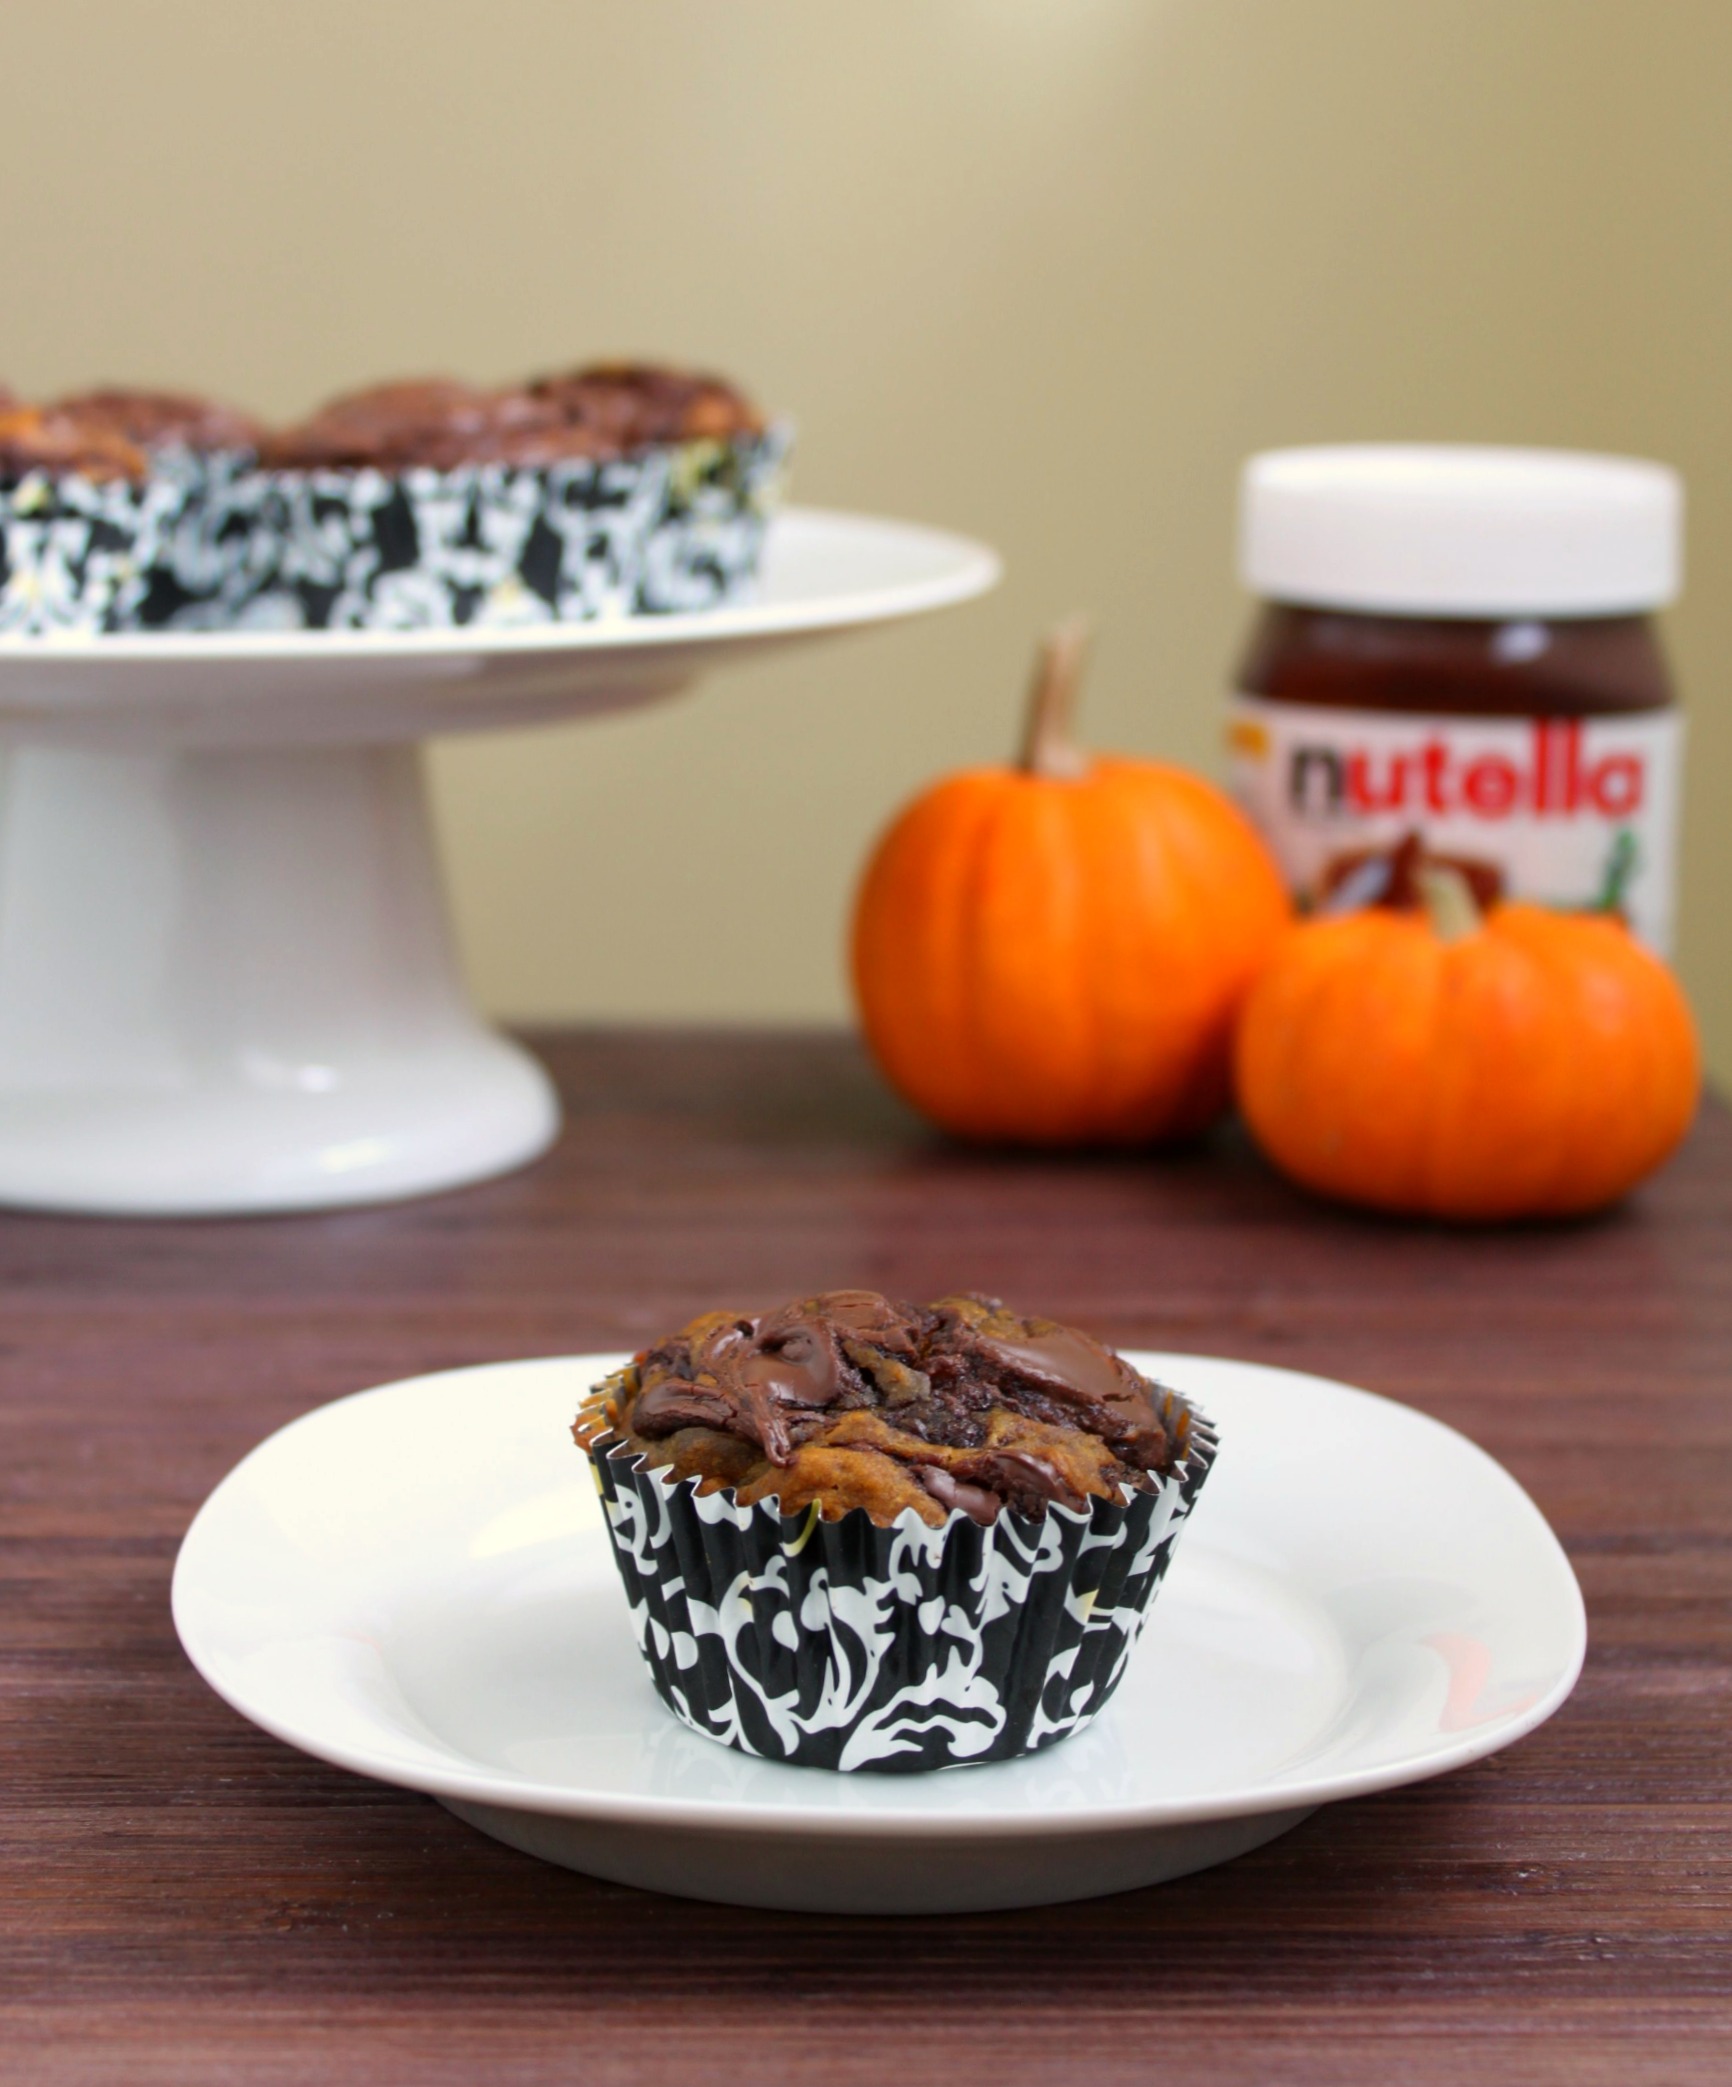
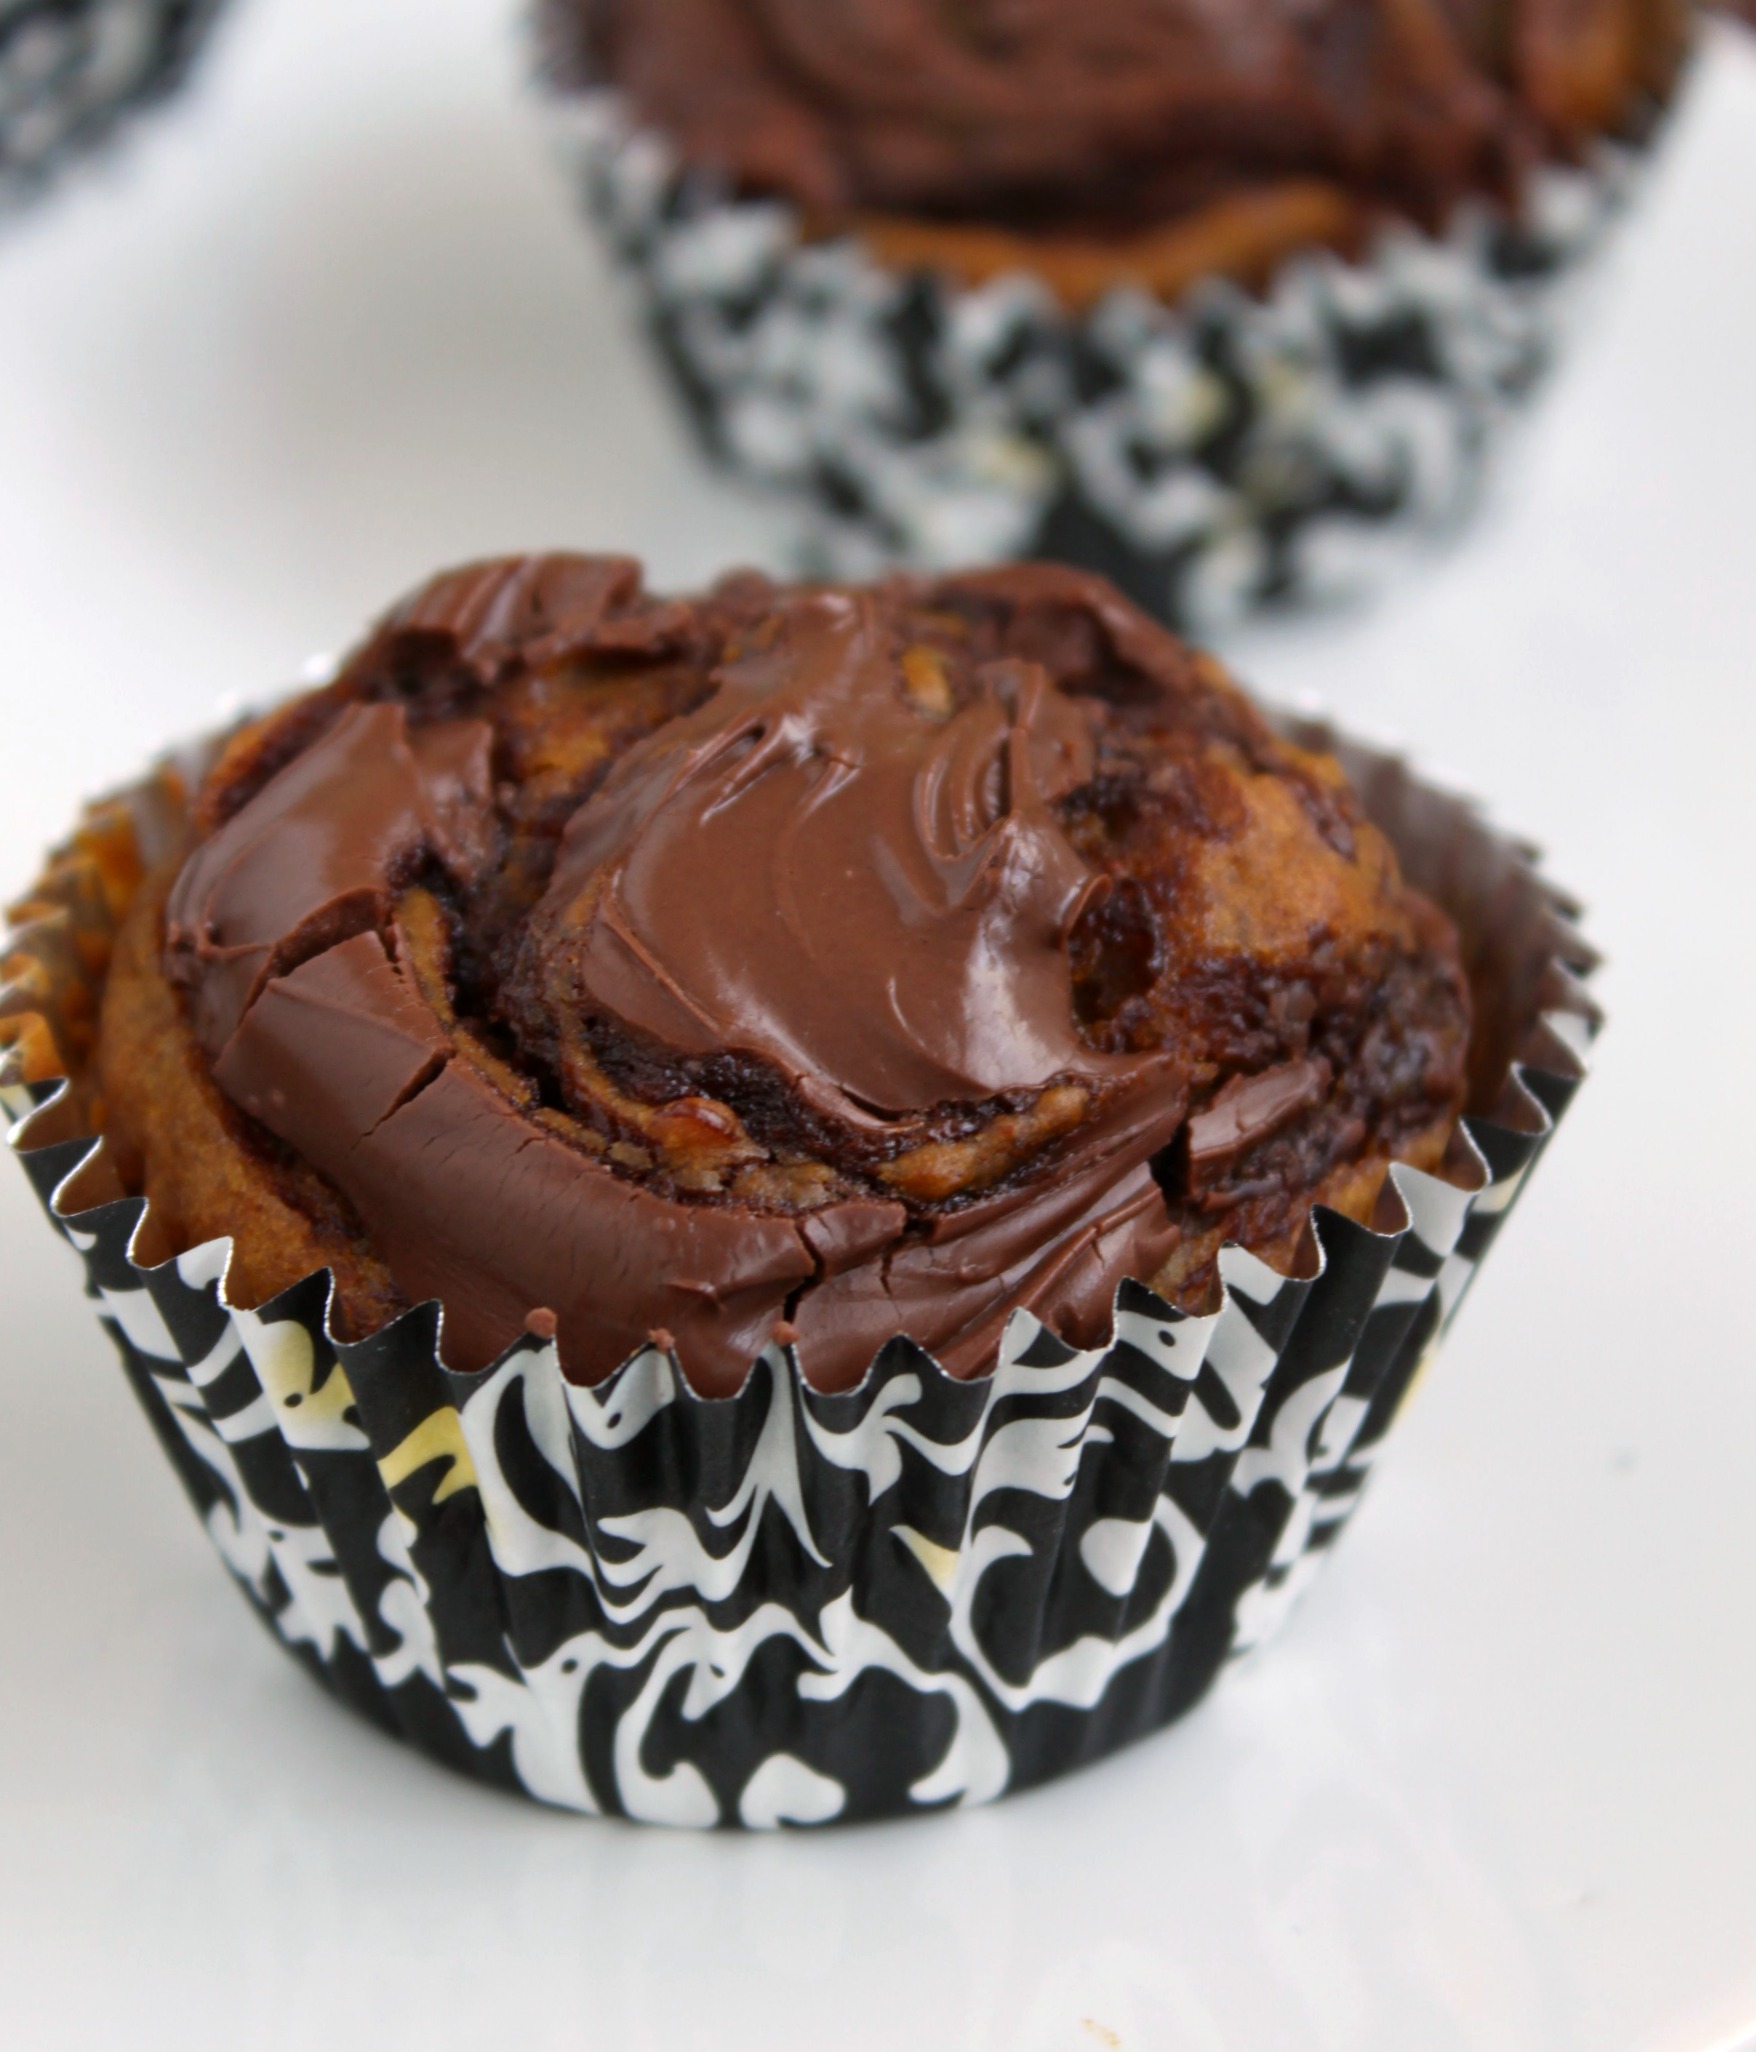
Self-Frosting Pumpkin Nutella Cupcakes

Today is the day my wonderful friend Hannah was born. It’s the first time in many years that we haven’t been together on her birthday, so last week I sent her some goodies in the mail. I needed something that would ship easily and I considered brownies or cookies until I discovered something better: self-frosting cupcakes!
These pumpkin cupcakes have a spoonful of Nutella mixed onto the top of them before they’re baked. They come out with a creamy Nutella swirl on top, making frosting unnecessary! I put them into a large container without worry of frosting smearing everywhere. Plus, no frosting = less calories (but not less flavor), and the cake part  is moist and full of spiced pumpkin goodness. These are perfect for a fall treat!
Happy birthday Hannah!!

Recipe:

Self-Frosting Pumpkin Nutella Cupcakes
Adapted from Phenomenon
Makes 12-15 cupcakes
  • 1 15-oz. can pumpkin puree
  • 1/2 cup vegetable oil
  • 2 large eggs
  • 1 tablespoon pure vanilla
  • 1/4 cup light brown sugar, packed
  • 1/4 cup sugar
  • 2 cups all-purpose flour
  • 1 1/2 teaspoons ground cinnamon
  • 1/2 teaspoon ground ginger
  • 1/2 teaspoon nutmeg
  • 1 teaspoon baking powder
  • 1/2 teaspoon baking soda
  • 1/2 teaspoon salt
  • Nutella for topping
Preheat oven to 350°F.  Line a muffin pan with foil or paper liners.
Place the pumpkin, oil, eggs, vanilla and brown sugar in a large bowl. Beat to combine.
In a separate large bowl, whisk the flour, cinnamon, ginger, nutmeg, baking powder, baking soda and salt together. Add to wet ingredients and stir until just combined.
Fill muffin cups around 3/4 full. Place a couple of teaspoons of Nutella on top of each cupcake. Use a toothpick to swirl the Nutella around the top of the batter.
Bake 25-30 minutes or until a toothpick inserted in the middle comes out clean.  http://www.52kitchenadventures.com/2011/10/30/pumpkin-nutella-cupcakes/

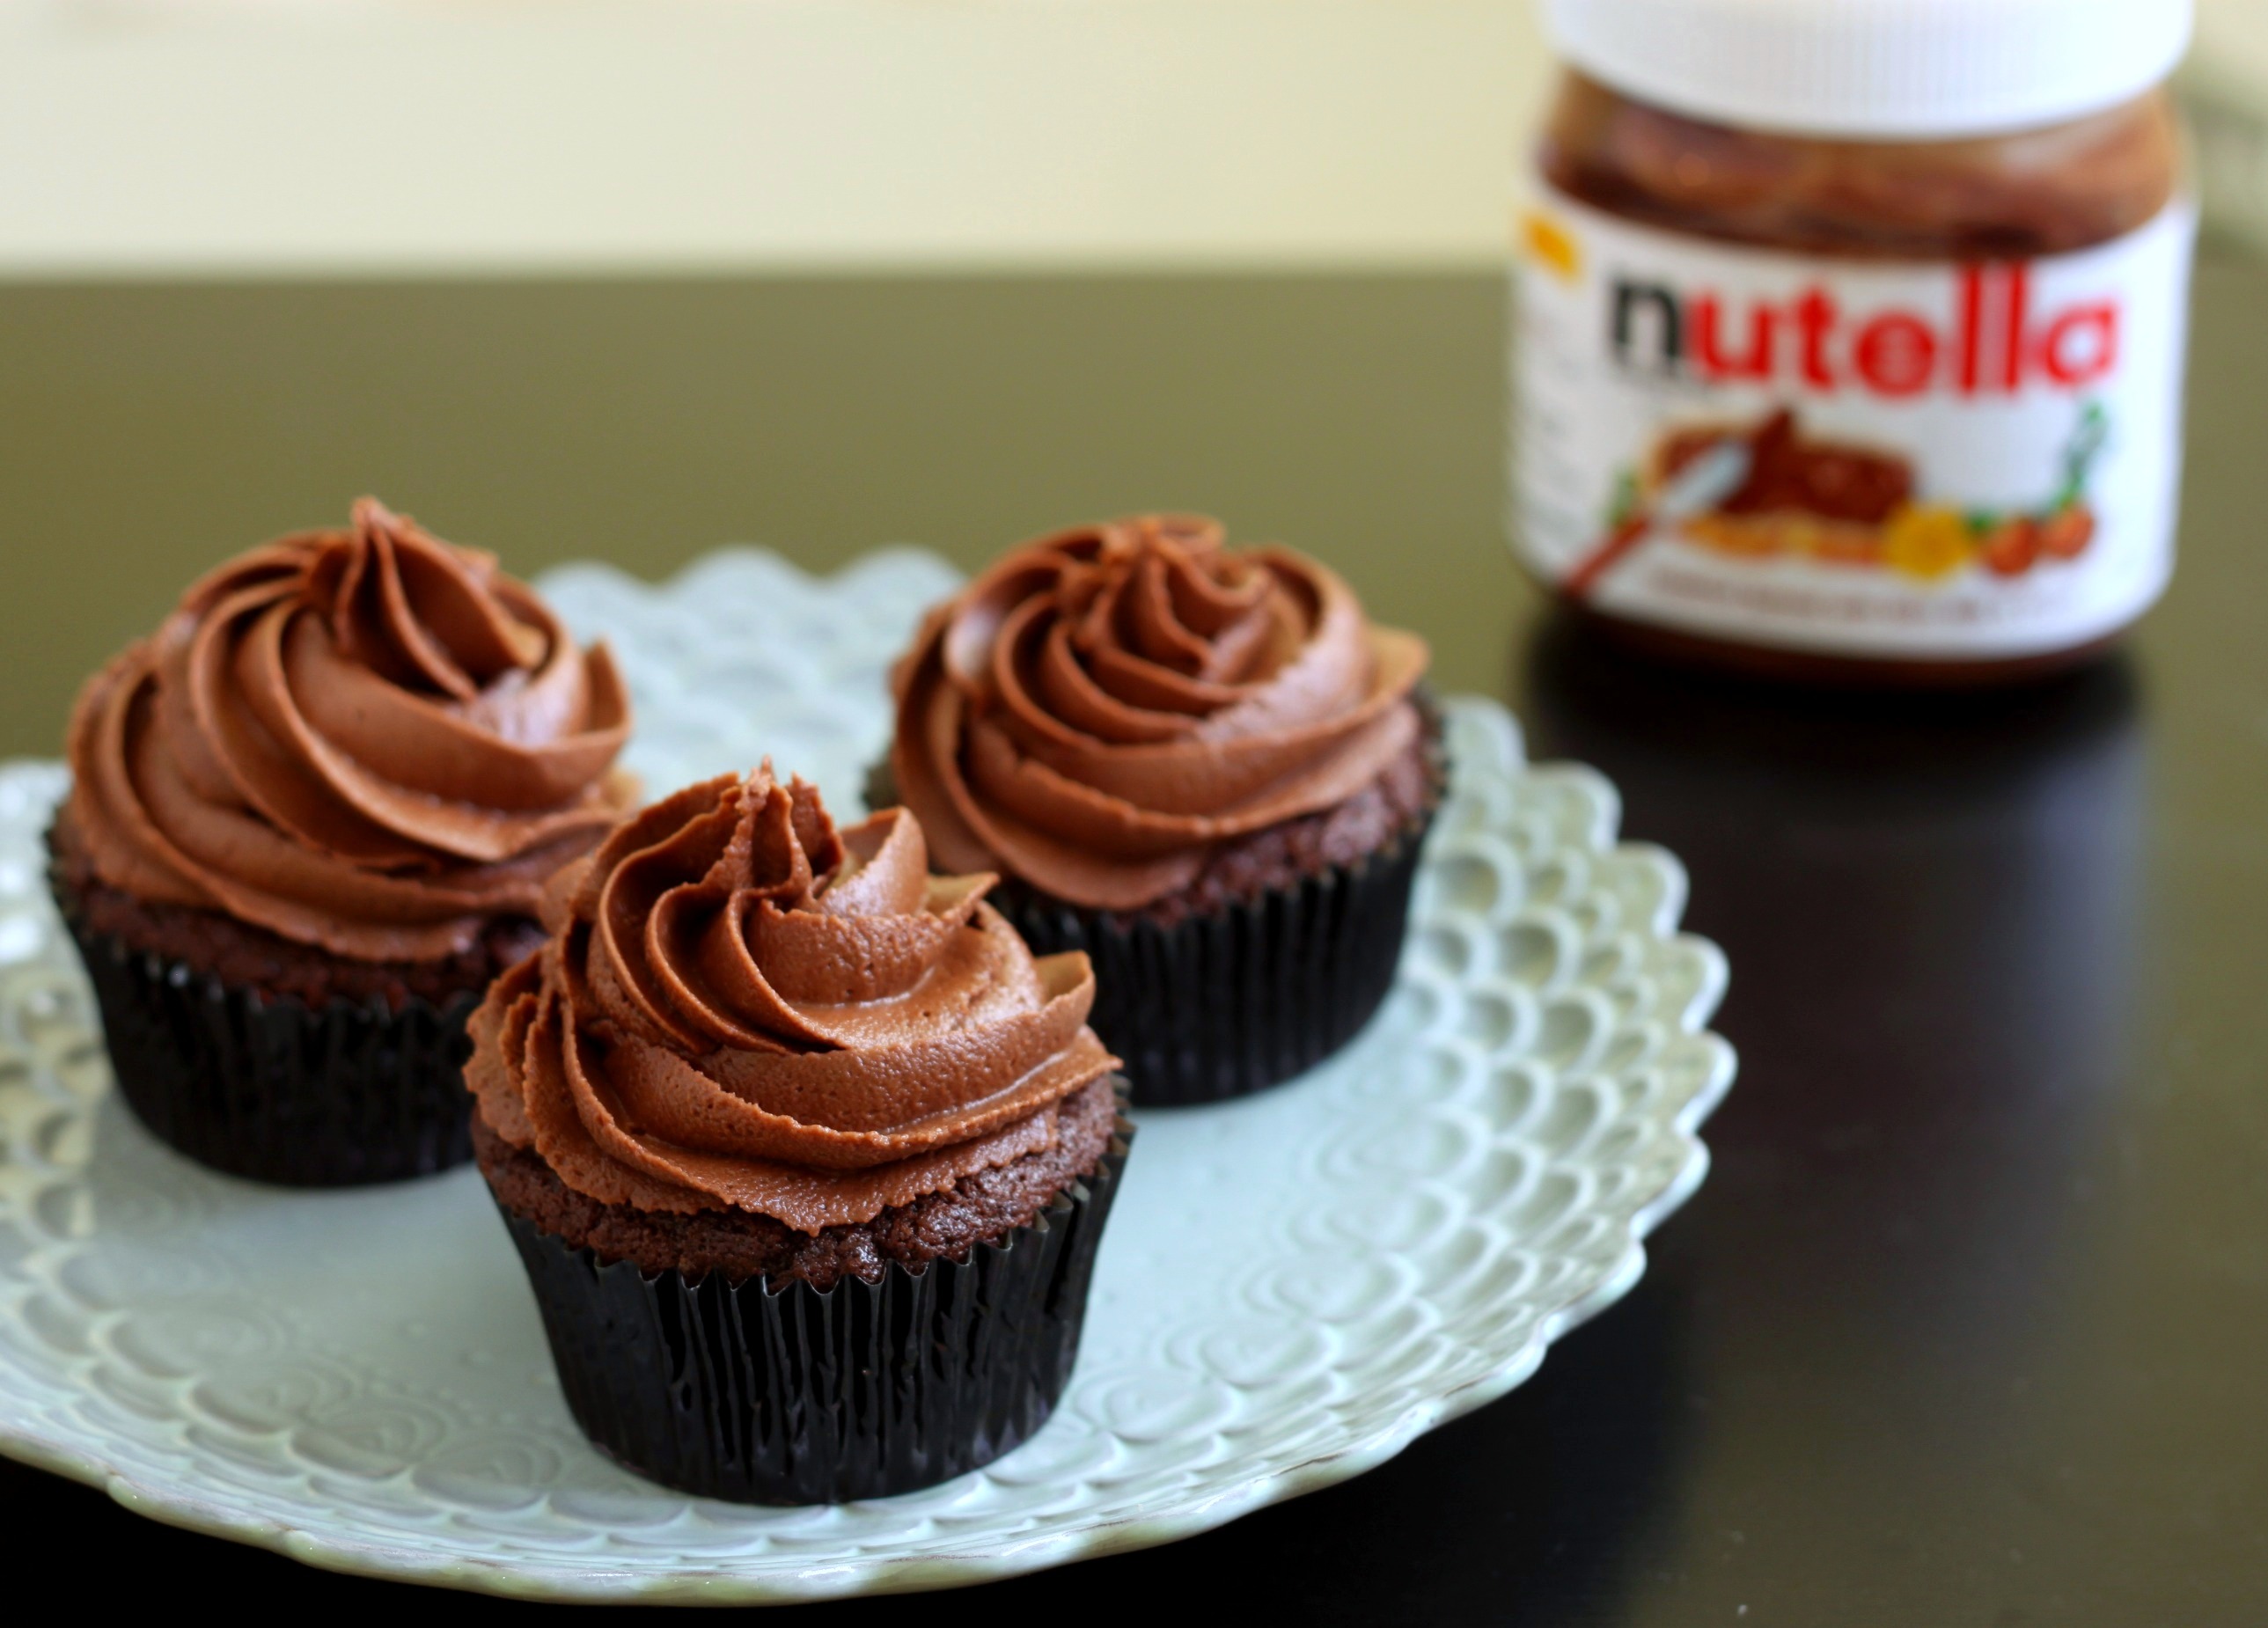
Chocolate Nutella Cupcakes

Hey, remember when I said I’d be posting healthy recipes in July? Ha! Since then I’ve shared recipes for mojito popsicles, chocolate cupcakes, blood orange sorbet, and now chocolate Nutella cupcakes (also, next up: carrot cake cupcakes). So, lesson learned: don’t listen to me and don’t expect anything healthy when you visit this blog!

These cupcakes were made in honor of my 300th Facebook fan, Rachel. I actually know Rachel – she was my student intern last year. I knew she was a big fan of my desserts so to celebrate hitting a big number on Facebook, I decided to bake her something special. She asked for cupcakes and told me that she likes chocolate and Nutella.
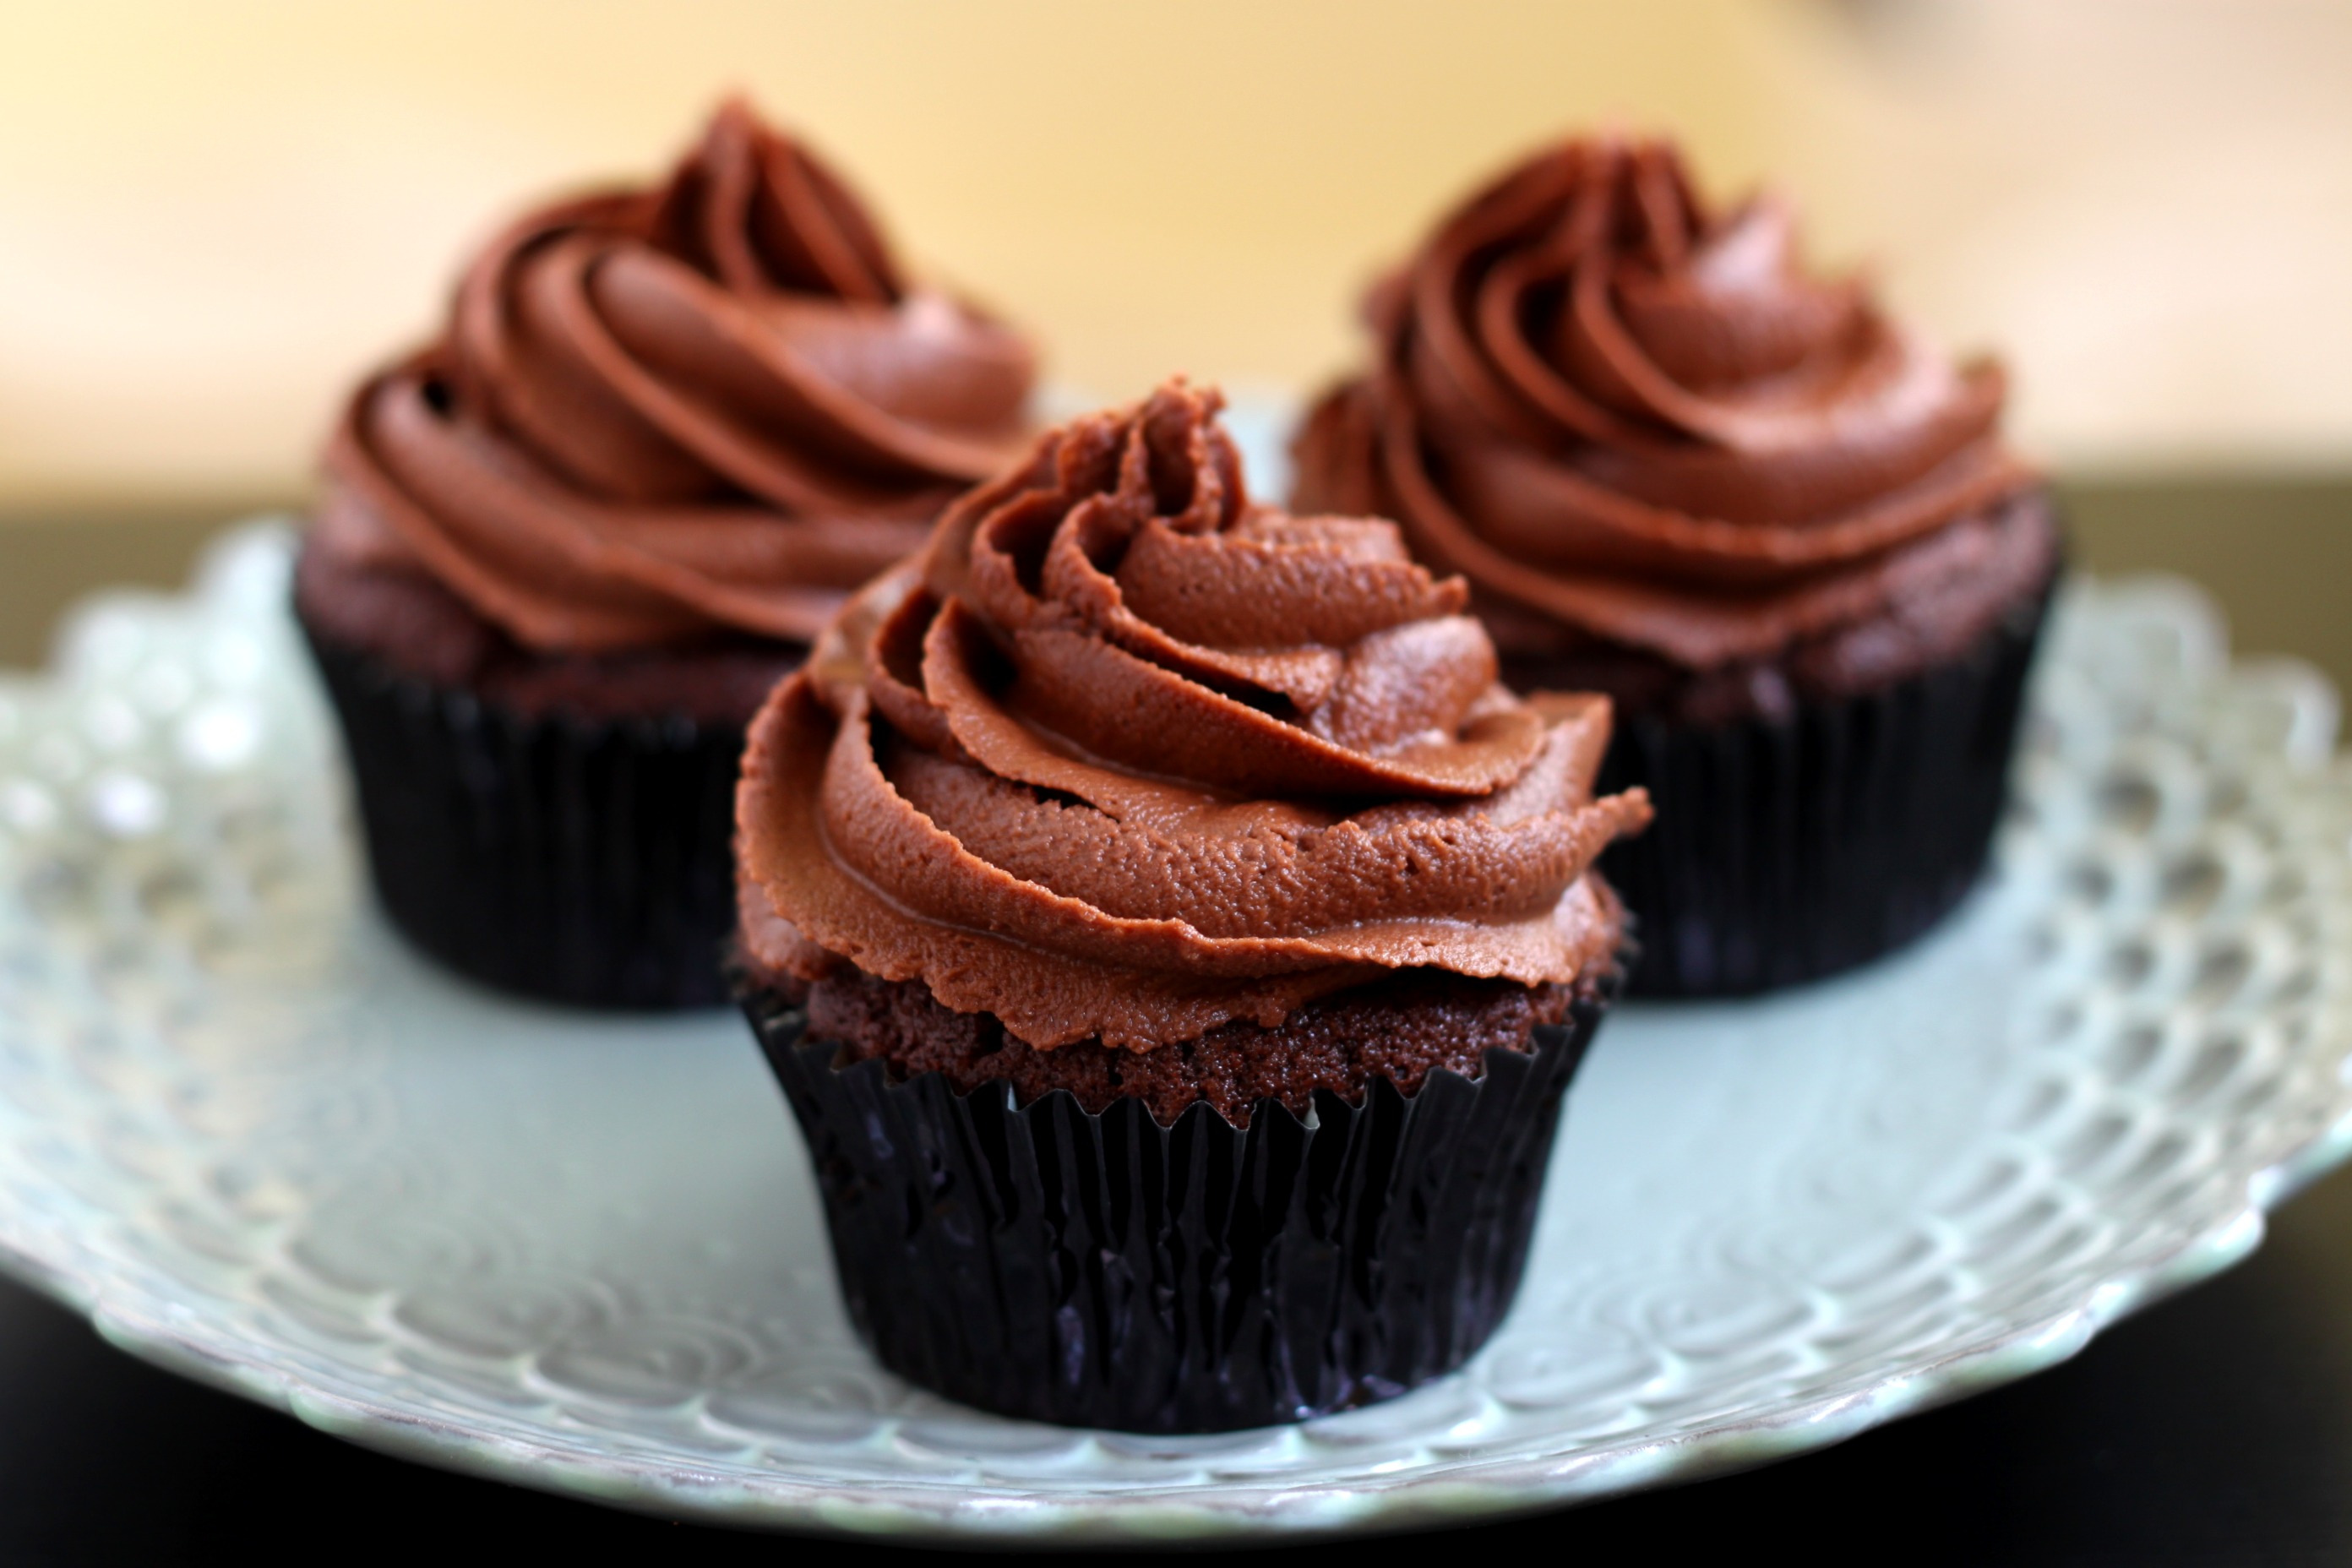
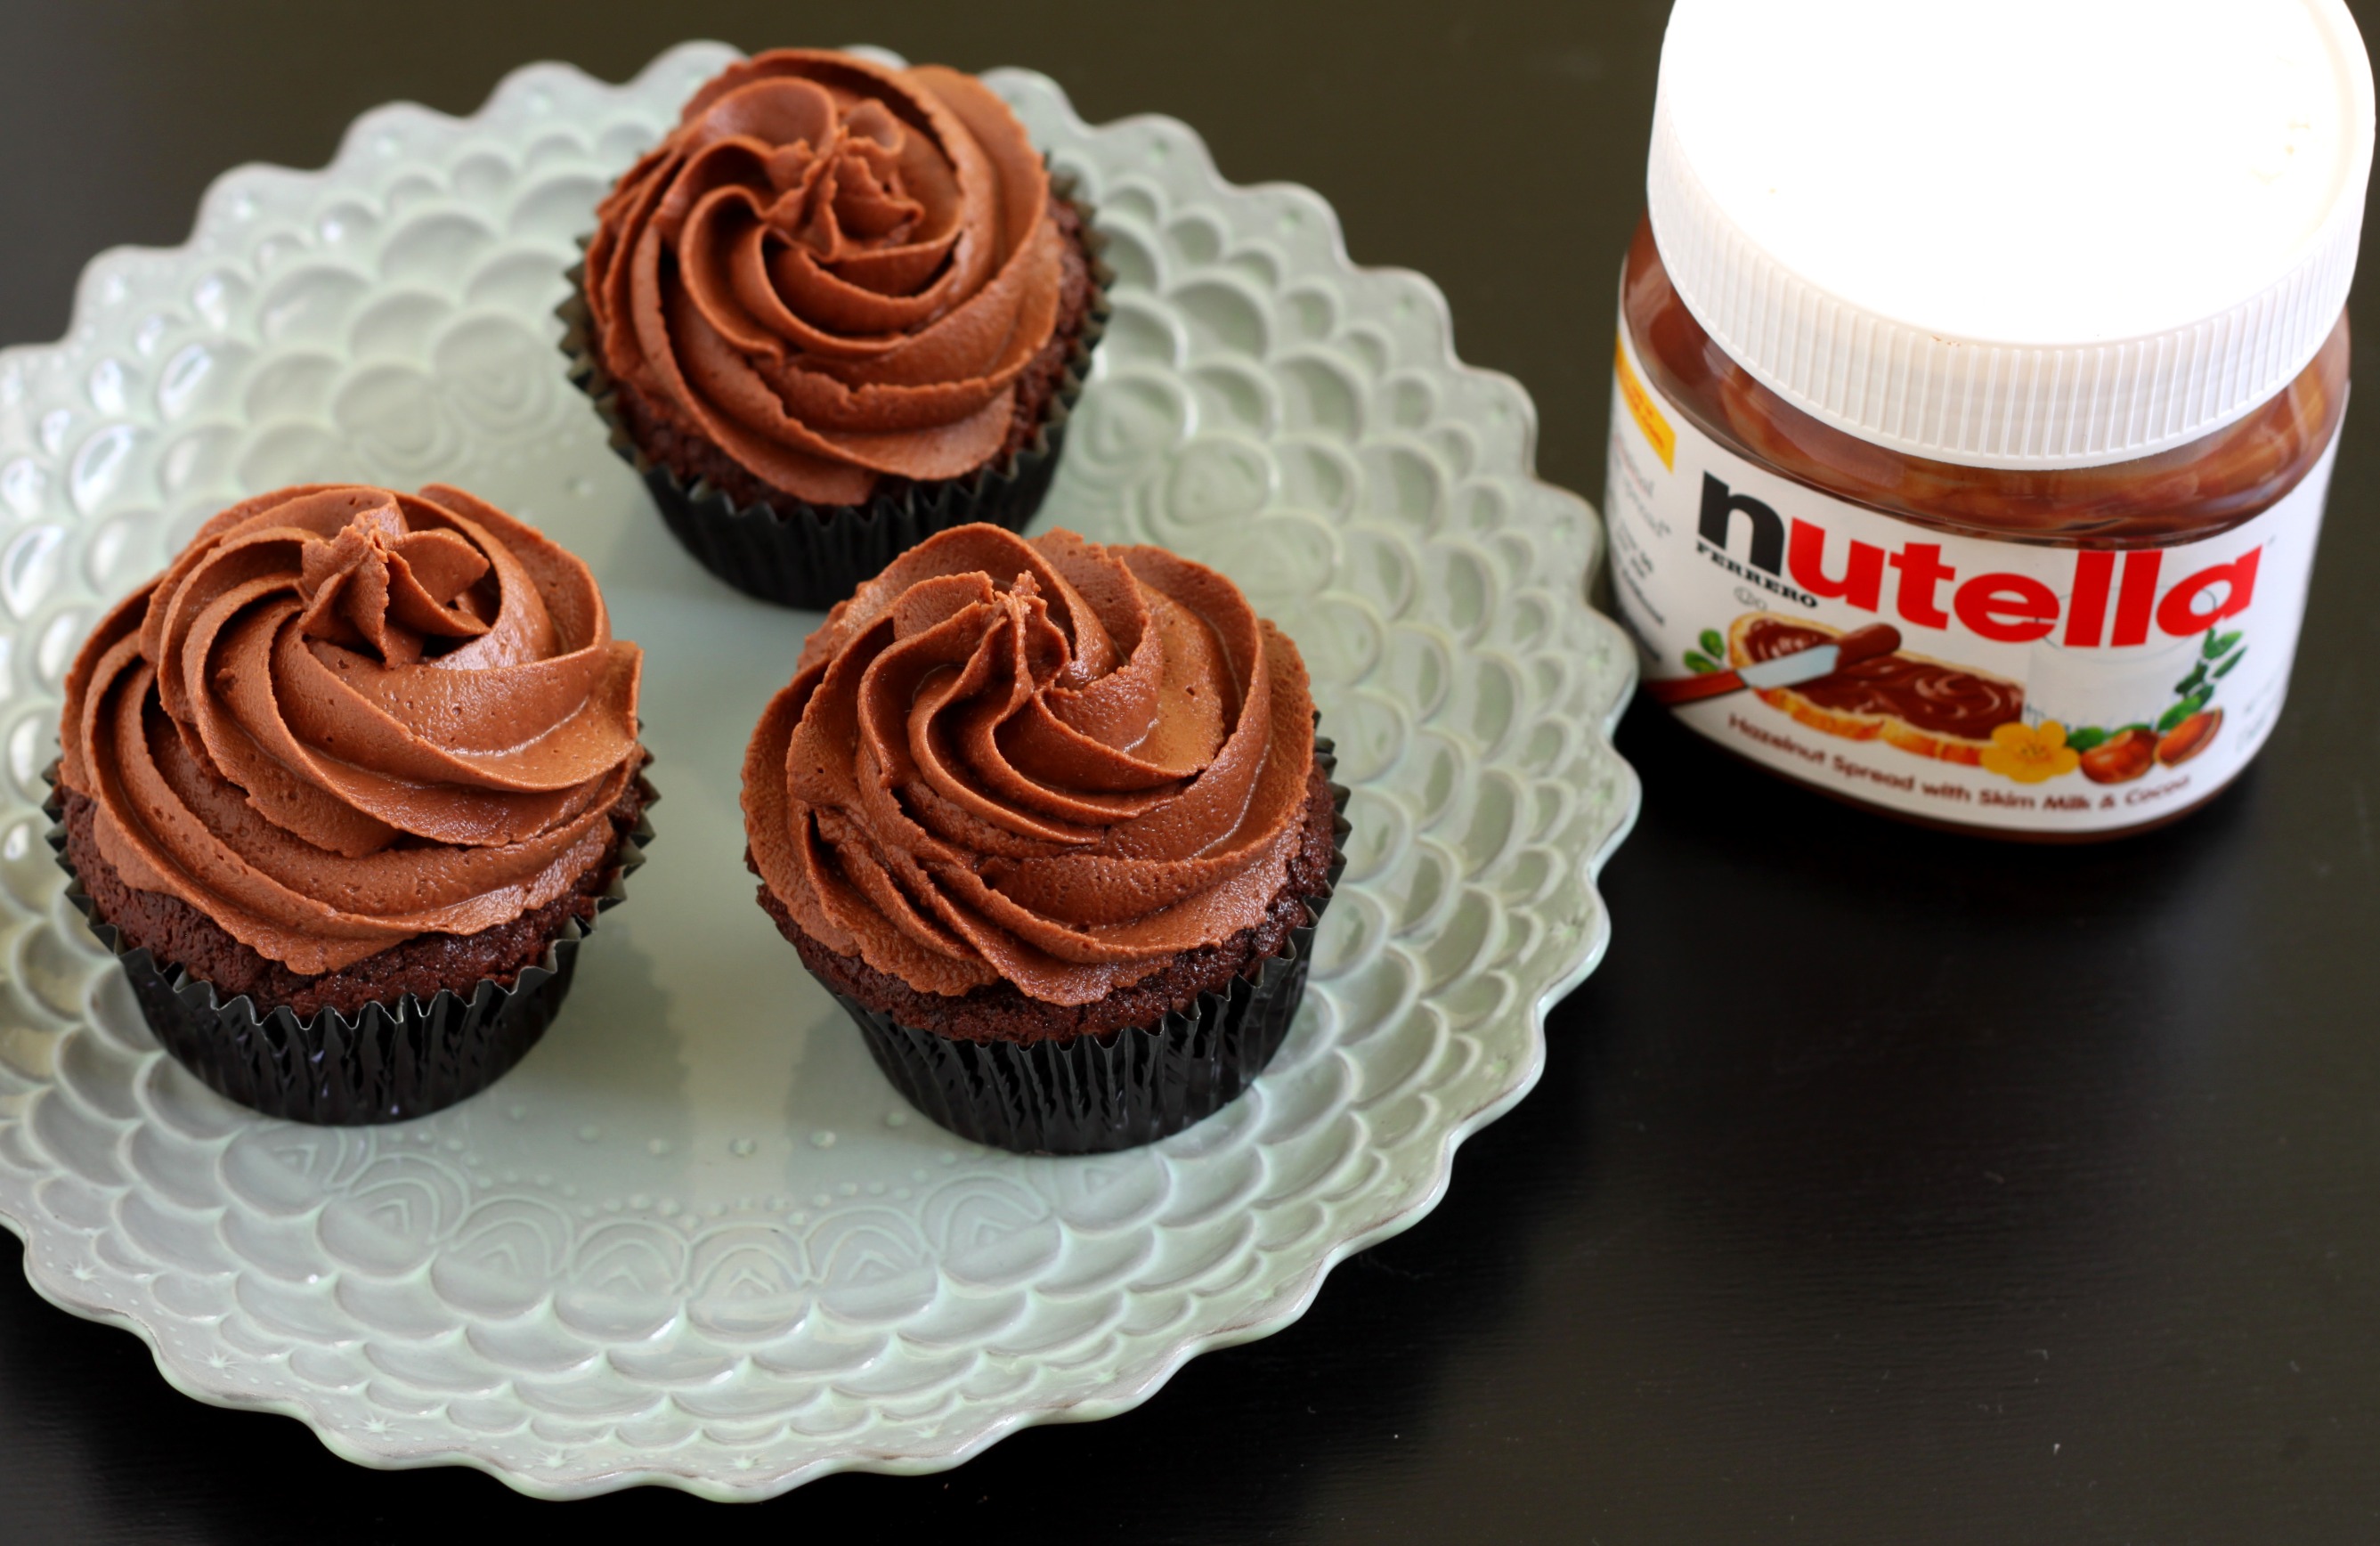
I took the “better than sex” chocolate cupcakes (think moist, very chocolatey cake) and topped them with my own Nutella buttercream. Other recipes use a little Nutella with more butter and powdered sugar, but that just didn’t do it for me. I ended up using that entire jar that’s in the photos. It was perfect: creamy, thick frosting with the distinctive flavor of the hazelnut chocolate spread. I ate one (you know – just to make sure they were okay) and was in chocolate/Nutella heaven. Good thing I had these earmarked for someone else – I could’ve eaten them all!
Thank you to all my fans, subscribers, supporters, and readers. You all make blogging fun and worthwhile. Every comment, “like,” new subscribe, Twitter mention, etc. makes me smile. I love hearing your feedback, what you think of a recipe or photo and how it goes when you try one of my recipes. You guys are amazing!

Recipe:

“Better than Sex” Chocolate Nutella Cupcakes
Adapted from Cupcake Project and Chockylit
Makes 15-16 cupcakes
  • 1/2 C butter, room temperature
  • 1 1/4 C sugar
  • 2 large eggs, room temperature
  • 3/4 C flour
  • 1/2 t baking powder
  • 1/4 t baking soda
  • 1/4 t salt
  • 1/2 C unsweetened cocoa powder
  • 1/2 C milk
  • 1 t vanilla
Preheat oven to 350°F.
In a mixing bowl, beat butter until softened and smooth. Add sugar and beat for a few minutes, until light and fluffy. Add eggs one at a time, beating after each until well combined.
In a small bowl, combine flour, baking powder, baking soda, salt and cocoa powder. In a separate small bowl, combine milk and vanilla.
Add about 1/3 of dry ingredients to butter and sugar and mix until combined. Add about 1/2 of wet ingredients to mixture and mix until combined. Continue alternating dry and wet, mixing in between (finish with the remaining dry ingredients).
Fill cupcake tins about 1/2 full (don’t overfill – you only need 1/2) and bake for around 20-25 minutes, until a toothpick inserted in center comes out clean. They will come out flat.

Nutella Buttercream
  • 1/2 C butter, room temperature
  • 1 C Nutella
  • 1 C powdered sugar, sifted
  • 1-2 T milk
Beat butter until smooth. Add Nutella and beat together until thoroughly combined. Slowly add powdered sugar, mixing until combined. Add 1 tablespoon of milk. Add additional milk or powdered sugar as needed to reach desired consistency.   http://www.52kitchenadventures.com/2011/07/18/chocolate-nutella-cupcakes/

Double Chocolate Gingerbread Cupcakes

So, it turns out I’ve been on a bit of a gingerbread kick lately…
I love sugar and spice and everything nice, and gingerbread (in any form) is such an old-fashioned treat that I can’t seem to get enough of (even though I seem to eat the entire year’s worth between December 1-December 31st). I make some form of gingerbread every year over the holidays, but yet it never dawned on me that pairing it with chocolate would be so delightful and that it would just all make so much sense…until, of course, I made Gingerbread Swiss Meringue Buttercream. Being an SMB (or SMBC) lover, I couldn’t resist tossing some gingerbread spices into a big fluffy batch of Brown Sugar Buttercream, making it the gingerbread variation, for swirling onto holiday cupcakes. I suddenly seem to be using Brown Sugar Buttercream often lately, because it’s such a wonderful base for so many variations (such as here and for the deliciousness that was Peanut Butter Buttercream. The thing was, I knew I wanted to make little gingerbread cookie toppers, and if I had made gingerbread cupcakes to go along with the gingerbread buttercream, that would have made them triple gingerbread cupcakes which seemed a bit, well, spicy (although, that may not be a bad thing–I will try this and get back to you). For this round, adding some rich dark chocolate to the idea just felt right.
Then I remembered how much I’d wanted to try the chocolate cupcake recipe from a book I recently received: Making Cupcakes with Lola, which was written by the talented baker duo from Lola’s in the UK. This is one of the loveliest cupcake books I’ve read, and I’ve studied it for weeks–the cupcakes are a mix of classic and creative and the gorgeous photography & styling just brings it all to life. I am eager to try many of their more unusual, or as they call it, “over the top” cupcakes (think Masala Chai Tea cupcakes, Gingerbread Latte cupcakes and more), but I couldn’t resist starting with their classic chocolate cupcake recipe. It stood out to me because they use both melted chocolate and cocoa powder and calls for no other liquid ingredient aside from 4 eggs. I was kind of intrigued! It’s a lighter, fluffier chocolate cake as opposed to the more fudgy oil-based chocolate cake I often use, which was a fun change, and I loved the double chocolate result.
So once I had my heart set on dark chocolate & gingerbread cupcakes, it dawned on me that my little gingerbread cookie toppers simply must be dipped in the finest dark chocolate–just makes good sense, right? I actually love making tiny gingerbread folk versus the standard size, because they are so cute and they are a perfect kid-sized treat. I was pretty excited when I remembered Reese having a teeny tiny house cutter in her playdough tool bin that was the perfect size for little chocolate gingerbread house toppers. So then we had a wee gingerbread girl and her wee gingerbread house. As far as we were concerned, it was kind of awesome. Why do things like this excite me so much? I’ll never know.
I hope you’re having a wonderful Saturday filled with holiday baking and hopefully, for your sake, no shopping! Personally, I like to keep the circus element of my day in our own four walls at this time of year, just as I am today. This thought would comfort me, if it weren’t for the fact that I have barely started my holiday shopping. Minor detail!
I’ll be back very soon with another holiday delight!
P.S. I’m pretty sure we’d jingle Santa’s bells if we left him a plate of these and a tall glass of milk. Maybe we could even add a pretty wrapped box of the chocolate dipped gingerbread cookies for his elves?
Double Chocolate Gingerbread Cupcakes          {click to print}
Double Chocolate Gingerbread Cupcakes = Lola’s Chocolate Cupcakes + Gingerbread Swiss Buttercream + Chocolate-Dipped Gingerbread Cookie Toppers
Lola’s Bakery Chocolate Cupcakes
*written (with permission) as it reads in the book, Making Cupcakes with Lola
Ingredients
100 g/3 1/2 oz dark bittersweet chocolate, chopped (I used Callebaut Dark Chocolate Callets)
175 g/1 1/2 sticks butter, cubed
225 g/1 cup plus 2 tablespoons (caster) sugar
4 eggs
100 g/3/4 cup self-rising flour
2 1/2 tablespoons cocoa powder (I used Cacao Barry Extra Brute Cocoa Powder)
a pinch of salt
Method
Preheat the oven to 180°C/350°F/Gas 4.
1. Put the chocolate and butter in a heatproof bowl over a pan of simmering water. Do not let the base of the bowl touch the water. Heat, stirring, until the chocolate melts and you have a smooth, glossy mixture. Remove from the heat and stir in the sugar. Let cool for 10 minutes.
2. Now beat with an electric hand mixer for 3 minutes. Add the eggs, one at a time, beating for 10 seconds between each addition.
3. Sift the flour, cocoa and salt into the bowl and beat until blendid.
4. Divide the mixture between the muffin cases. Bake in the preheated oven and let cool completely on a wire rack before decorating.
Sweetapolita’s Notes
*Caster/castor sugar is also known as superfine sugar. You can create your own superfine sugar by substituting regular granulated sugar and processing it in a food processor until very fine.
**As with any cake or cupcake recipe I bake, I used room temperature eggs (not cold).
***I filled the cupcake liners a little more than I typically do, as I divided the batter evenly among the 12 liners, as directed. They were just over 2/3 full. I typically don’t prefer a ”muffin-top” cupcake, but because I knew I wanted a wider cupcake to hold very billowy swirls of buttercream, I went with it. I may never look back.
Gingerbread Swiss Meringue Buttercream
Yield: ~5 cups, enough for filling and frosting an 8-inch round cake, or frosting 12+ cupcakes.
Ingredients
5 large egg whites (~150 grams/5 ounces)
1 1/4 cup (250 grams/8.5 ounces) dark brown sugar (you can also use light brown sugar)
1 1/2 cups (3 sticks,  340 grams/12 ounces/3/4 lb) unsalted butter, softened and cut into cubes
1/2 teaspoon ( mL) pure vanilla extract (I use Nielsen-Massey Vanillas 8-oz. Madagascar Bourbon Vanilla Extract)
1/2 teaspoon ground ginger
1/4 teaspoon ground cinnamon
a pinch of ground nutmeg
a pinch of salt
Method
1. Wipe the bowl and whisk attachment of an electric mixer with paper towel and lemon juice, to remove any trace of grease. Add egg whites and brown sugar and simmer over a pot of water (not boiling), whisking constantly but gently, until temperature reaches 140-160°F, or if you don’t have a candy thermometer, until the sugar has completely dissolved and the egg whites are hot, about 5 minutes if you used room temperature egg whites. About 8+ minutes if they were cold.
2. With whisk attachment of mixer, begin to whip until the meringue is thick, glossy, and the bottom of the bowl feels neutral to the touch (this can take up to 10 minutes or so and is so important–never add butter to warm meringue). Switch over to paddle attachment and, with mixer on low speed, add softened butter in chunks until incorporated, and mix until it has reached a silky smooth texture (if curdles, keep mixing on medium-low and it will come back to smooth).
3. Add vanilla, salt and spices, continuing to beat on low speed until well combined.
Sweetapolita’s Notes on Swiss Meringue Buttercream:
* Can make buttercream ahead and keep in an airtight container in refrigerator for up to one week, leaving out at room temperature when needed, re-whipping in mixer for 5 minutes.
** Can freeze for up to 6-8 weeks. To thaw, place on counter overnight, and rewhip for 5 minutes with paddle attachment in an electric mixer.
***If not satiny enough upon rewhip, take 1/3 of buttercream and microwave in a microwave-safe container for ~8 seconds, then add back to mixing bowl and remix with remaining buttercream.
****For more detail about making Swiss Meringue Buttercream, you can find my FAQ here and photo tutorial here.
Chocolate-Dipped Gingerbread Cookies
1. Bake your favourite gingerbread cookie dough, and cut desired shapes–I prefer bite-size cookies in general, especially when using them for cupcake toppers. For these cookies, I tried Martha’s Molasses-Gingerbread Cookies recipe, and I followed it to the letter. I love them because they are dark and have a very deep molasses taste. The dough is gorgeous–just note that you will likely need to add quite a bit of flour while rolling and you will need to flour your cutter often, otherwise it is quite sticky. Once baked, let cookies cool on wire rack. *I found my little house and gingerbread doll cutters in my little girl’s playdough tool box, so don’t feel you have to stick with traditional cookie cutters.
2. Melt some (depending on how many cookies you are covering) quality chocolate in the microwave, and if you follow this easy tempering process (when, using the microwave, your chocolate will be tempered in seconds, which is how we get the chocolate to harden with a nice sheen. For these cookies, I used Callebaut Dark Chocolate Callets, which is rich, dark and perfect for covering cookies and is intended for melting down.
3. Dip cookies into chocolate using two forks (or if you have a chocolate-dipping fork), covering entire cookie, or even just half, depending on the look you want to achieve, letting the excess chocolate drip back into bowl.
4. Place on Silpat or wax paper-lined cookie sheet.
5. Place filled sheet in the refrigerator for about 20 minutes to set.
Place upon cupcakes or simply eat them as they are. Or both! Store at room temperature.  http://sweetapolita.com/2011/12/double-chocolate-gingerbread-cupcakes/