Labels

"Погребок"- заготовки на зиму(canning) (82) Afternoon Tea-recipes and tradtions (41) All about Sushi rolls and more (2) appetizers (61) Baby Shower (2) Barbecue (45) Beauty (29) Bread and pizza (67) Breakfast Sunday Brunch (18) Bridal Shower and Wedding (8) burgers sandviches and toasts (22) Cake decorating and gum paste flowers (144) Cake pops and balls (35) cakes (197) canning (31) cheesecakes (31) Chocolate (38) Christmas (102) Coffee and Latte Art (22) Coffee cakes pies sweet breads (74) cookies (226) Cupcake Muffin Пирожное (62) Decorated cookies tutorials (48) Decorating Easter Eggs (19) Dessert (46) Easter (52) Easter and Spring (29) eggplants (3) eggs (11) Father's Day (4) Fish and seafood (30) French cooking (14) fresh fruits (6) gingerbread (68) Healthy Eating (32) Homemade gifts (3) Hапитки (30) Italian food (39) jams and jellies (33) Jello salads and desserts (17) Kашки (4) Kонфеты и другие сладости (42) Kремы-Buttercream-Frosting (4) Kрымские блюда (14) Main course (36) Main Dish (53) meringues зефир marshmallow pastilage (40) Mexican-Spanish food (34) Mothers Day (7) Mяско (59) Nutella (5) Olive Garden recipes (3) oranges (3) Oriental food (8) Oформление салатов (41) Pasta (16) plums (2) Potluck (6) Poultry (31) pumpkin (19) Pецепты Джейми Оливера (5) Pецепты Сталика Ханкишиева (37) Quinoa (5) Risotto Jambalaya Плов Paella (27) salads (123) Sauces Dips and Spreads (38) Saving money in the kitchen (4) Side Dish- гарнир (15) Slow-Cooker (9) soups (105) Summer recipes (12) Table setting etiquette(Сервировка стола) (67) Tagine-cuisine of Morocco (13) Thanksgiving and Fall (46) Tатарская кухня (6) Tесто (17) Valentines Day (36) Video-рецепты (20) Блины блинчики и оладушки (44) блюда в горшочках (23) Блюда из курицы (60) Блюда из теста (56) булочки (103) Вкусности из детства (63) Вкусные местечки-Sweet places (7) Детский праздник (29) Заготовки-полуфабрикаты (44) заливное и холодец (13) Запеканки и омлеты (11) история блюд и кулинарные истории (24) Котлеты Тефтели Голубцы и Перчики (58) Мороженое-Ice Cream (15) овощные заготовки (18) пирожки чебуреки беляши и т.д. (42) Пляцок (2) рулеты мясные и овощные (36) Сосиски и домашние колбаски (26) Старинные русские рецепты (38) Творожная выпечка (13) Узбекская кухня и Среднеазиатская (66) Хворост Крепли вергуны Пончики (25)
Showing posts with label Italian food. Show all posts

Tuesday, May 15, 2012

Italian Easter Bread


Buona Pasqua!  I've made this Easter bread for years for my kids. It's a sweet bread, made with milk and sugar and has an Easter Egg in the middle! There's a lot of Italian recipes for Easter breads, some are savory and some are sweet. This one is fun.

Italian Easter Bread


for a printer friendly recipe, click here
Ingredients:
  • 1 package Rapid Rise yeast
  • 1.25 cups scalded milk, cooled to room temperature
  • pinch of salt
  • 1/3 cup butter, softened
  • 2 eggs, beaten
  • 1/2 cup sugar
  • 3.5 cups flour (approximate)
  • 1 egg, beaten with 1 teaspoon of water
  • 6 dyed Easter eggs
  • sprinkles
 
tip: the Easter eggs do not need to be hard boiled. They cook when the bread bakes. I usually just dye the eggs right out of the fridge, without hardboiling them. Saves time. Just be careful they don't crack!
Instructions:
In a large mixer bowl, combine yeast, warm (not hot) milk, salt, butter, eggs and sugar. Add about half the flour and beat until smooth with dough hook.   Slowly add the remaining flour to form a stiff dough. Don't worry about how much flour it ends up being, just keep adding until the dough is not sticky anymore.  Knead until smooth with either dough hook attachment or turn out on floured board and knead. Place in a greased bowl, cover and let rise in a warm place until doubled, about an hour.
Punch dough down, divide into 12 pieces. Roll each piece to form a 1 inch thick rope about 14 inches long and, taking two pieces, twist to form a "braid", pinching the ends,  and loop into a circle.
Place on a greased baking sheet. Cover and let rise until double, about an hour again. Brush each bread with beaten egg wash. Put on the sprinkles. In the middle of each bread ring, gently place an Easter egg, making an indentation with the egg.
Bake at 350 degrees until golden - about 20 - 25 minutes. Cool on rack.

** Note:  For an updated version of this bread, see my most recent Easter Bread post.  It's made with golden eggs and pearl sugar:
  http://theitaliandishblog.com/imported-20090913150324/2008/3/19/italian-easter-bread.html

10 Secrets for the Best Homemade Pizza Imaginable! (she: Patricia)

Anybody in the mood for incredible homemade pizza?

 I know, I know... you can't make pizzeria quality pizzas in your humble home oven, right?

Wrong, you can.

 
Look, no soggy bottom crust here. Oh yeah baby!

You want to make some, don't you? Uh huh, you know you do.

Okay, wipe the drool off your keyboard and pay attention. I'm going to share some of my pizza making secrets with you. You can thank me later :).


 Secret #1

Start by placing a baking stone on the 2nd lowest rack position in your oven and preheat it at 475F for an entire hour. I know that sounds like a long time, but trust me, you won't be disappointed.

A note on baking stones, aka pizza stones - this particular one is sold by Pampered Chef, but I have others that were purchased in department stores. They start off very light in color and darken with use. The darker they get, the more "seasoned" they become; developing a non-stick patina - like a cast iron pan. These stones are great for baking bread and cookies too. I highly recommend one for every kitchen.


Secret #2

I take my blob of risen pizza dough (recipe below) and press it into a 12-inch circle on a piece of parchment paper. This eliminates the need for cornmeal or flour on the bottom of your crust (which I find very icky).

Secret #3

Use a pizza peel to easily transfer the wet, sticky dough to the searing hot baking stone. To easily remove the crust from the oven, just grab a corner of the parchment and pull off the oven shelf, back onto your peel.

Secret #4

I "dock" my dough to keep from developing big air bubbles during the baking process. I use a fork to do this - poking holes all over the portion of the dough that will hold the toppings.


Secret #5

I prebake the naked crust for 7-10 minutes. Note how the undocked edges rose during baking, while the docked center did not.

Secret #6

I brush the edges of the crust with olive oil (I used garlic oil here).

Add your favorite jarred or homemade San Marzano Tomato Sauce and toppings. You'll add whichever toppings you like, but I'm a purist - plain ole cheese pizza for me. I do, however, have to doctor it a little bit to mimic the nyc pizzeria pies of my childhood (which just so happens to be my next secret).


Secret #7

I sprinkle a good healthy dose of dried oregano on top of that cheese. Again, trust me, this takes the pizza to an entirely new level. Now back into the 475F oven for another 7-10 minutes.


Secret #8

Oops, I forgot to get a picture of this step, but when you take your finished pizza out of the oven, brush the edges with a little more olive oil and a light sprinkling of garlic salt. In this particular case, I used garlic flavored olive oil and a sprinkling of Jane's Crazy Mixed Up Salt (great stuff). Don't worry, the crust will absorb the oil so your fingers won't get too greasy, and it helps to keep the edges from being too dry.


Hubby and the kids are pepperoni pizza fans. If hubby had his way, there would be 2 or 3 times more pepperoni on this pizza.


Secret #9

A while back I shared a tip about cutting brownies - you remember, use a plastic knife because the brownies won't stick to it? Well, apparently the Oxo people realized this works for pizza cutters too. Nothing worse than using a cutter that pulls all the stringy melted cheese off your pizza, so I purchased this cutter the second I saw it at the store. It works perfectly and leaves all that wonderful cheese in place.


Secret #10
(last one)

If you don't have a pizza peel to transfer your pizza to and from the oven, you can use a flat cookie sheet or an upside down sheet pan like the one I used above.

 
I hope you'll give try some of my secrets the next time you make homemade pizza. Enjoy!

ButterYum's Pizza Dough
makes one 12-inch pie

1 1/2 cups all purpose flour
1 teaspoons dry active yeast
1/2 teaspoon salt
1 tablespoons granulated sugar
1 tablespoons olive oil
1/2 cup plus 1 tablespoons tepid water, if using a bread machine to make the dough (use 110-115F water if using a stand mixer)

To make dough in a bread machine:
Add the ingredients to your bread machine following your manufacture's instructions. Mine says to add the water first, then olive oil, half of the flour, sugar, salt, remaining flour, and finally the yeast. Set the machine for the Pizza Dough cycle (about an hour in my machine).

To make dough in a stand mixer:
Heat water to between 110-115F; add sugar, and yeast. Proof yeast mixture for 5 minutes. Put dry ingredient into mixer fitted with a dough hook; add yeast mixture and olive oil. Mix on low until ingredients are moistened. Increase to speed 2 and knead for 5 -10 minutes.

To make dough in a food processor:
Add dry ingredients, yeast mixture, and olive oil to the work bowl fitted with either the dough blade or metal chopping blade. Mix until a ball forms, turn out onto a floured work surface and knead for 5 -10 minutes.

To make dough by hand:
Combine ingredients in a bowl until a ball forms, turn out onto a floured work surface and knead for 10-15 minutes.

To let dough rise: (this is a good time to preheat your oven to 475F) Place dough in a large oiled bowl and allow it to double in size; 30-60 minutes. Place risen dough onto parchment paper and press it into a 12-inch circle. Dock dough with fork. Prebake 7-10 minutes. Brush edges with oil; add toppings. Return to oven to bake an additional 7-10 minutes. Remove from oven and brush edges with oil again; sprinkle with garlic salt (lightly).

Notes:
You can substitute garlic oil/salt for olive oil/garlic salt.

My 2-pound bread machine can make a quadruple batch of dough. Alternately, my stand mixer can make consecutive double batches.

The unbaked dough will stick nicely to the parchment, but the prebaked dough might slide off, in which case you don't really need it anymore, so don't worry about it.

Enjoy!
~ Patricia  http://www.oneshetwoshe.com/2011/01/10-secrets-for-best-homemade-pizza.html?utm_campaign=Feed%3A+OrSoSheSays+%28Or+so+she+says.%29&utm_medium=feed&utm_source=feedburner

Tuesday, October 25, 2011

Prosciutto Ravioli


ravioli21

December 18th, 2009

I love this time of year to cook with friends and family. Assembly line cooking can be a ton of fun especially for people who are intimidated being in a kitchen. This ravioli recipe is super easy because it calls for wonton wrappers- which can usually be found in the produce section of your local market. However, if you’re Italian and pride yourself on making your own pasta don’t use the wrappers. Your family and friends will be insulted and you’ll never live it down!
This is not a heavy pasta dish. The light dumpling packages are filled with creamy ricotta, salty prosciutto and drizzled with a buttery, oregano glaze. If you have never stuffed ravioli before make sure your filling is dry and centered and the edges are completely sealed before it goes for a swim in heavily salted water.  This dish will delight all your holiday guests.
Prosciutto Ravioli
1 (15-ounce) container whole milk ricotta cheese
1 (10-ounce) package frozen chopped spinach, thawed, *squeezed dry*4 ounces thinly sliced prosciutto, chopped
2 large egg yolks
3/4 teaspoon salt
1/2 teaspoon freshly ground black pepper
48 wonton wrappers
1/2 cup (1 stick) butter
1 1/2 teaspoons dried oregano
Freshly grated pecorino
Whisk the ricotta, spinach, prosciutto, egg yolks, salt, and pepper in a medium bowl to blend.
Place 1 tablespoon of the ricotta filling in the center of a wonton wrapper. Brush the edge of the wrapper lightly with water. Fold the wrapper in half, enclosing the filling completely and forming a triangle. Pinch the edges to seal. Transfer the ravioli to baking sheets. Repeat with the remaining filling and wrappers. (Can be prepared up to 2 hours ahead; cover and refrigerate.)
Melt the butter in a heavy small skillet over medium heat. Add the oregano and stir 1 minute. Season, to taste, with salt and pepper. Remove from the heat.
Working in batches, cook the ravioli in a large pot of boiling salted water until just tender, stirring occasionally, about 4 minutes per batch. Transfer the ravioli to a large shallow bowl.
Pour the oregano butter over the ravioli and toss gently to coat. Sprinkle the pecorino over the ravioli and serve.
 Recipe via Giada

Recipe For Butternut Squash Ravioli


By: Helen Polaski
Butternut squash ravioli is an excellent pasta dish for diabetics or those who are interested in watching their waistlines. With only 82 calories per serving, and no fat, squash is low in calories yet high in fiber and filled with plenty of good-for-you nutrients.
Butternut squash ravioli can be reduced in calories even more if you use light cream, margarine instead of butter and low-fat cheese. The pasta dough, however, will pack on the calories, so take care how you make the dough or use wonton skins, which are about 15 to 20 calories per wrapper. The following recipe is enough for three servings. One serving of butternut squash ravioli with wonton skins is about 200 calories.
Butternut Squash Ravioli
Ingredients You Will Need:
4 tablespoons butter, melted
2 cloves garlic, crushed
3 tablespoons shallots, minced
1 cup butternut squash puree
½ teaspoon salt
½ teaspoon pepper
½ cup grated Parmesan cheese
2 tablespoons heavy cream
Fresh sage leaves, chopped
Fresh parsley leaves, chopped
24 wonton skins, or pasta from following recipe
2 tablespoons fresh sage, chopped
¼ cup butter, softened
Heat the butter in a skillet, and sauté the garlic and shallots until tender. Add the squash, and mix well. Salt and pepper as desired. Blend in the cheese and cream. When the mixture is thoroughly blended, add the chopped sage and parsley leaves. Place one scoop on one side of a wonton wrapper and fold over, sealing the edges. Cook the pasta in boiling water for about three minutes. Mix the fresh sage into the ¼ cup of softened butter, and spread this sage butter sauce over the raviolis. Serve with garlic toast.
Making Ravioli Pasta
When making ravioli pasta from scratch, you will need several different tools. If you don't have a ravioli pasta maker, opt for a small plastic drinking cup to cut out the pasta. A pasta maker or ravioli maker is ideal, of course, but using the open end of a cup works just as well. Have a bowl of water and a pastry brush on hand to help seal the edges.
Basis Pasta Dough Recipe
Ingredients You Will Need:
2 to 3 eggs
½ teaspoon salt
2 to 3 cups white flour
2 tablespoons water (optional)
2 tablespoons vegetable oil (optional)
http://www.life123.com/food/italian-food/ravioli/butternut-squash-ravioli.shtml
This recipe will make about 24 raviolis. Mix the first four ingredients with a fork. Add the flour slowly, 1 cup at a time, or place a mound of flour on a clean countertop, make a well in it and then dump the ingredients into the well. To get the gluten working, knead the dough for about 7 minutes. Roll out the dough with a rolling pin to about ⅛-inch thickness. Cut the raviolis out with the open end of a small glass, place 1 teaspoon of filling on each dough circle and add another circle over the filling and seal. If necessary, add water to the edges to seal.    

Saturday, September 3, 2011

Tomato Basil Bisque Soup


http://www.jensyummyfun.com/2009/10/tomato-basil-bisque-soup.html
A great friend of mine made this UNBELIEVABLE soup for our Super Saturday last weekend and it was A-M-A-Z-I-N-G! Thanks Dalana!


1/2 c. butter
2 cloves garlic, minced
1/4 c. yellow onion, finely diced
1/4 c. leeks finely diced (white parts only)
1/4 c. carrots finely diced
1/4 c. celery finely diced
1/2 c. flour
2 c. chicken or vegetable broth
2 c. cream
3/4 teas. worcestershire sauce
1-(15 ounce) can Italian style crushed tomatoes
1 Tblsp. honey
salt and pepper to taste
3 Tblsp. basil, coursely chopped
3/4 teasp. rice wine vinegar
3 Tblsp. basil, julienned

In a medium saucepan melt butter. Add garlic, onions, carrots, leeks, and celery then cook until tender. Add flour to make roux, cook the flour for 2 minutes. Remove from heat and add broth, cream, and worcestershire sauce. Return to heat add tomatoes, and honey, let simmer for 20 minutes. Mix in salt and pepper, basil and rice wine vinegar, then continue to simmer for another 20 minutes.  You can blend soup with a immersion blender or put it in a food processor for a creamy soup or leave chunky.  Serve with julienned basil.  

Tomato Basil Bisque

Tomato Basil Bisque  Description:
This is the most delicious tomato basil bisque recipe I've found! You'll have your guests raving all over it and begging for the recipe! Freezes very well, too.   

Ingredients

8
large tomatoes
2
small cans V8 (or 1 large can)
15+ fresh basil leaves
1
pint whipping cream
1/4
lb. butter
salt and pepper

Directions

1.
http://friendseat.com/Tomato-Basil-Bisque-Recipe
Boil all tomatoes for about 10 min. until you see the skin crack. Rinse them in cold water, then peel and core them. Put them back into the stockpot, add V8 and all of the basil leaves and bring to a boil. Turn down and let simmer for about 30 min. Put hand blender directly into stockpot and puree your tomato mixture. (If you don't have a hand blender, you can put increments of the mixture into a blender, but it takes a little more time and can be hot and messy.) Stir in all of the whipping cream and butter. Add salt and pepper to taste.   

Monday, May 16, 2011

creamy italian chicken


This is an easy and yummy kid friendly crock pot recipe that I got from Liz. You can add broccoli, or any other veggies....enjoy!
2 pounds boneless, skinless chicken breasts
1/4 cup butter, melted
8 ounce cream cheese, softened
1 10 ounce can condensed cream of mushroom soup or chicken soup
1 0.7 ounce package ZESTY Italian dressing mix
1/2 cup water

Cut chicken breasts into strips and place into a 3 to 4 quart crock pot. In a medium bowl, combine melted butter, softened cream cheese, soup, Italian dressing mix and water and stir until blended. Pour over chicken in crock pot. Cover and cook on low for 6 to 8 hours. Stir well, then serve over hot cooked egg noodles, rice or my boys favorite....toast cut into bite size squares.   http://whiskusaway.blogspot.com/search/label/Main%20Course?updated-max=2009-07-30T09%3A19%3A00-06%3A00&max-results=20

Wednesday, April 6, 2011

Паста: la cima di rapa


Не так давно pratina предложила мне приготовить пасту, используя верхушки рапы. Я про такое растение и слыхом не слыхивал, поэтому крайне заинтересовался. Вот так и появился этот пост.

( Read more... )

Курица, тушенная по-охотничьи (pollo alla cacciatora)


Автор: Няма
Курица качиаторе, похоже, хорошо известна в Британии. Её можно купить в виде полуфабриката в супермаркетах, в отделах итальянской кухни (честно говоря, ничего такого в этих полуфабрикатах нет). Но вот если приготовить это блюдо со всем старанием и любовью у себя дома, вы почувствуете разницу. Качиаторе значит “охотник”. Должно быть, такое блюдо готовит жена охотника для своего усталого, но милого парня, когда он возвращается домой после целого дня в лесу.
Отличное блюдо для больших сборищ и вечеринок, готовится в духовке, не требуя особого внимания. © Джейми Оливер


Баклажаны по-пармски

Классический рецепт севера Италии. Уложите баклажаны слоями, чередуя с пармезаном и помидорами, и у вас получится непередаваемо вкусное блюдо. Подавать к столу можно и с самым разным мясом, и с рыбой. Один из трюков, к которым я прибегаю, готовя это блюдо, – запекание баклажанов на гриле, чтобы они стали мягкими внутри. Я думаю, это лучше, чем обжаривать их в масле, где они впитывают слишком много жира. © Джейми Оливер

Friday, April 1, 2011

Печенье Амаретти


АмареттиAmaretti di Saronno - известное на весь мир итальянское печенье. Его часто подают к каппучино в итальянских кофейнях. Мы же попробуем приготовить вкусное миндальное печенье дома.

Вам потребуется для приготовления 30 штук:

- 250 г очищенного миндаля
- 1 ч. л миндальной эссенции
- 200 г сахара
- 4 белка
- 1 ст. л сливочного масла
- 1 ст. л муки
- сахарная пудра для посыпания
Читать далее

Monday, March 28, 2011

Italian Wedding Soup

by farmgirl
italian-wedding-soup
I’m amazed by how many people haven’t heard of this soup. Wha-a-at?? Crazy talk, people! Crazy talk! This is one those throw-together feel-good soups (think chicken noodle) that can be made ultra-quickly and is uber-easy. (Is that enough hyphens for you? Good.) My original recipe comes from Penzeys Girl’s mom. (She also introduced me to stuffed peppers–that woman needs to write her own cookbook.) I’ve tinkered a bit, using things I usually have on hand but like I said, its a throw-together soup. Play with it; make it yours.
  • 1 onion, diced
  • 2 tsp. minced garlic
  • 1 cup sliced baby carrots
  • 1 stalk celery, diced
  • 1 tsp. olive oil
  • 1/2 tsp. dried parsley
  • 8 cups fat-free chicken broth (or a mix of broth and water if you don’t want it too salty)
  • 1/2 cup dry orzo
  • 4 oz. fresh spinach, sliced
  • 1/2 lb. lean ground beef (I used ground turkey for the soup in the picture)
  • 1/4 cup Eggbeaters
  • 3 Tbs. dry seasoned bread crumbs
  • 1/2 tsp. dried parsley
  • 2 Tbs. finely diced onion
In large soup pot, saute onion, celery, carrots and garlic in olive oil. When the onion becomes translucent and the carrots begins to soften, stir in the parsley. Cook until fragrant, about one minute, then add broth. Stir in orzo and spinach. To make the meatballs, combine the last five ingredients and roll into marble sized balls. Bring soup to a rapid boil and drop in the meatballs. Gently stir (those meatballs tend to be wallflowers!) for a couple minutes, then reduce heat to medium. Continue to cook until meatballs are done, about 15 minutes.
Serves: 10 WWP: 3   http://farmgirlsworld.wordpress.com/2008/11/13/italian-wedding-soup/

Friday, March 25, 2011

Восхитительный итальянский хлеб!

Название смешное - "комнатные тапки", "тапочек без задника".
А сущность прекрасная - хрустящая корочка и воздушный пористый мякиш!

ЧИАБАТТА


 (400x358, 75Kb)  http://blog.kp.ru/users/735975/rubric/232982/

Thursday, March 24, 2011

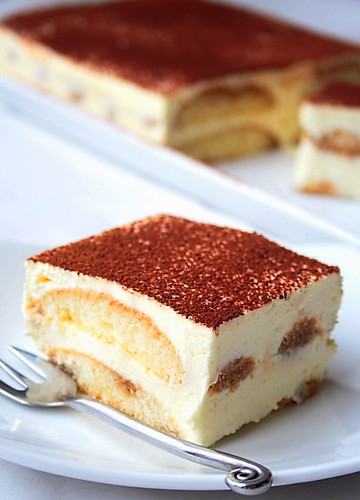
Tiramisu-light as air

Tiramisu

October 05, 2009:
Thank you so much for visiting, and your continued support, even in my absence!
I have taken on a career that requires a lot of work, and a lot of time, so I am still unable to return to the scene, and mix something up... I do, from time to time, check in to see what you all are doing, and I miss being part of your world actively.
Hope to return soon, at least on a monthly basis, till then, please enjoy Cafe Chocolada!
-Melita-

I have recently made this awesome light as air Tiramisu, based on a recipe from Masatera of “Recepti iz moje biljeznice” (Recipes from my notebook), and just slightly edited to what I had available here. It is not based on a traditionally used mascarpone cheese, but rather I have used Philadelphia whipped cream cheese, and got this luscious cream, which make you feel like you are eating sweet delicious air!

Tiramisu

2 packages of lady fingers, the soft kind
Strong coffee to soak them, but not over soak
1 pint of heavy whipping cream
1 packet whip it, whipped cream stabilizer
200g of Philadelphia whipped cream cheese
150g, or as much as you like, powdered sugar
1 teaspoon pure vanilla extract
About 3 tbsp cocoa powder

Mix whipped cream, with powdered sugar, and whipped cream stabilizer until whipped, then add cream cheese, vanilla extract, and mix well. You may also add like 1 or 2 drops of yellow food color, but that is completely optional.

On a plate, rectangular or however you like, arrange a layer of lady fingers soaked gently in strong coffee (unsweetened), then spread half of the cream, then a layer of lady fingers again, and then rest of the cream, and spread that cream all over the sides too, if you wish. Dust with cocoa powder, and you are all set. Refrigerate for couple of hours, or put in a freezer for about half an hour, to serve sooner :)  http://cafechocolada.blogspot.com/search?updated-max=2009-12-01T19%3A32%3A00-05%3A00&max-results=4

Monday, March 21, 2011

Итальянский молочный хлеб (Pane al Latte)

Бискотти с фисташками и вяленой вишней


60 г масла
1 ст.(220 г) сахара
1 ч.лож ванильной ессенции
1 ст.ложка лимон. цедры
3 больших яйца
2+1/4 ст.(320 г)самов.муки
50-75 г фисташек
100 г вяленой вишни
2 ст.ложки сахара(для посыпки)


( Read more... )( Read more... )

Sunday, March 20, 2011

спагетти по соусом "Болонезе"

Один из самых любимых рецептов итальянской кухни это соус "Болонезе". По легенде этот соус возник в Болонье. Этот густой мясной соус, приправленый ароматными травами, с сладко-кислым вкусом, известен сегодня по всему миру. Пожалуй нет ни одного итальянского ресторана в любом уголке планеты, где бы не подавали спагетти под соусом Болонезе. Мы же любим его с тальятелле (более тяжелыми и плоскими, которые, помоему, лучше впитывают соус), или же как часть лазаньи.


( Read more... )

Минестроне овощной по- крестьянски - minestrone di verdura alla contadina

Минестроне - вот еще один итальянский суп, который идеален для жаркой погоды.
Минестроне в итальянской кухне готовят обычно на воде или овощном бульоне, что является безусловным преймуществом перед супами на мясном бульоне.
Есть варианты и с мясным бульоном, но такой суп будем готовить зимой.
Легкая обжарка на небольшом огне в оливковом масле овощей, позволит Вам приготовить настоящий минестроне, как в Италии. Обжаривают обычно лук, чеснок, сельдерей, морковь.
В нашем минестроне это еще будет цуккини и тыква, зеленая фасоль.
Благодаря такой технологии приготовления овощей, минестроне получится насыщенным, с чудесным ароматом и вкусом.
Добавление фасоли позволит получить необходимую порцию белка, при этом Вы не получите лишних калорий. Одна порция нашего супа содержит всего 54 ккал.
Если Ваши дети не хотят есть первое блюдо в жаркую погоду, попробуйте приготовить минестроне. Уверена Вам понравится.


( Read more... )

"Struffoli" - итальянские медовые пончики (Изумительные пончики!!!)))


Читать далее

Saturday, March 19, 2011

Mango Yogurt Ice Cream


It's not summer yet. But lines outside Pinkberry are getting longer and longer. And I refuse to pay $5 to a small tub of frozen yogurt. What to do? I wish I have an ice cream maker but my kitchen cannot store any more appliances. Hmmmm.... maybe I'll get one anyway and keep it in my closet.

In the meantime, I make do with my version of yogurt ice cream. My last attempt turned out so successful that I have to try again. This time with frozen mango....


Ingredients
  • 1 large mango - peeled, cut and frozen
  • A tub of non-fat Greek strained yogurt (16 oz.)

Directions
  1. In a food processor, blend the frozen mango and yogurt together until smooth. Serve immediately or chill in the freezer for a few minutes before serving.


The mango gave the yogurt even creamier texture. I love it. I didn't even have to add any sugar or other sweetener.  http://sucheela.blogspot.com/search/label/ice%20cream