So I did it. I finally learned how to can... and did it! I successfully did my first (and second!) round of canning the other day with some of the wonderful fruits I got from Bountiful Baskets. So let's start with my first jam... Plum Jam!

Note: Before canning you should santize and heat the cans. I do this by putting them in my dishwasher with a bit a detergent and turning heat dry on. The jars NEED to be hot when you pour in your jam or else the cool glass will crack when it's filled with hot jam.
Recipe:
Ingredients:
3 Cups of Plums (I used all 19 that I had and it ended up being a little more than 3 cups)
1/2 Cup of Water
1 Tbs Lemon Juice

 -Combine the plums, water, and lemon juice in a pot and bring to a boil while stiring constantly. Then reduce the heat, cover, and let simmer for 10 minutes (longer if you want the jam to be less chunky), stir occasionally.
-Remove from heat and allow to cool for about 5 minutes. Scoop the foam off the top if desired.
-Scoop the jam into canning jars and wipe the rims and threads of the can to remove jam (to reduce spoilage). Secure with lids and bands.
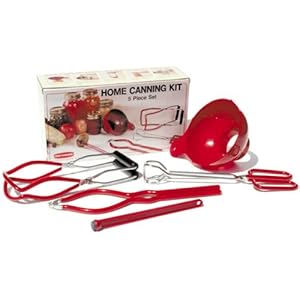
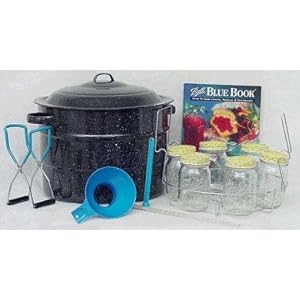
 -In your canning pot, bring water to a boil and then place the jars onto the raised rack or using whatever canning method you desire. I use this Ball Canning Kit
 (HIGHLY recommend it! It did not melt or even soften at all!) Make sure the water covers the jars with 1-2 inches of water. Boil between 5-10 minute (the higher your elevation, the more you need to boil the jars).
*You can substitute the sugar for honey if you prefer a sugar-free mixture. I haven't tried this yet but I'm told about one cup of honey would work for the recipe.
My Results: FANTASTIC! It's a little *too* sweet (which is why I lowered the sugar amount here) but so delicious. Tart and great on toast. I hope I get many more plums from Bountiful Baskets in the future because Plum Jam is my favorite! All in all a very successful first canning experience. I was inspired enough to go for round two in the same night. Come back soon to see my recipe for Mango-Strawberry Jam! http://www.ecofriendlyandfrugal.com/search/label/Recipes-%20Canning

Note: Before canning you should santize and heat the cans. I do this by putting them in my dishwasher with a bit a detergent and turning heat dry on. The jars NEED to be hot when you pour in your jam or else the cool glass will crack when it's filled with hot jam.
Recipe:
Ingredients:
3 Cups of Plums (I used all 19 that I had and it ended up being a little more than 3 cups)
1/2 Cup of Water
1 Tbs Lemon Juice
3 Cups Sugar* (I actually used 4 but I recommend only using 3)
1 Package of Powdered Pectin (I used Sure-Jell)

Directions:
-Chop and pit the plums. The larger the plum chunks the chunkier your jam will be. If you want your jam to be more jelly-like make the pieces smaller. If you live in an area where plum trees will thrive try saving the pits and see if you can get it to grow!
 -Combine the plums, water, and lemon juice in a pot and bring to a boil while stiring constantly. Then reduce the heat, cover, and let simmer for 10 minutes (longer if you want the jam to be less chunky), stir occasionally.
 -Combine the sugar and pectin in a bowl and mix it well. Add the mixture to the pot and combine thoroughly with the plums. Increase heat and bring the mixture back to a boil, stirring constantly. Boil for 10-15 or until you get the texture you desire.
-Remove from heat and allow to cool for about 5 minutes. Scoop the foam off the top if desired.
-Scoop the jam into canning jars and wipe the rims and threads of the can to remove jam (to reduce spoilage). Secure with lids and bands.
 -In your canning pot, bring water to a boil and then place the jars onto the raised rack or using whatever canning method you desire. I use this Ball Canning Kit (HIGHLY recommend it! It did not melt or even soften at all!) Make sure the water covers the jars with 1-2 inches of water. Boil between 5-10 minute (the higher your elevation, the more you need to boil the jars).
 -Remove jars from the boiling water and set on a cooling rack to cool for 12-18 hours. After the cooling period you can test the lids by pressing in on the top. If the lids move up and down they are not secure and you need to refridgerate and use these cans right away. Any others can be stored and kept for up to a year!
*You can substitute the sugar for honey if you prefer a sugar-free mixture. I haven't tried this yet but I'm told about one cup of honey would work for the recipe.
My Results: FANTASTIC! It's a little *too* sweet (which is why I lowered the sugar amount here) but so delicious. Tart and great on toast. I hope I get many more plums from Bountiful Baskets in the future because Plum Jam is my favorite! All in all a very successful first canning experience. I was inspired enough to go for round two in the same night. Come back soon to see my recipe for Mango-Strawberry Jam! http://www.ecofriendlyandfrugal.com/search/label/Recipes-%20Canning


