Labels

"Погребок"- заготовки на зиму(canning) (82) Afternoon Tea-recipes and tradtions (41) All about Sushi rolls and more (2) appetizers (61) Baby Shower (2) Barbecue (45) Beauty (29) Bread and pizza (67) Breakfast Sunday Brunch (18) Bridal Shower and Wedding (8) burgers sandviches and toasts (22) Cake decorating and gum paste flowers (144) Cake pops and balls (35) cakes (197) canning (31) cheesecakes (31) Chocolate (38) Christmas (102) Coffee and Latte Art (22) Coffee cakes pies sweet breads (74) cookies (226) Cupcake Muffin Пирожное (62) Decorated cookies tutorials (48) Decorating Easter Eggs (19) Dessert (46) Easter (52) Easter and Spring (29) eggplants (3) eggs (11) Father's Day (4) Fish and seafood (30) French cooking (14) fresh fruits (6) gingerbread (68) Healthy Eating (32) Homemade gifts (3) Hапитки (30) Italian food (39) jams and jellies (33) Jello salads and desserts (17) Kашки (4) Kонфеты и другие сладости (42) Kремы-Buttercream-Frosting (4) Kрымские блюда (14) Main course (36) Main Dish (53) meringues зефир marshmallow pastilage (40) Mexican-Spanish food (34) Mothers Day (7) Mяско (59) Nutella (5) Olive Garden recipes (3) oranges (3) Oriental food (8) Oформление салатов (41) Pasta (16) plums (2) Potluck (6) Poultry (31) pumpkin (19) Pецепты Джейми Оливера (5) Pецепты Сталика Ханкишиева (37) Quinoa (5) Risotto Jambalaya Плов Paella (27) salads (123) Sauces Dips and Spreads (38) Saving money in the kitchen (4) Side Dish- гарнир (15) Slow-Cooker (9) soups (105) Summer recipes (12) Table setting etiquette(Сервировка стола) (67) Tagine-cuisine of Morocco (13) Thanksgiving and Fall (46) Tатарская кухня (6) Tесто (17) Valentines Day (36) Video-рецепты (20) Блины блинчики и оладушки (44) блюда в горшочках (23) Блюда из курицы (60) Блюда из теста (56) булочки (103) Вкусности из детства (63) Вкусные местечки-Sweet places (7) Детский праздник (29) Заготовки-полуфабрикаты (44) заливное и холодец (13) Запеканки и омлеты (11) история блюд и кулинарные истории (24) Котлеты Тефтели Голубцы и Перчики (58) Мороженое-Ice Cream (15) овощные заготовки (18) пирожки чебуреки беляши и т.д. (42) Пляцок (2) рулеты мясные и овощные (36) Сосиски и домашние колбаски (26) Старинные русские рецепты (38) Творожная выпечка (13) Узбекская кухня и Среднеазиатская (66) Хворост Крепли вергуны Пончики (25)

Monday, June 11, 2012

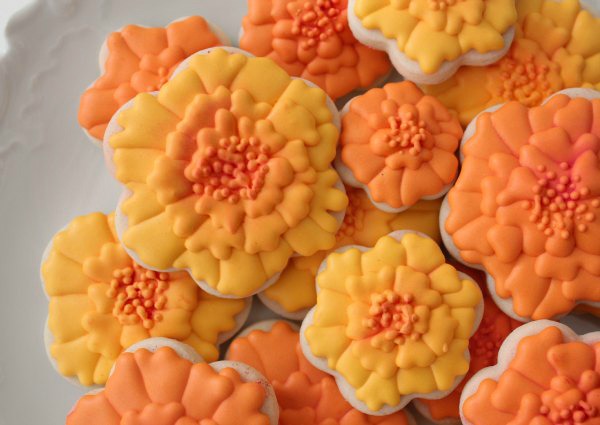
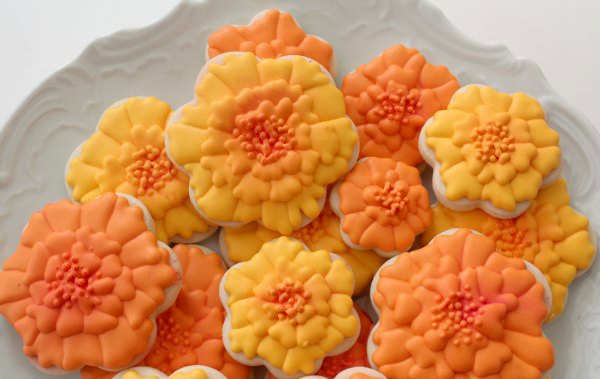
Marigold cookies

This year instead of buying flowers from the nursery, the littles and I thought it would be fun to grow them from seed.  It’s been really exciting for all of us to watch them grow.  All of the flowers are doing well, but none so much as the marigolds.  They aren’t quite ready to bloom, but while we are waiting I thought it might be fun to create a cookie version.

These are seriously the easiest cookies you will ever make.  This may be the shortest supply list I’ve ever written.
To make these cookies you will need:
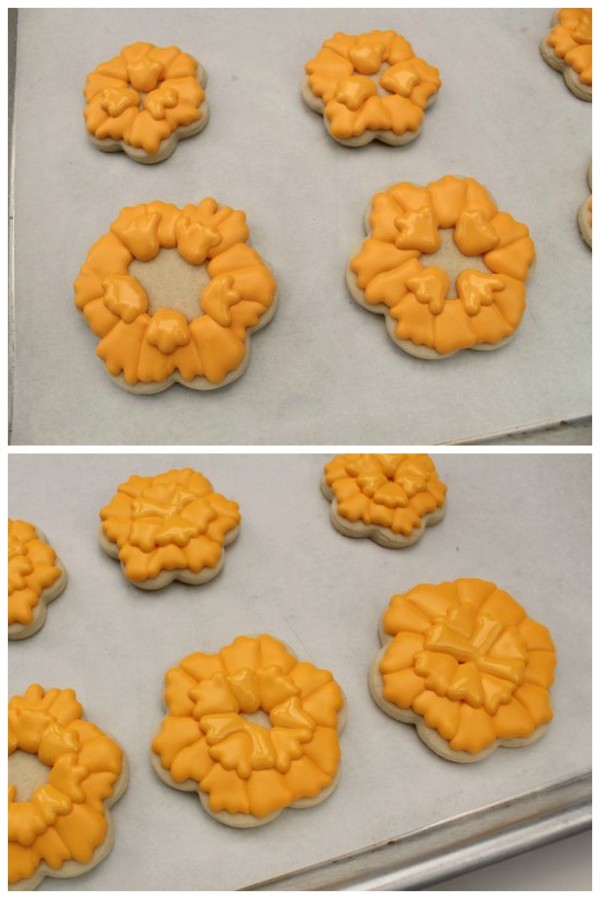
I started with a plain flower cookie.  I used a cutter from this set, which is really really handy.  The key to this cookie is patience.  It’s all about the layering and drying.  Begin by adding the first layer of petals to the cookie.  I used a #2 tip.
Notice the empty spaces between them?  This is an important step in getting a realistic look.  Let the first layer dry for 30-45 minutes then come back and fill in the spaces.  See the dimension you get from adding the icing at different times?
Let the first layer dry then repeat.
Let eah layer of icing set between applications and work toward the center until the petals eventually meet.  For the sake of illustration I also wanted to show a side view of the cookie.  All this layering might give the impression of a mile-high blob of icing on top of the cookie, but this is not the case.
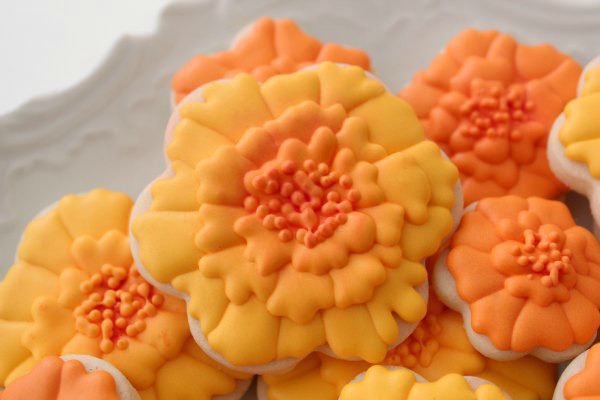
When the middle has dried, add a few dots using a small {about #1.5} tip. Give them a bit of drying time…are you noticing a pattern…and add a few more.
This is when you REALLY let them dry!  And by dry, I mean dry.  Like overnight or something.
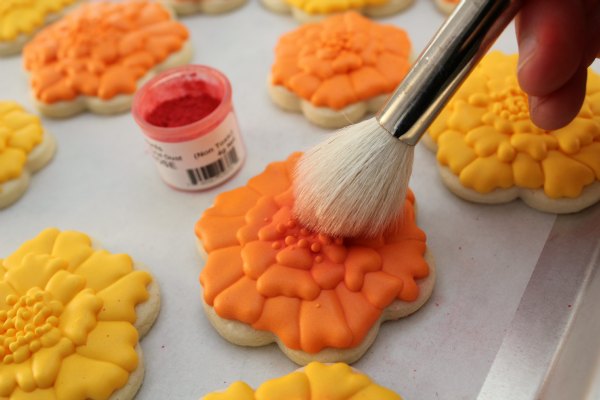
The next day, use a paintbrush and apply a little petal dust to the middle of the marigolds.  This is optional, but I think it really adds a lot.
These are what I call laundry day cookies because you can do a lot of folding during drying time.
I’ve always liked marigolds, but after this summer they will always symbolize a very special memory for me.
   http://www.sweetsugarbelle.com/blog/2012/04/pretty-marigold-cookies/?utm_source=feedburner&utm_medium=feed&utm_campaign=Feed%3A+TheSweetAdventuresOfSugarbelle+%28The+Sweet+Adventures+of+Sugarbelle%29

Sewing Cookies for Mother’s Day

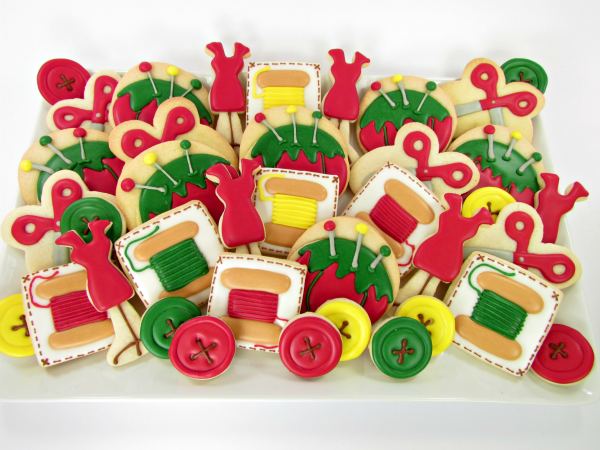
Happy Mother’s Day Week everyone! I wanted to make some sewing cookies for Mother’s Day this year. I first made these cookies back in 2010 and I wanted to  make a tutorial for you so you can make some sewing cookies for your mom. I think these are a great way to say Happy Mother’s Day. You can even make a cute card that says we love you “Sew” much but, I didn’t think of that until just now or I would have made one for my mom. Anyway, lets make some cookies.
Supplies: 
I used 15 second icing for this set.
Colors: 
Grey
Yellow
Green
Red
Brown
Tan
White
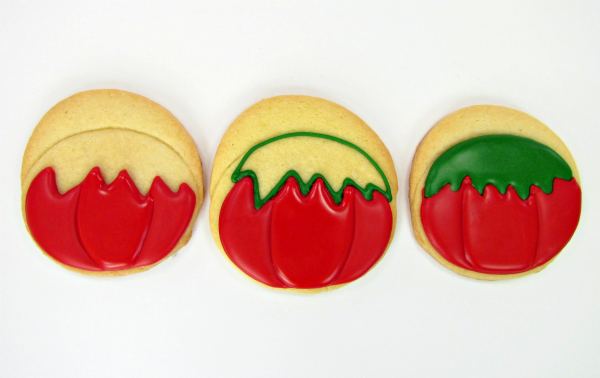
Tomato Pincushion Cookie
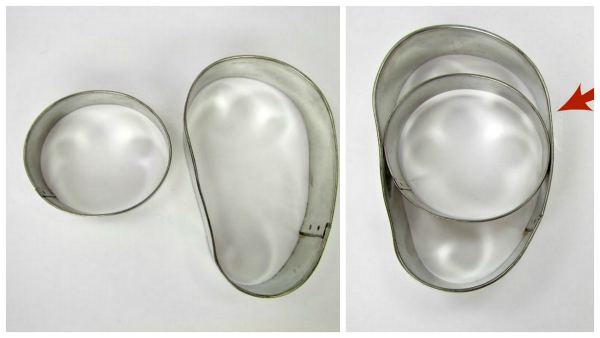
I avoid hand cutting whenever I can so to make these, I used a smashed circle and a flip flop cutter. I placed the smashed circle into the flip flop and cut.
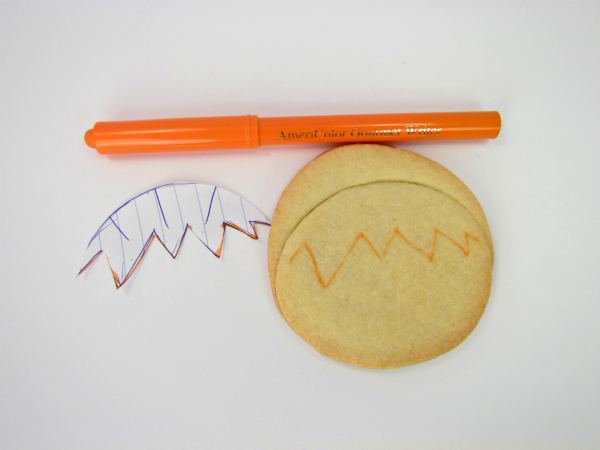
Then, you can cut a piece of paper like the top of a tomato and use it as a template and trace with a  food safe marker.
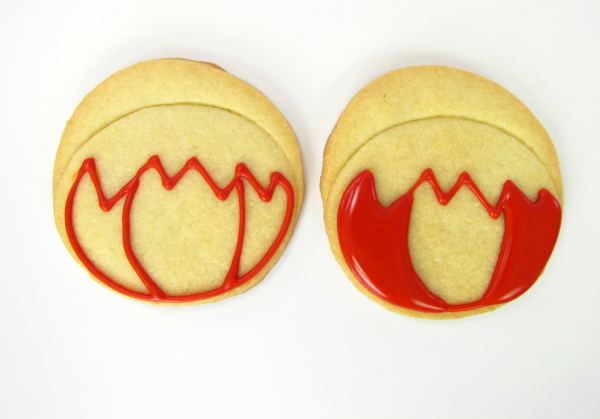
Next, with the red icing, outline your tomato. Immediately flood both sides and let dry for about 20 minutes.
With the red icing, flood the middle and let it dry for about 20 minutes.
Then, outline the top of the tomato with green and flood right away.
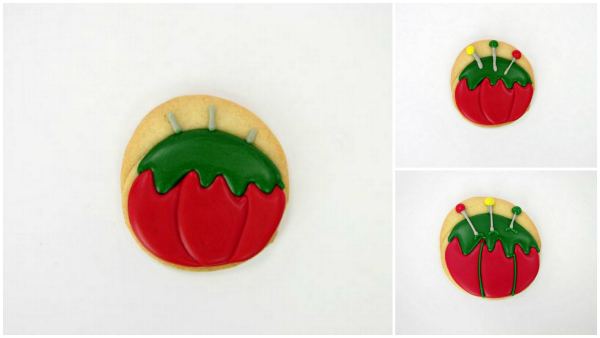
With your grey icing, make three little lines where your want your pins to be and let it dry for about 20 minutes. This step is important because when you make the pins you don’t want them to look like they are falling down the top of the tomato later. Adding the lines will make it level. Now let this dry several hours or overnight before you add the final details.
Then, with the grey icing, add the pins.
Next, make the balls on top any color you want.
With your green icing, make the lines on the tomato and where the pins are pushed into the tomato top.
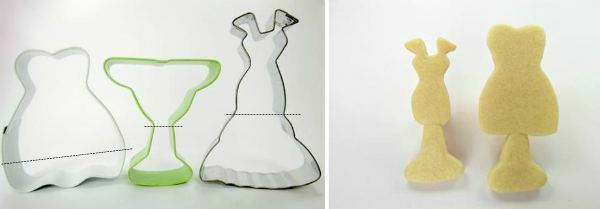
The Dressmaker Dummy

For the dressmakers dummy I used a dress cutter and a martini glass cutter. You can use almost any dress cutter for this. The wedding dress was perfect for what I wanted but the other one work well after I trimmed a little off the sides.
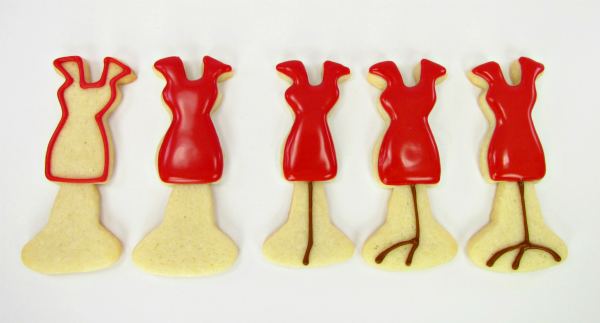
Next outline the top of the dummy with red icing and flood immediately.
Then, add the stand with your brown icing.
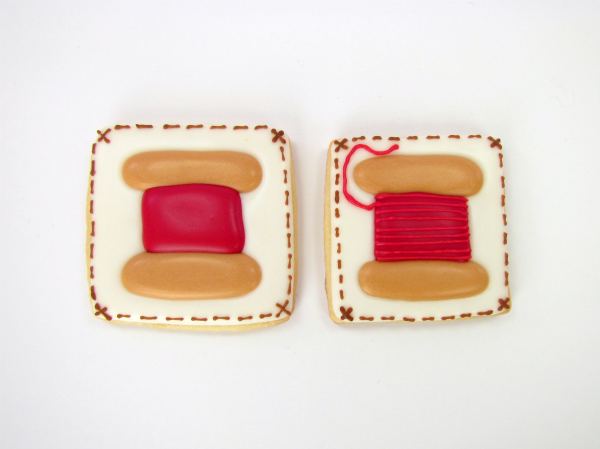
Spool of Thread Cookies
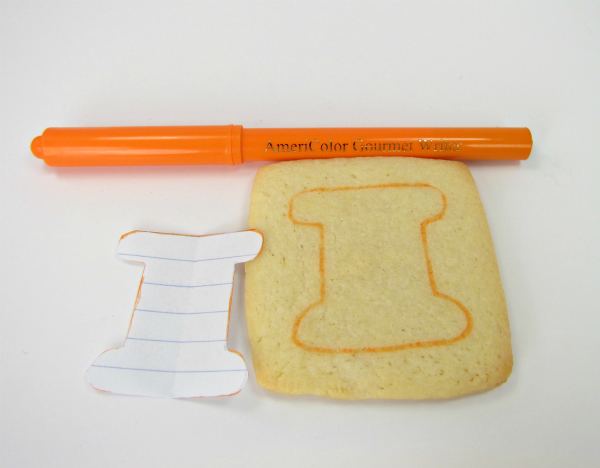
First, cut a pattern for thread from paper and traced it onto your square with a food safe marker.
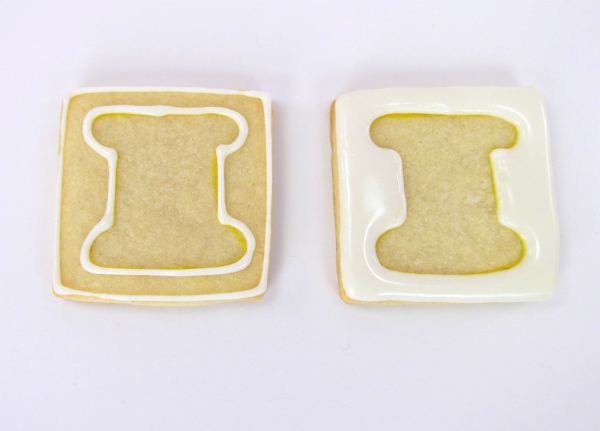
Then, outline the cookie with white icing and flood the background. Let it dry several hours or overnight.
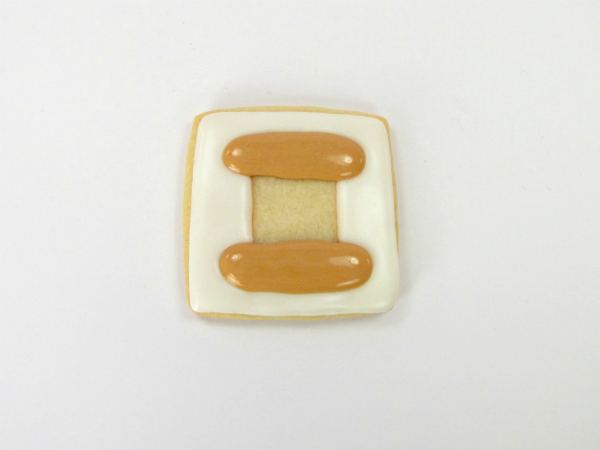
With your tan icing, flood the top and bottom of the spool.
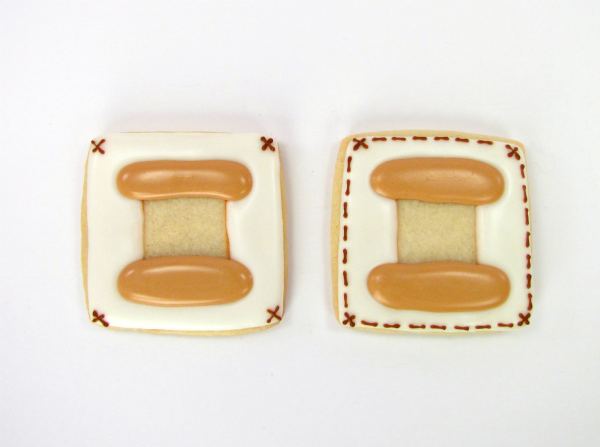
With your brown icing and a small tip, (I used a 1.5 PME) make an “X” in each corner of your cookie. Then make your stitches around the edges and let it dry for several hours or overnight.
Next, with your red icing flood the center of the spool and let it dry for about an hour. Then, add the lines for the thread.
If you want a tutorial for buttons, Sweet Sugar Belle has a great one here. That is where I learned to make them.
I love being a mom! It has been the greatest pleasure of my life and I have loved every minute of it! Yes, even moments like when we were on our way to church one Easter Sunday morning and Tylor, who was about six at the time, grabbed his little sisters Easter basket and tossed his cookies into it. And like the time when all three kids had chicken pox at the same time. Or the time when they had a pet hamster that I swear was  Harry Houdini reincarnated because it would escape from it’s cage and crawl on my face while I was sleeping!! Yes, all these things really happened and although it wasn’t funny at the time, we laugh about it all the time now.
Happy Mother’s Day! Now go make some cookies for your mom and grandma!
Happy Creating,  http://thebearfootbaker.com/2012/05/sewing-cookies-for-mothers-day/

Picnik Is Closing :(

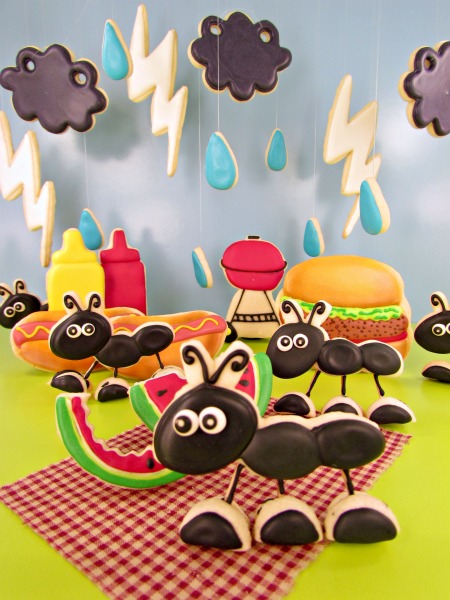
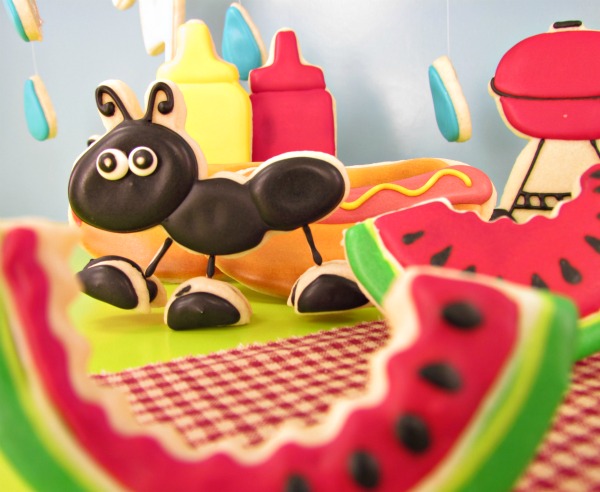
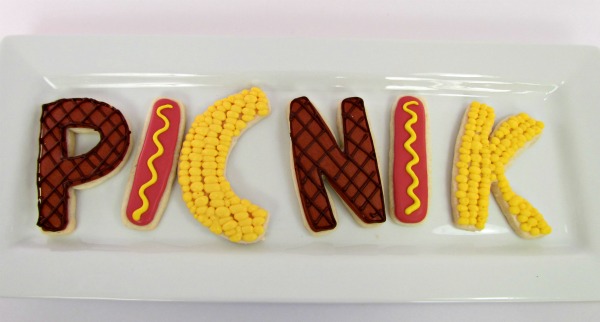
Want to have a picnic with me? We can have hot dogs, hamburgers, watermelon, and corn on the cob. Sound like fun to you? This was my world for a long time! A happy little picnic! A world of sunshine and watermelon! Then, it happened!! The storm rolled in!! Dark clouds, pouring rain, and lightning blots!!!! It totally rained on my PICNIK!!! Picnik.com is closing?? WHAT?!! I am the saddest girl in the world! I use Picnik for editing my photo so without it I am going to be lost! All I could think of it is why are you raining on my Picnik???

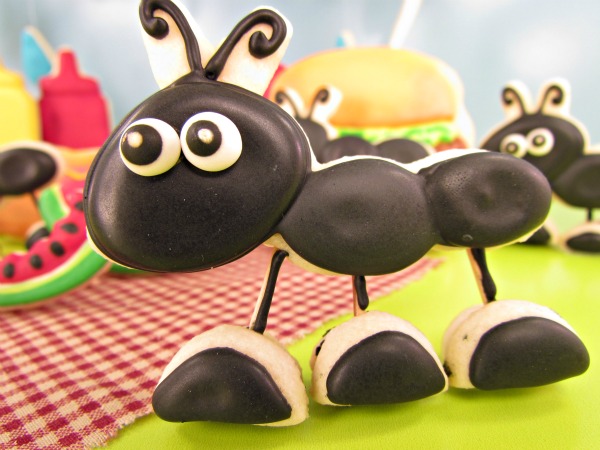
Then, there are those poor little ants to think about! What are they going to do without us playing with them? I am so worried!
They are scrambling to move things before everything goes dark! Pack up your Picnik baskets and forget about having beautiful photos!
You don’t have time to eat watermelon because Picnik is closing on April 19th!! What in world am I going to do??
Bye bye Picnik!! No more ants to play with! But wait…I have something to tell you!!
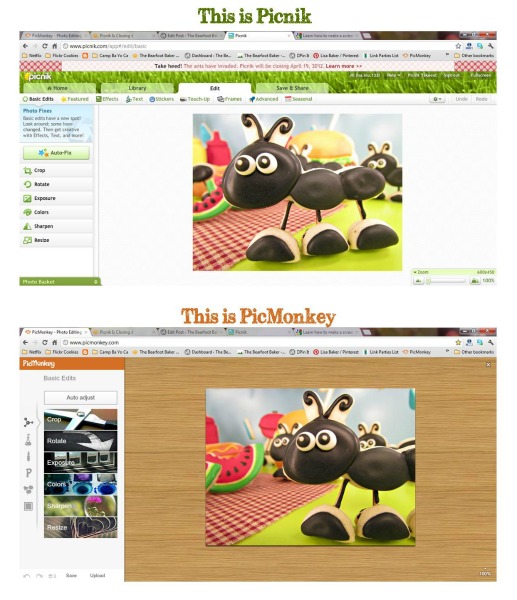
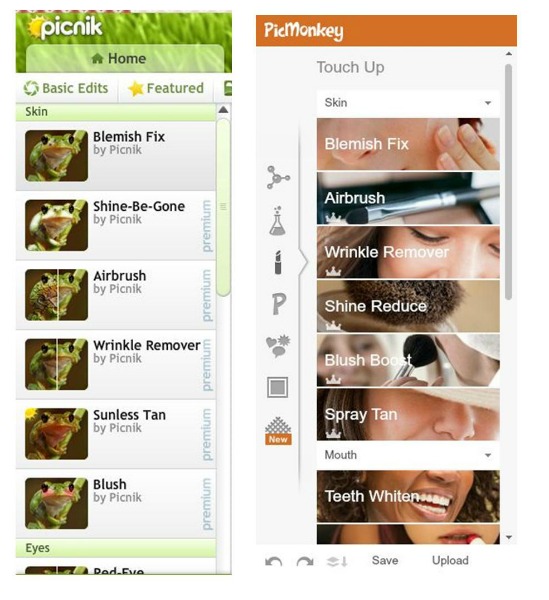
If the ants won’t play with us the monkeys will!! Hello PicMonkey!! My friend Sweet Pudgy Panda told me about it! PicMonkey.com  was made by a couple of engineers that created Picnik! They are a lot alike!! I will show you:)
There are a few things that are different like the pictures but for the most part, the basic editing tools are the same.
On PicMonkey, you can rotate, crop, tweak the exposure and color, sharpen and re-size just like you could on Picnik. I don’t know what I would do without these basic editing tools. They are wonderful!!

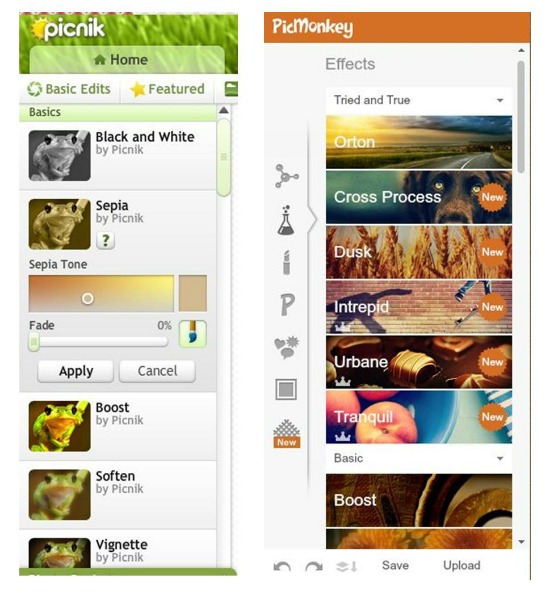
The effects are fun to play with! I don’t use these much on pictures for my blog, but I do for personal pictures and for my other job. The camp pictures I take for promotions would be awful with the effects I add.
LOOK!! PicMonkey even has Touch Up Tools!! YEAH!! I am not going to go over all the tools because you need to see for yourself how you want to use it.  I am really excited to have so many editing tools! Without this, I would have some really dull and ugly pictures to share with you on my blog.

So please don’t cry about the ants leaving! We now have a cute little monkey to play with!
Want to make some of those cute little ants that stand up all by themselves? I have a tutorial for you so be sure to stop back by!!   http://thebearfootbaker.com/2012/04/picnik-is-closing/


Cherry Blossom Shortbread Cookies

While the judges are “still out” on the Intermediate Division Overall Winner title, I am going to hold off on the post for my cakes.
I know, I know. A little frustrating, but it is what it is. Until then let us talk cookies!
photo
So for anyone reading who may not be familiar with some of the big events in Washington, D.C., we are currently in the peak season for the Cherry Blossoms. Thousands upon thousands of people travel from all over to visit the D.C. area to see the Cherry Blossom trees in full bloom. The entire Tidal Basin is engulfed in a baby pink. It’s beautiful.
Below is a picture that The Boss took, it’ll give you the idea if you’re not familiar.DCRainmaker
So due to the Cherry Blossom season I felt honored to pay tribute to our beautiful flower!
These Cookies were a bit of a process, so I’ll take you through my thoughts step by step.
I love big canvas panel art works. Even more so when there are several pieces of canvas that line up and the scene carries on across the many pieces. That was my thought here, I just had an internal struggle with how I wanted to cookies to line up. Straight and clean, or jumbled and modern.
IMG_9460
Eventually I went with clean lines and a level set of cookies. Then it was time to sketch out how this was all going to come together.
IMG_9463
After playing around with the paper, icing, flower style, etc. I decided it was time to get going on the real deal!IMG_9464
I decided to initially pipe the outline of the tree onto the cookie set before airbrushing. I did this because I didn’t want to be guessing how low and high I wanted the sky and grasses. Essentially, this way my tree design drove the decision making while I had the airbrush in hand!
IMG_9466
Once I was happy with the heights of the sky and grass, I filled in the tree with my brown royal icing. I loved the way this turned out, and even considered stopping here! The texture of the trunk was well beyond my expectations.
IMG_9472
From here I started to spackle on the baby pink royal icing as well as piping in tiny red beads for more dimension.
IMG_9474
That was supposed to be it. I was going to stop at the spackling and beads. But as I sat there and hemmed and hawed, I decided that the cookie could actually benefit from a third level of pink dimension. So I punched out the tiniest flowers that I had a cutter for.IMG_9480
While I really liked the extra “pop” of the pink flowers, they were almost too plain, and even took away from the detail of all of the red bead work I piped into the pink. Hmmmm
So I took all of the flowers back off and one by every stinkin’ one, I piped with royal icing and my 00 tip 3 little yellow and two black beads. Wow, my neck still hurts thinking about this.
IMG_9482
This was only a fraction of the flowers!
Then I started to build the flowers back onto the tree.
IMG_9486IMG_9487
Finally I was finished!
IMG_9492
Like I said in yesterday’s post. I really had a soft spot for these cookies, I figured I had the best chance at taking an award with these.
Well, let’s see what the judges had to say about that:
Judges Score Card
I have several opinions about some of the comments made…but I’m going to keep them to myself. Well except that for the next time I cut out several hundred flowers tinier than the butt of a pencil eraser, shape them into 3D flowers, and pipe five different teeny-tiny royal icing beads into each and every one of those 250+ flowers, I’ll be sure to be more precise  and detailed than that and also get out my ball tool and “soften their edges”???
Fear not, my feelings aren’t hurt. I loved these cookies, and I learned a lot from this whole process. Also, whether or not I agree with all of the feedback from the judges, it is always helpful to see my work through other peoples’ eyes.
These are the cookies that won overall best cookies. This was for everyone who entered a cookie set; ages 6 to master sugar artist. These were submitted by a professional (and pretty crazy impressive!).
IMG_6866 The cookies that took 1st in my Division are below, the elephants.
IMG_6863
And finally mine:
Cherry Blossom Cookies
I hope you enjoyed my photo story of how I created these cookies! Did you get a chance to look through the album of Cake Entries that I posted yesterday. Did you have any favorites? Personally “The Flying Arnolds” was my absolute favorite!  http://www.bertiesbakery.com/2012/03/cherry-blossom-shortbread-cookies.html