Labels

"Погребок"- заготовки на зиму(canning) (82) Afternoon Tea-recipes and tradtions (41) All about Sushi rolls and more (2) appetizers (61) Baby Shower (2) Barbecue (45) Beauty (29) Bread and pizza (67) Breakfast Sunday Brunch (18) Bridal Shower and Wedding (8) burgers sandviches and toasts (22) Cake decorating and gum paste flowers (144) Cake pops and balls (35) cakes (197) canning (31) cheesecakes (31) Chocolate (38) Christmas (102) Coffee and Latte Art (22) Coffee cakes pies sweet breads (74) cookies (226) Cupcake Muffin Пирожное (62) Decorated cookies tutorials (48) Decorating Easter Eggs (19) Dessert (46) Easter (52) Easter and Spring (29) eggplants (3) eggs (11) Father's Day (4) Fish and seafood (30) French cooking (14) fresh fruits (6) gingerbread (68) Healthy Eating (32) Homemade gifts (3) Hапитки (30) Italian food (39) jams and jellies (33) Jello salads and desserts (17) Kашки (4) Kонфеты и другие сладости (42) Kремы-Buttercream-Frosting (4) Kрымские блюда (14) Main course (36) Main Dish (53) meringues зефир marshmallow pastilage (40) Mexican-Spanish food (34) Mothers Day (7) Mяско (59) Nutella (5) Olive Garden recipes (3) oranges (3) Oriental food (8) Oформление салатов (41) Pasta (16) plums (2) Potluck (6) Poultry (31) pumpkin (19) Pецепты Джейми Оливера (5) Pецепты Сталика Ханкишиева (37) Quinoa (5) Risotto Jambalaya Плов Paella (27) salads (123) Sauces Dips and Spreads (38) Saving money in the kitchen (4) Side Dish- гарнир (15) Slow-Cooker (9) soups (105) Summer recipes (12) Table setting etiquette(Сервировка стола) (67) Tagine-cuisine of Morocco (13) Thanksgiving and Fall (46) Tатарская кухня (6) Tесто (17) Valentines Day (36) Video-рецепты (20) Блины блинчики и оладушки (44) блюда в горшочках (23) Блюда из курицы (60) Блюда из теста (56) булочки (103) Вкусности из детства (63) Вкусные местечки-Sweet places (7) Детский праздник (29) Заготовки-полуфабрикаты (44) заливное и холодец (13) Запеканки и омлеты (11) история блюд и кулинарные истории (24) Котлеты Тефтели Голубцы и Перчики (58) Мороженое-Ice Cream (15) овощные заготовки (18) пирожки чебуреки беляши и т.д. (42) Пляцок (2) рулеты мясные и овощные (36) Сосиски и домашние колбаски (26) Старинные русские рецепты (38) Творожная выпечка (13) Узбекская кухня и Среднеазиатская (66) Хворост Крепли вергуны Пончики (25)

Wednesday, May 23, 2012

sorta, kinda martha-like


Ginger3
When the December issue of Martha arrived, I was immediately hooked on this scene above - it's been on my inspiration board since it arrived. It must be all that Scandinavian goodness. Or the sleeping child under handknit blankets. Whatever the reason, I knew we had to make the gingerbread mobile.
Ginger2
Which is just what we did last Friday night. Or attempted to do last Friday night more precisely. We had some funky dough issues. And some funky children issues. And some funky oven issues. (And some funky camera flash issues, too. It was a funky night. Thank goodness it was a funny-funky kind of night.) I should have stuck with my stand-by Gingerbread recipe (also a la Martha), but I tried the one called for in the magazine. It was near impossible to work with - but I don't blame the recipe (yet) - it could have been any of the other 10 funky factors going on at the moment. I'm pretty sure I'll be cleaning that gingerbread dough off the floors (and ceilings and cabinets) for as long as we live here. But regardless - a fabulously good time was had by all. Really - a silly, fun and very good time.
Ginger5
Over the weekend we iced our gingerbread.
Ginger4
And then yesterday, we put our mobiles together. Or rather, Adelaide and I put this mobile together. All of Ezra's mobile-destined cookies (bats, by the way) ended up in his belly (and nearly all of Adelaide's ended up there, too...if you couldn't tell from the photo above).
Ginger6

Then Calvin completed his. When the funky dough issues made it impossible for him to make his planned deer, he quickly switched gears....to doughnuts. It's a Holiday Doughnut mobile. It hangs over his desk now, and I'm pretty sure it's the most fabulous holiday decoration I've ever seen. A Doughnut Mobile? Really now. I'm in love.
Ginger7a http://www.soulemama.com/soulemama/crafting-with-kids/page/2/

Thursday, May 17, 2012

Raspberry White-Chocolate Scones


On Saturday we went raspberry picking at Horse Hill Farm.  I had a voucher giving me 50% off of up to 10 pounds of berries.  I highly recommend that place!  I was expecting mud and mosquitos and mess, but experienced none of that. Well, I have about 10 mosquito bites on my legs, but I didn't notice them until last night.  They have wide aisles of mown grass between the rows of canes, so there was no mud either.  The messiest we got was when Nico sat on a berry.

I picked one bucket fairly quickly on my own, then helped Kevin finish filling his bucket.  My arms were totally scratched, and I still have prickles embedded in my hands.  But it was worth it.  Next time, I'll wear long sleeves, and maybe even gloves.  Juli loved picking the berries.  If her birthday was a month later, I'd consider having a raspberry-picking party for her.  Last night, I made some scones.


Raspberry White-Chocolate Scones

2 cups of flour
1 rounded tablespoon of baking powder
1 teaspoon of salt
1/4 cup of white sugar

Mix the above together.  Add 1/4 cup butter or margarine or shortening, and mix it with a fork or pastry blender.  Stir in 1 cup of milk

Lightly mix in 1 cup of white chocolate chunks and 1 to 1.5 cups of fresh raspberries.  Drop by he spoonful onto a baking sheet.  I used parchment paper on mine, because I knew the chocolate and raspberries would stick.  I love parchment paper!

Bake at 450 degrees F for 12 -18 minutes.

These scones are so moist and delicious that you don't even need butter.  I got the idea for this recipe from Cobs Bakery, but I think mine are better.  Theirs were really dry and biscuit-like.  Yeah, I'm humble!


Edited 8/13 to add the correct oven temperature! The first batch I made (pictured) I baked at 400, which is why it took forever, and ended up slightly too moist.  the second batch was much better.   http://toaprettylife.blogspot.com/2011/08/raspberry-white-chocolate-scones.html

Strawberry Picking


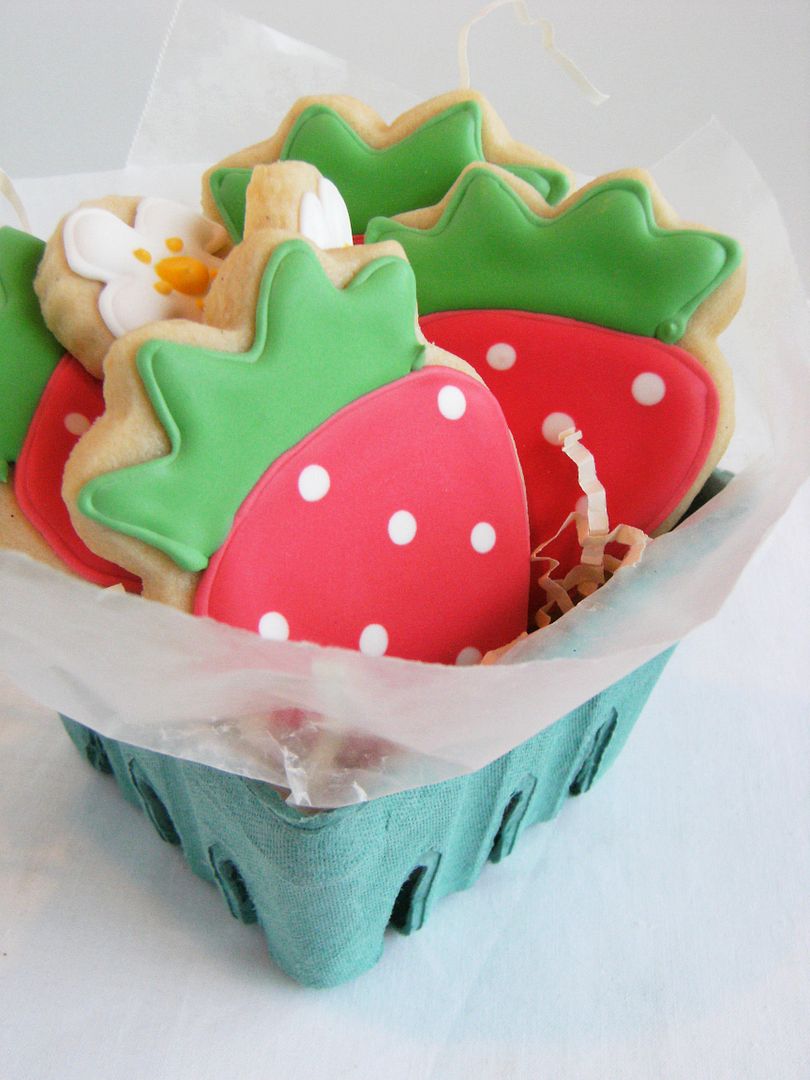
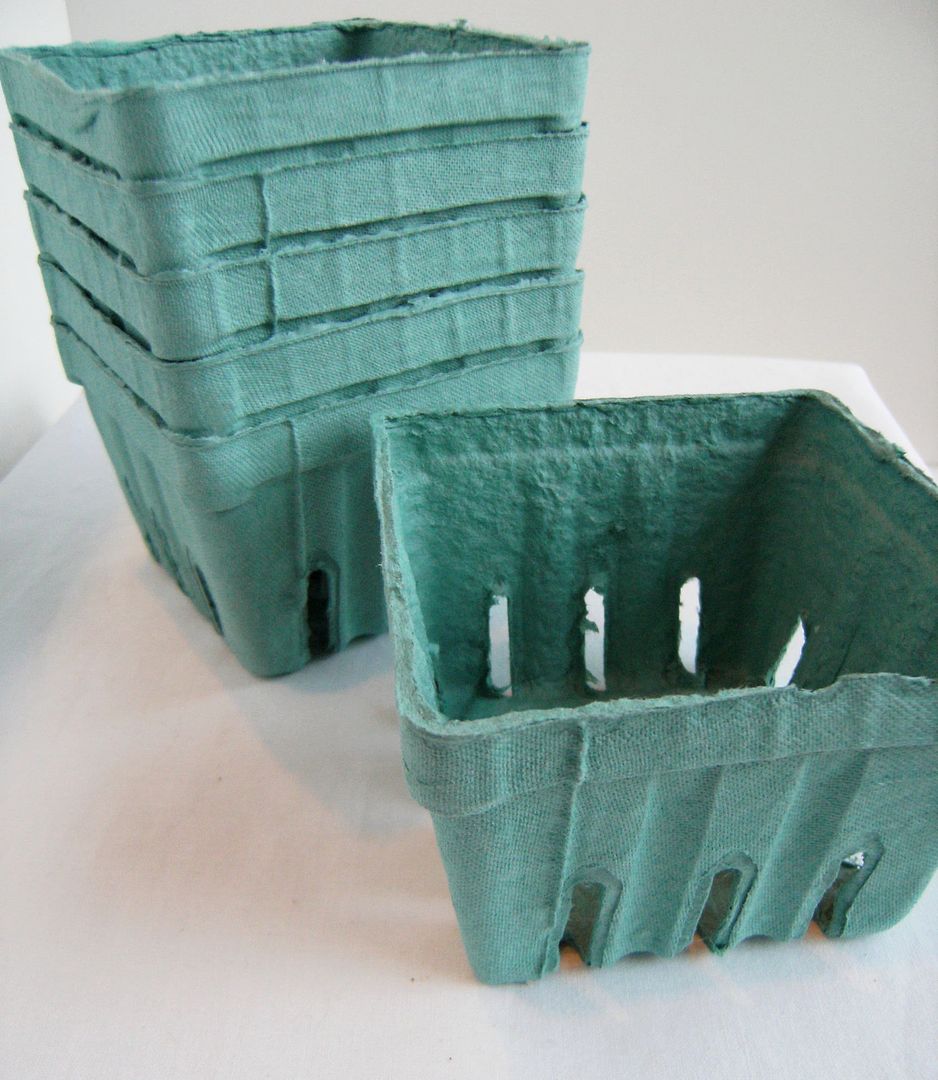
It all started with these darling Berry Baskets from Bake It Pretty.
Of course, I went there to buy food coloring and ended up with berry baskets and candy necklaces in my cart (I'm not sure how that happened).

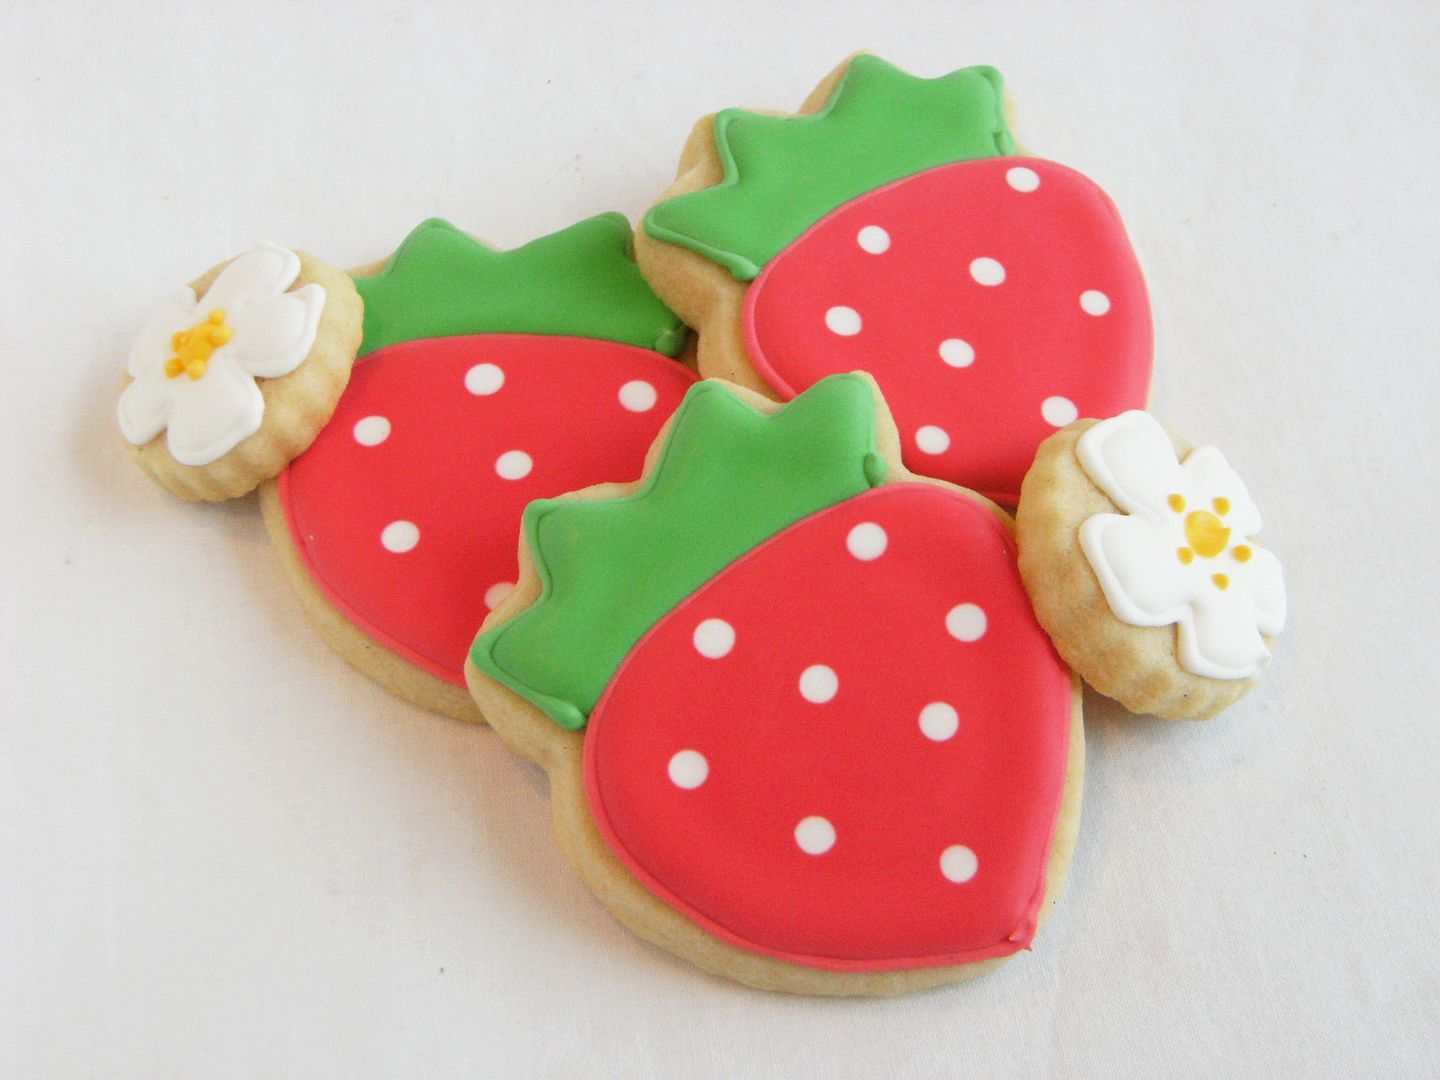
The strawberry cookies are really simple. Just a basic outline and fill in AmeriColor Leaf Green and Super Red.
The white dots are dropped on while the red flood icing is still wet.
Here's a post on getting dotty. :)

I added in a few strawberry flowers, just piped on a small scalloped circle cookie.
{Is is just me or are bite-size cookies the hardest to resist eating?}

I told Mr E. (hubby) that I was sending him to his meetings with cookies. When he saw the cute little berry baskets lined up on the table, I could see the look of panic spread across his face. Not to worry, though, the berry baskets were for MY cookie deliveries....I sent him off with cookies in a much more masculine pink bakery box.

Amanda from Bake It Pretty mentioned to me that these baskets are not "grease resistant," so I lined each one with wax paper before filling with a little paper shred and cookies.  http://bakeat350.blogspot.com/2010/05/strawberry-picking.html

Sweetheart Tarts

 
1/2 recipe Sugar Cookie Dough, at room temperature, chilled
Confectioner's sugar, for rolling
1/2 cup seedless raspberry or cherry jam
36 canned or jarred whole dark cherries in syrup, drained
Equipment: Non-stick mini-muffin tin
Preheat the oven to 375 degrees.
Sprinkle a work surface and rolling pin with confectioner's sugar and roll out dough to 1/8-inch thick. Move dough frequently to prevent it from sticking and add more confectioner's sugar to the work surface and rolling pin as needed.
Using a round cookie cutter the same diameter as the top of the muffin tin cups (about 2 inches), cut 36 rounds of dough. Gently press a dough round into each muffin cup and press evenly into the sides and bottom of the cup. Continue with remaining dough rounds. Bake until set and edges are light golden, about 10-12 minutes. Let cool in the pan completely before removing with a small offset spatula.
Heat the jam in a small saucepan over medium heat until melted. Add the cherries and stir gently to coat completely. With a small teaspoon, transfer a cherry into each tart shell and drizzle with a little more warm jam. Allow to cool and set.  http://www.foodnetwork.com/holidays-and-parties/valentines-day-cookie-recipes/index.html

Nilla Girls

This treat was born out of the failure of another.  I won't get into that long and boring story except to say that I found myself in the kitchen with half an hour on my hands and already-melted red and pink candy melts.  I looked around for something to dip and found the Nilla Wafers.

One dip in the candy melts and I knew what I had to make.  The candy looked like hair and the heart-shaped sprinkles looked like a bow.  All it needed was a face drawn on by my favorite new toy (Wilton Food Writers) and these little beauties were born. 

I had fun taking their pictures and my kids had fun eating them.


  http://www.flexibledreams.com/2011/02/nilla-girls.html

Reci-bee: Lady Bug Munchies!

If you’ve ever signed up to receive The Swiss Colony catalog, you’re probably familiar with these truffles:
Lady Bug Truffles
The Swiss Colony has had these for a few years now…and I just think they are the cutest thing…however, I’m not the biggest truffle fan.  I love me some chocolate, but the stuff from The Swiss Colony is just too sweet for me.  Therefore, I’ve found a way to make these super cute ladybugs using cookies and chocolate.
NILLA WAFER LADYBUG COOKIES:
10-15 nilla wafer round cookies
1 1/2 cup red chocolate melts
1 cup chocolate chips

1.  Melt red chocolate melts in a double boiler or in the microwave.  Cover Nilla Wafers with red chocolate and let cool completely.  Decorate the face, wings, eyes, etc. with melted chocolate chips.  Let your creativity fly.  http://thehobbeehive.wordpress.com/2011/10/10/reci-bee-lady-bug-munchies/

Reci-bee: Cute Thanksgiving Dessert Idea!

Hard to believe, but Thanksgiving is only 2 weeks away!  Here’s an adorable little treat that would be a PERFECT addition to a bowl of vanilla ice cream.  It’s a light dessert after what’s bound to be the best meal of your life…at least that’s how I feel every year!
Acorn Cookies!
Acorn Cookies:
Hershey’s Kisses, unwrapped
Round Nutter Butter snack cookies
Creamy peanut butter
Melted chocolate
1.  Twist open the Nutter Butter cookies and remove the peanut butter filling.
2.  Melt the chocolate (about ½ cup) and let cool to room temperature.
3.  Using a piping bag or a knife, place a small amount of peanut butter on the Nutter Butter cookie.
4.  Working quickly, dip the bottom of the Hershey’s kiss into the melted chocolate and attach the cookie to the kiss, peanut butter side down, so the chocolate and peanut butter melt together.  Repeat for as many acorns as you need.
5.  Place remaining chocolate in a piping bag and create little stems on top of the Nutter Butter cookies.
Toss 2-3 acorns in with a bowl of vanilla ice cream and you’re good to go!  http://thehobbeehive.wordpress.com/2011/11/07/reci-bee-cute-thanksgiving-dessert-idea/

Beehive Cupcakes

beehive cupcakes"A fun way to play up your everyday cupcake."

ingredients and directions:


  • 1 box (18 oz.) your favorite cake mix
  • 3 cups prepared vanilla frosting
  • Yellow food coloring
  • 24 pieces SNICKERS® Brand Miniatures
  • ½ cup orange STARBURST® Brand Jellybeans
  • 1 tube chocolate decorative frosting, with plain tip
  • ¼ cup sliced almonds
  • ¼ cup M&M’S® Brand Chocolate Candies
  • Resealable plastic bag
  • 24 paper cupcake liners classic
  • 2 12-cup muffin tins
  • 3 pieces construction paper, in bright, spring colors (orange, pink, green, etc.)
  • Serving tray, optional
  • Yield: Makes 24 cupcakes.
  • Prep Time: 20 min.
  • Bake Time: 21-25 min.
  • Decoration Time: 30 min.
  • Difficulty: Challenging
  • 1. Line the 2 muffin tins with the paper cupcake liners. Prepare the cake mix and bake according to the package directions.
  • 2. Let the cupcakes cool to room temperature.
  • 3. In the meantime, tint the frosting with yellow food coloring to the desired shade. Dab a teaspoon of frosting on the bottom of each SNICKERS® Brand Miniatures and place one on top of each cupcake.
  • 4. Frost the top of the cupcake, covering both the cupcake and candy. This will help support the frosting beehive.
  • 5. Spoon the remaining frosting into a resealable plastic bag. Using scissors, snip a small corner of the bag. Pipe the frosting in a spiral fashion, starting at the bottom of the hive and working your way up to the top.
  • 6. Place jellybeans randomly around the cupcake hives, and gently squeeze the chocolate frosting in a zigzag pattern on top of them.
  • 7. For the bee’s wings, place an almond slice on both sides of each jellybean.
  • 8. To serve, create flower cut-outs from the construction paper. Place the flowers on a table or serving tray, put a hive on each flower, and sprinkle with M&M’S® Brand Chocolate Candies.  http://brightideas.com/bright_idea.aspx?ID=41

How To: Simple Tilted Jell-O Shots

For a fresh twist, I added mini titled Jello Pop Shots to the Make It Pop! KSL Studio 5 dessert table.
Here’s how to make them for your own event! Detailed steps written below.
*Choose your glass. The more simple the glass the more dramatic your tilt will look.  I purchased clear mini cordials from Pier One Imports.  You can find them here.
Step One:   Make your first Jello.  You can use a traditional gelatin  or you can spice it up by adding soda pop, alcohol for mature audiences, fruit, or cream.  It’s completely up to you!  Pour first layer of gelatin into glass.  How much gelatin you pour in will depend on what glass you are using as well as how dramatic you want the tilt.  My first layer of jello was approximately 1/4 of an inch.   Once each glass is filled evenly, it’s time to tilt your glasses.  Place each glass in a mini cupcake tin (or regular cupcake tin for larger jellos) being careful that each jello is tilted in the same direction and angle.  Place jellos inside refrigerator and let firm.  Due to their mini size, my jello layers firmed up super quick.  Approximately 15 minutes.
Step Two: Repeat step one using a new flavor of jello and adjusting the tilt of each Jello in your cupcake tin accordingly.
Step Three: Repeat Step one again using new flavor of jello and adjusting the tilt of each Jello in your cupcake tin accordingly.  http://www.loraleelewis.com/blog/?p=16621

Tuesday, May 15, 2012

Summer Pineapple Strawberry Cooler

I am ready for summer! This recipe just puts me in the summer mood. Come-on sunshine! Pineapple juice, limeade and club soda make a refreshing drink that goes beautifully with all kinds of summer fruit. And with strawberries in season right now, they make a perfect match.
pineapple cooler

Ingredients

  • 1 12-ounce can frozen pineapple juice concentrate, thawed
  • 1 6-ounce can frozen limeade concentrate, thawed
  • 4 cups cold water * 1 liter club soda, chilled
  • Ice cubes
  • Fresh strawberries (optional)
  • Short (6-inch) wooden skewers
  • Assorted fruits such as halved orange slices, halved lime slices, orange sections, raspberries, strawberries, sliced kiwifruit, and mint sprigs

Directions

In a large pitcher combine pineapple juice concentrate, limeade, and water. Chill for at least 30 minutes. To serve, transfer fruit juice mixture to pitchers; add club soda, ice cubes, and fresh strawberries.
Serve with Fruit Swizzle Sticks, if desired.
Makes 14 (6-ounce) servings.
Fruit Swizzle Sticks: On short (6-inch) wooden skewers, thread assorted fruits and mint sprigs. Make-Ahead Tip: Up to 24 hours ahead, prepare the juice mixture and chill well. Proceed as directed.
Sit back, soak up the sunshine sipping a sweet drink and enjoy summer.
Recipe from Daily Recipes, find more fun summer drinks here.  http://www.mommag.com/local/tri-cities/2010/6/16/summer-pineapple-strawberry-cooler

Espresso Chocolate Truffles and a wish for a very Happy Holidays!


Every year around this time the same question starts popping up into my mind: what should I make for the holiday gatherings? I think everyone has atleast a few dashing staple stars; these are the dishes that you can whip up with no worries at-all, with very less preparation and they are sure to please every tummy! I am always awed by all the fellow food-bloggers who whip up these delightfully scrumptious baked goodies; seeing the pictures of which make me wish I had more of a baking woo-doo :) But with my limited baking talent all I feel comfortable taking to any holiday gatherings is usually a banana nut bread or some fruit cake!

This year though when I saw this chocolate truffles post on Yasmeen's blog I knew exactly what I wanted to make! Chocolate truffles are a type of chocolates made with a chocolate ganache inside and coated with various coatings, the most ubiquitous of which is cocoa powder but powdered sugar and toasted nuts are common coatings too. Ganache is just a fancy name for smooth melted chocolate with cream (low-fat milk or heavy cream). Occasionally ganache is flavored with flavorings such as vanilla and espresso. Chocolate truffles are named for the look-alike wild truffle fungus/mushroom variety which is a delicacy. Now the truffle-police will insist that the real chocolate truffles must be uneven and rustic to resemble the mushrooms they are named after.. but I am raised in a round and perfect laddoo tradition and what the heck I took pride in making my truffles perfectly circular and round so the pictures will look better (don't tell the truffle-police!) :D
Anyway, so here is how I made my truffles:
Recipe source: multiple truffle posts mainly Yasmeen's post, an old Joy-of-Baking article describing anatomy of a truffle and a step-by-step photo post from here.
Ingredients:
For ganache:
8.5 ounces of dark chocolate (I used Trader Joe's Belgium chocolate brand with 54% cocoa)
1/2C cream (I used mixture of heavy cream and 2% reduced fat)
1/2tsp vanilla extract
1tsp instant espresso coffee
For coating:
cocoa powder
toasted crushed slivered almonds
powdered sugar
Recipe:
(The posts linked above have a much detailed description of the method, but here is what I did in a nutshell).
  1. Cut the chocolate into as many thin pieces as possible. My chocolate slab was very thick and so I chopped it very roughly into big pieces.
  2. Heat the cream just until the boiling point. Add espresso and mix well.
  3. Pour the cream over the chocolate pieces and let it stand for a minute. At this time if your chocolate was very finely chopped then the cream will be able to melt the chocolate. If instead you had big chocolate chunks like mine, you will need a double-boiler method to melt the chocolate. For double boiler method: heat water in a large pan to barely simmering. Place the pan holding the chocolates and cream over the simmering water and continue stirring until the entire chocolate is melted.
  4. Add vanilla extract to the melted chocolate and mix it really well to get a smooth consistency. This is your ganache, cover and let it chill in refrigerator for overnight.
  5. Remove from fridge when you are ready to make truffles. Place each of the coating ingredients in a separate plate.
  6. Using a mellon scooper scoop out a chocolate bowl. Roll in your hands for a smoother round shape. (Heat from your hand will start to melt the chocolate making it easy to reform into a round ball).
  7. Roll the chocolate balls in one of the coating plates making sure the truffle is thoroughly coated. Place  the truffle on a parchment paper.
  8. Ready to serve! Serve them at room temperature or refrigerate for later use.
These were heavenly and had a perfect truffle byte! I forgot to take a photo of the truffle byte, may be next time :-)
These chocolate truffles go straight to S of the wonderful blog Art, Food and Travel Chronicles for giving me my first food blog award here! Thanks S!
   http://ginger-and-garlic.blogspot.com/2009/12/espresso-chocolate-truffles-and-wish.html

Edible Fruit Christmas Tree

I have a lot to be thankful for this season including my friends and family and all of you wonderful bloggers who encouraged me through these initial steps of my blog! Happy Holidays to all! Till next time, leaving you with an edible fruit tree that I made few weeks ago for some decoration:

(Image credit: my husband, Saurabh Deoras)

Note: Since many people asked me how this tree was made I am updating this post with the instructions on how you can make an edible tree like this one!
Source: Inspired from a supermarket holiday flier.
Material:
1 styrofoam cone (small or medium size) from your local craft store. (I got mine from Michaels).
Toothpicks
Cookie cutters with various shapes (I used a gingerbread-man shaped and a star shaped cutter)
Assorted fruits - I used green and black grapes, strawberries, kiwis, dried cranberries and a honeydew melon.
Cilantro garnish.
Steps:
  1. My styrofoam cone was green in color, if you only have a white one then I suppose you could drape some green paper on a white cone or attach fruits very densely so it resembles more like a tree trunk.
  2. Using the cookie cutters create various shapes out of the melon slices.
  3. Attach toothpicks to the styrofoam cone. Attach one piece each of a fruit to a toothpick. (Think free-form; as the tree starts building you will know more about which fruit combinations are looking better and how densely packed you want your tree to be).
  4. Continue building the tree as dense as you want!
  5. Use cilantro leaves as grass garnish.
  6. Enjoy your new edible fruit tree!!   http://ginger-and-garlic.blogspot.com/2009/12/espresso-chocolate-truffles-and-wish.html

BAKED FRIED CHICKEN!

This is, hands down, a family favorite! Everytime I make this everyone goes nuts! I have actually made it a lot easy! It is super easy, so it is easy for big groups! I made it for our little family. Then I made it for the weekly Lindstrom gathering at my in-laws house, which usually includes about 20-25 people. Then, because it was such a huge hit there, we suggested to Jake & Tyler (cousin), whom are both working on their "Citizenship in the Community" merit badge for scouts, that this would be a great dinner idea for the Ronald McDonald House in SLC. A few days later, we were on our way up there. Salad, bread, corn, mashed potatoes & gravy and this chicken were all on the menu. The boys worked their little hineys off and we served nearly 50 people! We cooked 4 big bags of chicken tenderloin strips, about 100 strips in all, and we knew the meal was a success when there was only 1 piece of chicken left and a lot of happy faces! :)
I am pretty sure that I have discovered the KFC secret recipe! It is DEAD ON! It is also baked...not fried and there isn't any skin! So you get to enjoy the taste of the seasoning, instead of pulling it off because of the slimy skin!
This is super easy and you are TOTALLY going to love it!
ENJOY!
{Baked Fried Chicken}
Place thawed chicken breast tenderloin strips in a bowl of milk. Let soak for 20-30 min.
Mix in a Gallon Size Ziploc or Large Bowl:  
1/2 tsp. Salt
1 T Season All
3/4 tsp Pepper
1 c. Flour
2 tsp. Paprika
Preheat oven to 400 degrees. Cut 1/2 stick of butter into a few pieces and place in a 9x13 pan. Melt butter in pre-heated oven.
Spread melted butter around the bottom of the pan. Lightly spray the pan, if needed, to make sure that there are no dry spots.
Shake excess milk off of chicken and completely coat each piece with the seasoning mix. You can either shake the chicken in the bag, until coated, or dip each piece in the bowl until coated.
Place each piece of chicken in the pan.
Cook for 20 min. Turn each piece of chicken and continue cooking for 20 more minutes, or until cooked through.
ENJOY!    http://thewondertwins.blogspot.com/2011/10/mondays-menu-baked-fried-chicken.html

Ham and cheese rolls


It is no secret the carnivore and I like different things. There are, however, a few things we both love - like cheese and bread. This nifty dinner not only works in these things we hold near and dear, but it is also super quick. (Plus, you can adjust it be either vegetarian or carnivore friendly.) It is a wonderful way to throw together a meal in minutes on those days when the rest of your day has been spiraling out of control.


Start with a roll of 4 regular Pillsbury crescent rolls. Unroll them and divide the rolls in half leaving two triangles connected. You should have two rectangles. Lightly flour them and a rolling pin. Flatten the rectangles out some. Then place them on a greased cookie sheet. Top each with your chosen ingredients. This night we both had swiss cheese. The carnivore also had deli ham, while I had vidalia onions and basil. Once filled roll the reactangles. Then bake these beauties according to the directions (usually a little more than ten minutes at 375 degrees). Remove from the oven while golden brown and serve while hot.

They are buttery and satisfying. Plus, you can vary this recipe to suit anyone's tastes or dietary restrictions. Oh, and as you can see they take little time to make. This is a great meal for those nights you work late and need to through something together quick. I promise they will stop things from spiraling out of control. Nothing like a super with some of your favorite things (like cheese and bread) does the trick faster - except maybe a meal that is ready in minutes. And, this will do both.     http://www.cooking4carnivores.com/2009/08/spiraling-out-of-control.html

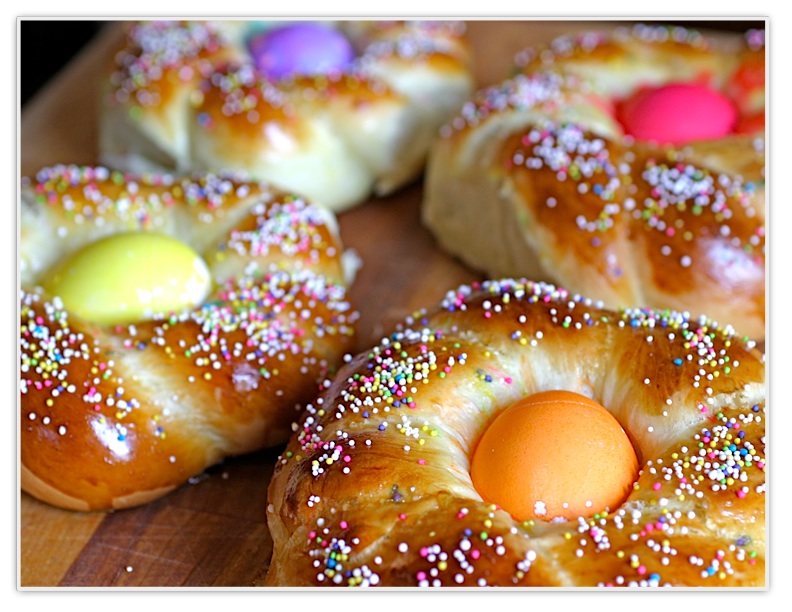
Italian Easter Bread


Buona Pasqua!  I've made this Easter bread for years for my kids. It's a sweet bread, made with milk and sugar and has an Easter Egg in the middle! There's a lot of Italian recipes for Easter breads, some are savory and some are sweet. This one is fun.

Italian Easter Bread


for a printer friendly recipe, click here
Ingredients:
  • 1 package Rapid Rise yeast
  • 1.25 cups scalded milk, cooled to room temperature
  • pinch of salt
  • 1/3 cup butter, softened
  • 2 eggs, beaten
  • 1/2 cup sugar
  • 3.5 cups flour (approximate)
  • 1 egg, beaten with 1 teaspoon of water
  • 6 dyed Easter eggs
  • sprinkles
 
tip: the Easter eggs do not need to be hard boiled. They cook when the bread bakes. I usually just dye the eggs right out of the fridge, without hardboiling them. Saves time. Just be careful they don't crack!
Instructions:
In a large mixer bowl, combine yeast, warm (not hot) milk, salt, butter, eggs and sugar. Add about half the flour and beat until smooth with dough hook.   Slowly add the remaining flour to form a stiff dough. Don't worry about how much flour it ends up being, just keep adding until the dough is not sticky anymore.  Knead until smooth with either dough hook attachment or turn out on floured board and knead. Place in a greased bowl, cover and let rise in a warm place until doubled, about an hour.
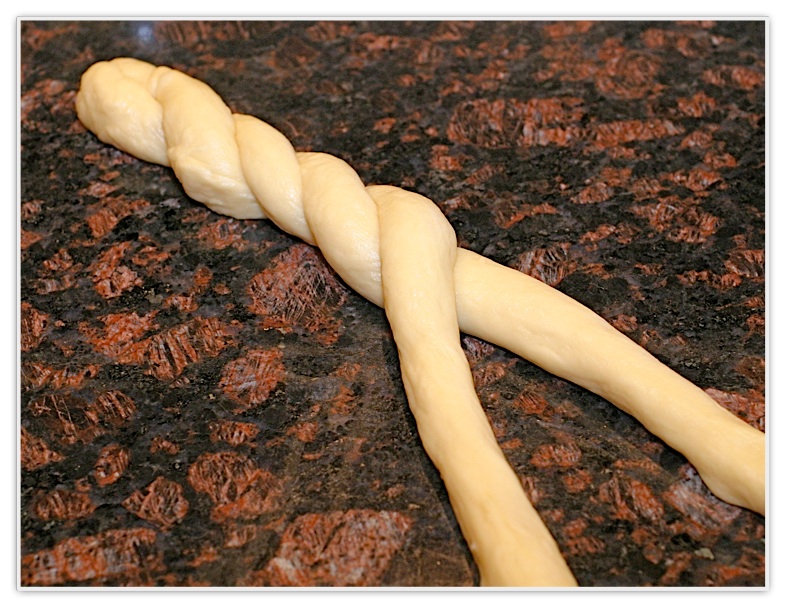
Punch dough down, divide into 12 pieces. Roll each piece to form a 1 inch thick rope about 14 inches long and, taking two pieces, twist to form a "braid", pinching the ends,  and loop into a circle.
Place on a greased baking sheet. Cover and let rise until double, about an hour again. Brush each bread with beaten egg wash. Put on the sprinkles. In the middle of each bread ring, gently place an Easter egg, making an indentation with the egg.
Bake at 350 degrees until golden - about 20 - 25 minutes. Cool on rack.

** Note:  For an updated version of this bread, see my most recent Easter Bread post.  It's made with golden eggs and pearl sugar:
  http://theitaliandishblog.com/imported-20090913150324/2008/3/19/italian-easter-bread.html

IKEA's Swedish Meatball Recipe (Knock-Off).....Delicious!!

I haven't quite caught the IKEA bug, yet.  I know, I'm crazy...from what I hear.  However, I've only been there one time, for about 15 minutes, and I was with the husband.  Shopping with the man is one of my least favorite things to do.  I don't know why.  Dan is totally sweet, but I clam up when I shop with him (or anyone, really.)  It offends him, but I just can't do it.  I like to shop alone, that's when magic happens, I find awesome things, and I can move super fast.  I have this nerdy method, where I walk past everything really quickly, and I won't stop until something grabs my attention.  I figure, if I have to carefully browse to find something I might like, I don't like it enough.  I'm one of those ladies at the store who speed walks, freaking people out, because I'm zooming all around them.  It's my shopping-mode, can't help it.  Watch out for the crazy-lady.

So, I should probably give IKEA another chance (alone, next time.)  If not for the ultra-cheap/cool knick-knacks, but for the food court.  I keep hearing about these amazing Swedish Meatballs, so when I saw a "perfect knock-off" recipe in the latest Food Network Magazine, I had to try them.  Although, I can't attest to their authenticity (since I've never eaten at IKEA), I can tell you that my family loved them.  Dan asked me to save this recipe in the keep-pile, because he wanted more...we all did.  Luckily, I doubled my batch of meatballs, to freeze half of them.  So, next time around, all I have to do is make the sauce!


'Get on with it', I hear ya.  So, to make the meatballs, you will need:  breadcrumbs, butter, minced onion (fresh or dry), minced garlic, ground allspice, salt, white pepper, milk, Worcestershire sauce, lean ground beef, lean ground pork, and an egg.

* Again, I doubled the meatball recipe, to have an extra batch of meatballs to freeze.  Also, I tripled the sauce recipe...not to freeze, but because I wanted plenty of sauce to serve over noodles.  I'm not sure, but I don't think IKEA serves their meatballs with noodles, just plain. Don't quote me.


Heat the butter, in a skillet, over medium heat.  Saute the onion, garlic, allspice, salt, and white pepper, for about 5 minutes, or until garlic and onions are soft.  I just used dry minced onion, so I just cooked it for about a minute.  Add the milk and Worcestershire sauce to the mixture, and bring to a simmer.


Dump the breadcrumbs in a bowl.  Pour the hot skillet mixture over the breadcrumbs and stir together.


Add the beef, pork, 1 egg and 1 egg white to the bowl, and mix until combined.  It's easiest to use your hands and squish everything together for about 5 minutes.  I'm scared of raw meat, so this is where I pull out my plastic doctor gloves.


Spray a sheet pan to grease, and roll the meat into 1 inch balls, and place on a baking sheet.  One recipe makes about 35-40 meatballs.  Make sure you don't roll them much bigger than 1 inch, or they take a lot longer to cook through...unless, you're cool with that.  Cover your sheet with plastic wrap and refrigerate the meatballs for about an hour.  I didn't have an hour, so I stuck them in the freezer for about 25 minutes.  Worked for me.  Heat the oven to 400 degrees and bake the meatballs for about 20 minutes, or until cooked through.


Next up, the gravy.  For the gravy, you will need:  butter, flour, beef broth, Worcestershire sauce, heavy cream, salt, pepper, and parsley (optional, for garnish).


If you are going to serve this with noodles, this is about the time you get the water boiling.


To make the gravy, melt the butter in a skillet and add the flour.  Cook for a few minutes while whisking.  Pour in the beef broth and Worcestershire sauce, bring to a simmer.  Finally, add the heavy cream and the cooked meatballs.  Let simmer, until the gravy thickens.  Season with salt and pepper, to taste.


Serve plain, or over a bed of noodles, rice, or potatoes.  (Remember, make extra sauce if you're going to be serving on top of something...again, I tripled the sauce recipe.)


IKEA's Swedish Meatballs Recipe (Knock-Off)
Food Network Magazine

Meatballs
(Makes about 35-40 1" meatballs.  Make double to freeze a batch for later!)

1 cup breadcrumbs
2 TBS butter
1/3 cup white onion, mince (or a couple TBS. of dry minced onion)
2 cloves garlic, minced (or 2 tsp. pre-minced garlic)
1/4 tsp. ground allspice
1 tsp. salt
1/4 tsp. white pepper
1/2 cup milk
1 tsp. Worcestershire sauce
3/4 lb. lean ground beef
1/2 lb. lean ground pork
1 large egg, plus 1 egg white, beaten

Gravy
(Makes just enough to cover the meatballs, if you want extra to serve over noodles, double/triple gravy recipe.)

2 TBS butter
2 TBS flour
1 1/2 cups beef broth
1 tsp. Worcestershire sauce
1/4 cup heavy cream
Salt & Pepper (to taste)
Parsley (optional - garnish)

Directions:  To make the meatballs, heat the butter, in a skillet, over medium heat.  Saute the onion, garlic, allspice, salt, and white pepper, for about 5 minutes, or until garlic and onions are soft.  (I just used dry minced onion, so I just cooked it for about a minute.)  Add the milk and Worcestershire sauce to the mixture, and bring to a simmer.  Dump the breadcrumbs in a bowl.  Pour the hot skillet mixture over the breadcrumbs and stir together.  Add the beef, pork, 1 egg and 1 egg white to the bowl, and mix until combined.  (It's easiest to use your hands and squish everything together for about 5 minutes.)  Spray a sheet pan to grease, and roll the meat into 1 inch balls, and place on a baking sheet.  One recipe makes about 35-40 meatballs.  Cover your sheet with plastic wrap and refrigerate the meatballs for about an hour.  (I stuck them in the freezer for about 25 minutes.)  Heat the oven to 400 degrees and bake the meatballs for about 20 minutes, or until cooked through.

To make the gravy, melt the butter in a skillet and add the flour.  Cook for a few minutes while whisking.  Pour in the beef broth and Worcestershire sauce, bring to a simmer.  Finally, add the heavy cream and the cooked meatballs.  Let simmer, until the gravy thickens, about 10 minutes  Season with salt and pepper, to taste.  Serve as is, or on top of a bed of rice, noodles, or potatoes.  Garnish with parsley.

Photobucket  http://www.oneshetwoshe.com/2011/11/ikeas-swedish-meatball-recipe-knock.html