
Hello Everyone,
Just like I promised in my previous post about Homemade marshmallows, I will be sharing a new idea...you probably guessed those marshmallows I made yesterday are involved in this project.
Step One
Make your marshmallows following this recipe, you can use any kind of flavoring and color of /use food colors only!/your choice, only sky is the limit to your imagination. When choosing a cookie cutter to use, I recommend using simple ones.
Step Two
Make your template piping guide. I used a cutter for this, I just traced the cutter onto the paper using a pencil. Then lay the wax paper on the top of the piping guide template and secure it with few pins. Make sure you have more than one waxing paper on hand.

Step Three
For some this may be the most challenging step, but it doesn't have to be. You'll need to make 2 chocolate parts for your sandwich, top and bottom.Since we are using chocolate for this, we have to temper chocolate before we start piping those chocolate parts. I prepared a very easy to understand tutorial on how to temper chocolate and you can find it here.
Step Four
I assume you have tempered your chocolate and now are ready to pipe the chocolate parts.For the piping part I used a simple plastic sandwich bag, just deposit some of the chocolate into the sandwich bag./easy way to do this is use a small glass, open the sandwich bag and place it inside of the glass with opening facing you, now you can carefully pour some of the chocolate inside of the bag/.You can also use piping bag, parchment paper cones, what ever is the best solution for you.

Step Five
This is where it really pays off to have a good quality tools when working with chocolate, I used glass bowl, as it keeps the tempered chocolate at a constant temperature for longer periods of time.If your tempered chocolate has cooled a bit just run it above the double boiled for a few seconds to the desired temperature, don't go over.
In order to make the chocolate parts, we need to fill the outlines with chocolate and let them harden.Take a small teaspoon and slowly one at a time fill the outlined areas. I used a small knife to help chocolate flow where I wanted it to flow.

Step Six - Optional
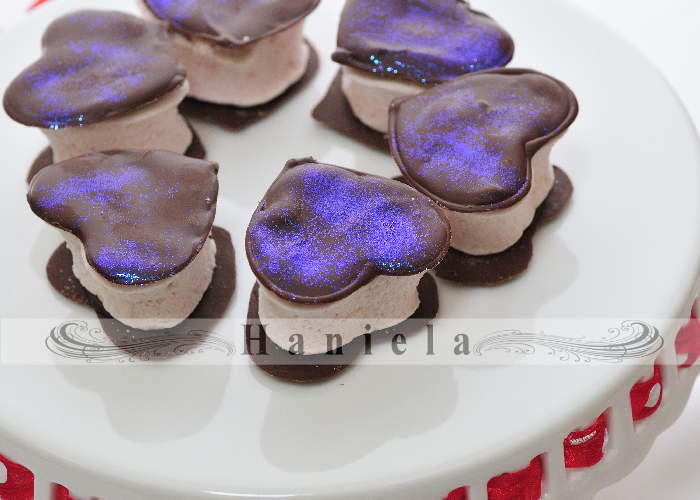
When I filled all the chocolate parts, I then took some disco dust and gently sprinkled some on the top of chocolate part. Example : if you are making 20 sandwiches..that means you need 40 chocolate parts. Only 20 parts will be the tops, so sprinkle 20 tops with disco dust. You don't have to do this..but it looks pretty cool once it dries.

Step Seven-Optional
Once dried, you can decorate even more if you want to, I decided to use white chocolate. Here I actually cheated a little and I used chocolate that I bought in the craft store - Michael's Craft Stores, I think the brand is Wilton, I never used it before, and it was on sale only for $1.99 so I thought for asmall job it should work fine, it is for dipping and chocolate molds and such.I only recommend this chocolate for tiny little small jobs, even though I feel guilty that I didn't use the quality stuff, I thought for such a tiny piped design I didn't need to temper whole lot of white chocolate.I hope you can forgive me.:-)

Step Eight
Once your chocolate parts have harden/actually I used a little trick /saw it on the Food Network/and place them for few minutes into the fridge to harden/ and then using a sharp knife or a spatula I lifted them off the wax paper. Work slowly so they don't break.
To sandwich Marshmallow between two chocolates I melted some chocolate that I have left and with a small knife I placed a dab of chocolate first on the bottom part of the marshmallow and slowly put the marshmallow on the bottom chocolate part.Repeat with the top part. Chocolate works as a glue so now all you have to do is give it about 10 minutes to harden and enjoy.

TIPS
- I came to a realization that when making these sandwiched marshmallows I had to use 2 slightly different sized cutters. I used a smaller cutter to make the piping guide template and a slightly larger cutter to cut the marshmallows. Reason I did so was because the elasticity of the marshmallow causes the cutout marshmallow to retract a little.
You can see visibly here what I'm talking about. It is not a big deal as it is only a visual flaw, but you should know about it.

Picture 2 -Better result using 2 different sizes of the same heart shape or similar is fine too.You only want a very slight size difference not too big.
- if you are in a hurry you can always dip marshmallows in the chocolate using dipping tools.

I'm a girl where are mine
orange and chocolate go together fine
i envision biting into these
must i be in diapers to get one please
orange and chocolate go together fine
i envision biting into these
must i be in diapers to get one please
© Iris Zuares
Creative works of Iris can be also viewed on her flickr page eyewrisz
I made these several times and they lasted for about a week with no problems, just store them in cool, dark and dry place..that is if you don't eat them right away. They are delicious. Special treat for sure.

http://hanielas.blogspot.com/2010/04/cherry-blossom-marshmallow-sandwich.html
No comments:
Post a Comment